Table of Contents >> Show >> Hide
- Before You Light Anything: The 60-Second Safety Setup
- The 3 Simple Ways to Light a Propane Torch
- Troubleshooting: When Your Propane Torch Won’t Light (or Won’t Stay Lit)
- How to Dial In the Flame (So You Don’t Overcook the Project)
- Fast FAQs
- Conclusion
- Extra: of Real-World Torch Experiences (So You Learn the Easy Way)
- SEO Tags
Lighting a propane torch should be a five-second event, not a full-length suspense film starring your eyebrows.
Whether you’re sweating copper pipe, loosening a stubborn bolt, caramelizing a crème brûlée (respect), or
banishing weeds from the driveway like a tiny dragon, the goal is the same: ignite a propane torch safely,
get a clean steady flame, and shut it down without drama.
This guide walks you through three simple ways to light a propane torchplus the setup steps that keep
“simple” from turning into “sirens.” You’ll also get troubleshooting tips for the most common “why won’t this thing light?”
moments, and flame-control advice so you heat the workpiecenot your patience.
Before You Light Anything: The 60-Second Safety Setup
Most propane torch problems start before the flame. A quick pre-flight check prevents leaks, flare-ups, and
the classic “I swear I turned it off” situation.
1) Pick a smart location (aka: not next to the pile of cardboard)
- Ventilation matters. Use the torch outdoors or in a well-ventilated area. Propane torches consume oxygen, and confined spaces can be dangerous.
- Clear the zone. Move paper, sawdust, dry leaves, solvents, and anything else that likes fire a little too much.
- Have a “just in case” plan. Keep water nearby, or better yet a fire extinguisher that’s easy to grab.
2) Inspect the torch head and connection (tiny parts, big consequences)
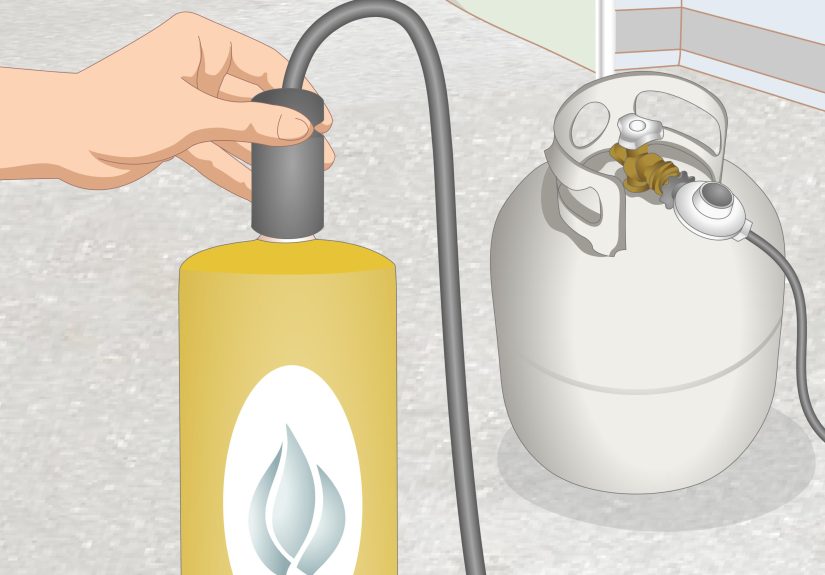
Most handheld torches screw directly onto a small propane cylinder. That connection needs to be in good shape.
- Check the threads. If they’re cross-threaded or chewed up, don’t force it.
- Look for an O-ring or sealing surface. If it’s cracked, torn, or missing, fix that first.
- Hand-tight is the rule. “Tight enough” is good. “I used pliers” is usually not.
3) Do a quick leak check (no, not with a lighter)
The safest DIY method is a bubble test using leak-detection solution or thick soapy water.
Apply it to the connection area, then slowly open the cylinder valve and watch. If you see growing bubbles, you’ve got a leak.
- See bubbles? Close the valve, disconnect, inspect the seal/O-ring, and reattach correctly.
- If bubbles continue after reseating, stop using the torch and replace the faulty part or get it serviced.
- Never use an open flame to check for leaks. Ever. Not even “just for a second.”
4) Keep the cylinder mostly upright
Handheld cylinders are designed to feed vapor. Tilting too far can cause sputtering, yellow flames, or flare-ups.
Keep it near upright while lighting and using the torch.
The 3 Simple Ways to Light a Propane Torch
Which method you should use depends on your torch type. Some torch heads have a built-in igniter (often called
trigger-start or push-button ignition). Others are manual-ignition and need a spark source like a flint striker.
If you’re not sure which you have, look for a button that clicks and sparks near the burner tip.
Way #1: Use the Built-In Igniter (Trigger-Start Torch)
This is the easiest methodwhen it works. Trigger-start torches are popular for plumbing, brazing, heat-shrink,
and quick DIY jobs because you can ignite them one-handed and adjust the flame on the fly.
Step-by-step
- Point the torch in a safe directionaway from people, pets, and anything flammable.
- Open the fuel valve to the recommended start position (some models prefer fully open for ignitionfollow your torch’s instructions).
- Press/pull the igniter until the flame catches. If it doesn’t light within a couple seconds, stop and reset (see safety note below).
- Adjust the flame using the control knob until it’s steady and appropriate for the job.
Why this works
The igniter creates a spark at the burner tip right as gas flows, so the torch lights quickly without you holding a separate flame source.
Common mistakes (and how to avoid them)
- Click-click-click… nothing. If you hear gas but no ignition, the spark may be weak or not positioned correctly. Try adjusting the gas slightly and try again.
- Lighting in a bright area. Some flames are hard to see in daylight. Listen for the steady “whoosh” and feel for heat (carefully, from a safe distance).
- Letting gas flow too long without ignition. If it doesn’t light promptly, close the valve and wait before retrying.
Safety note: If ignition doesn’t happen quickly, close the valve and wait several minutes before attempting again.
This helps prevent a buildup of unburned gas that could ignite in a sudden “fireball” flare.
Way #2: Use a Flint Striker (Spark Lighter)
For manual-ignition torches, the gold standard is a flint striker (often sold as a “spark lighter”).
It’s simple, reliable, and keeps your hand farther from the burner tip than a match.
What you need
- A manual-ignition propane torch
- A flint striker/spark lighter (the classic “metal cup” style)
Step-by-step
- Hold the striker near the torch tipclose enough for sparks to land at the opening, but not touching the burner.
- Crack the torch valve open slowly until you hear a gentle hiss (not full blast).
- Strike once or twice to throw sparks into the gas stream.
- Once lit, adjust the flame to the size you need.
A quick flame tip (for a cleaner, hotter burn)
Many torch tips run most efficiently with a defined inner blue cone. If you’re using a pencil-style tip for soldering,
a moderate inner cone is often the sweet spot for heat control without roaring like a jet engine.
Common mistakes (and how to fix them fast)
- Valve open too far. Counterintuitively, some torches are harder to ignite when wide open. Start low and increase after ignition.
- Striker too far away. Sparks need to land right at the burner opening. Move closer (without touching the hot parts).
- Wet striker flint. If it’s been in a toolbox during a monsoon (or a leaky truck bed), dry it out and try again.
Way #3: Use a Long-Reach Lighter (or Match) Only If Your Torch Allows It
Some torch instructions allow lighting with a match; other manufacturers strongly discourage it.
So here’s the rule: follow the instructions for your specific torch. If your torch manual allows match lighting,
a long-reach multipurpose lighter is usually safer than a short match because it keeps your hand away from the burner.
Step-by-step (the safer approach)
- Ignite the lighter first. Get the flame steady before any gas flows.
- Position the flame near the torch tip (just under/near the opening).
- Slowly open the torch valve until the gas ignites.
- Remove the lighter and adjust the torch flame.
Why “lighter first” matters
If you open the valve and then fumble for a flame source, you can briefly release unburned gas. Lighting immediately reduces that risk.
Hard stop safety rule
If the torch doesn’t light quickly, close the valve, step back, let the gas disperse, and wait a few minutes before trying again.
No rapid-fire retries. This is how people end up starring in their own “whoomp” sound effects.
Troubleshooting: When Your Propane Torch Won’t Light (or Won’t Stay Lit)
If your torch refuses to cooperate, don’t immediately assume it’s broken. Most issues are simple: no fuel, poor airflow,
a compromised seal, a clogged tip, or an ignition problem.
Problem: You hear no hiss (no gas flow)
- Empty cylinder. The simplest answer is often correct. Swap cylinders.
- Valve fully closed. Open slightly and listen again.
- Connection not seated. Turn everything off, disconnect, and reconnect hand-tight.
Problem: You hear gas, but it won’t ignite
- Bad spark or weak igniter. Try a flint striker even if your torch has a button igniter (many users keep one as a backup).
- Too much gas too soon. Start with a smaller flow; some torch designs light better at a lower setting.
- Wind blowing out ignition. Shield the tip with your body (at a safe distance) or reposition.
- Stop-and-wait rule. If it doesn’t light promptly, close the valve and wait before trying again.
Problem: It lights, then sputters or flares
- Cylinder angle. Bring it closer to upright; extreme tilt can cause unstable flames.
- Cold cylinder. In cold weather, flame size can shrink. Let the cylinder warm to room temperature naturallynever heat the cylinder with a flame.
- Tip mismatch. Using the wrong tip for the job can create an odd flame pattern. Swap to the proper torch tip.
Problem: You smell propane
Treat it seriously. Shut off the valve if it’s safe, get to fresh air, avoid creating sparks, and address the leak before using the torch again.
If you can’t quickly identify and fix the issue, stop and contact a qualified professional.
How to Dial In the Flame (So You Don’t Overcook the Project)
Lighting the torch is step one. Using it well is where you start feeling like you know what you’re doing.
A stable flame improves control, speeds work, and reduces sooty buildup.
Quick flame-control guidelines
- Start small, then increase. Light at a lower setting (unless your torch manual says otherwise), then open up as needed.
- Watch the color. A clean blue flame generally indicates good combustion. A lazy yellow flame often means poor air mix or too much fuel.
- Heat the work, not the air. For soldering, sweep the flame and heat the fitting evenly instead of parking the flame in one spot.
Shut-down and storage (the part everyone rushes)
- Close the torch valve to extinguish the flame.
- Let it cool on a non-flammable surface.
- Store cylinders properlyupright, away from heat sources, and according to the cylinder label and safety guidance.
- Don’t overtighten the control knob when shutting off; “firm” is better than “gorilla strong” to avoid damaging valve surfaces.
Fast FAQs
Is a spark lighter better than a regular lighter?
For manual-ignition torches, a flint striker is purpose-built and keeps your hand farther from the flame.
A long-reach multipurpose lighter can work for some torch designs, but only if your manufacturer allows it.
Why does my torch “pop” when it lights?
Usually it’s a brief gas buildup before ignitionoften caused by opening the valve too much before sparking,
or delaying ignition. Light promptly, keep initial gas flow modest, and avoid repeated quick attempts.
Can I use a propane torch indoors?
Many safety guides recommend torch use only in well-ventilated areas and avoiding confined spaces.
If you’re indoors, ventilation and clearance from combustibles are non-negotiable. When in doubt, move outdoors.
What should I do if I suspect a leak?
Shut off the gas if it’s safe, get away from the area, avoid sparks/open flames, and contact a qualified professional
or emergency services as appropriate. Do not keep “testing” by trying to light it.
Conclusion
If you remember nothing else, remember this: propane torches like patience.
A calm setup (tight connection, bubble leak test, ventilation, upright cylinder) plus the right ignition method
makes lighting a propane torch quick and predictable.
Use a built-in igniter when you have it, a flint striker when you don’t, and a long-reach lighter only when your torch
instructions allow. And if it won’t light immediately, shut it down and waitbecause “just one more try” is how
the torch turns into a jump scare.
Extra: of Real-World Torch Experiences (So You Learn the Easy Way)
People rarely remember the first time they lit a propane torch when it went perfectly. They remember the moments when it
went almost perfectlybecause “almost” comes with sound effects.
One common learning moment: the “it’s on, right?” confusion. In bright daylight, a clean blue flame can be surprisingly hard to see.
DIYers often realize it’s lit only when they feel heat from a safe distance or hear that steady, confident whoosh. The takeaway?
Don’t hover your face near the tip like you’re trying to read the flame’s horoscope. Assume it might be lit, keep your hands clear,
and verify safely.
Another classic: the stubborn ignition button. Folks with trigger-start torches sometimes squeeze or click like they’re trying to win a video game,
but the torch doesn’t catch. The better move is boring: close the valve, reset your grip, open the gas to the proper start position, and try again.
If the igniter is flaky, a flint striker becomes the hero of the day. Plenty of tradespeople keep one in the toolbox for exactly this reason:
it works even when the fancy button decides to take a personal day.
Then there’s the “tiny flare” momentusually caused by tilting the cylinder too far or opening the valve too aggressively at startup.
In real garages and backyards, people naturally angle the torch to reach around objects. But handheld propane cylinders prefer staying near upright.
When someone forgets that, the torch can sputter, pulse, or briefly flare. The practical lesson: light it upright, stabilize the flame, then adjust
your position slowly. If it sputters or acts weird, shut it off, let things ventilate, and restart calmly.
Cooking stories are their own genre. The torch is fantastic for finishing a steak crust, melting cheese, or scorching sugaruntil someone learns
that “high” is not a personality trait you want in your flame. For food, a medium flame with control is usually the sweet spot, because you’re
aiming for browning, not launching a caramel meteor. Also: keep the torch moving. Parking it in one spot is a fast track to “crispy” turning into
“archaeological.”
And finally: weed torches. People love them because they feel powerful, efficient, and slightly medieval. Fire departments love them less when
they’re used during dry conditions or burn bans. The best real-world advice is simple: treat weeds like you’re giving them a bad day, not turning
them into a campfire. A quick pass to wilt is often enough, and it reduces the chance of accidental spread.
Across all these scenarios, the shared wisdom is consistent: prep the connection, check for leaks, light promptly, control the flame,
and shut down properly. The torch is a great toolas long as you treat it like a tool, not a magic wand.


