Table of Contents >> Show >> Hide
- Before You Start: Replacement or Reglue?
- Tools and Materials You’ll Want Nearby
- How to Replace the Bridge on an Acoustic Guitar in 15 Steps
- Step 1: Confirm the bridge is actually the problem
- Step 2: Remove the strings, pins, saddle, and anything loose
- Step 3: Protect the top and mark the bridge footprint
- Step 4: Warm the bridge slowly and evenly
- Step 5: Work a thin blade under the bridge with patience
- Step 6: Lift the bridge and inspect both surfaces
- Step 7: Remove old glue and get down to clean wood
- Step 8: Make sure the new bridge actually fits the guitar
- Step 9: Fit the bridge bottom to the top if needed
- Step 10: Dry-clamp the whole repair before opening the glue
- Step 11: Check alignment with locating pins or reference marks
- Step 12: Apply the glue evenly, but do not flood the neighborhood
- Step 13: Clamp firmly, evenly, and not like you are tightening lug nuts
- Step 14: Clean squeeze-out and let the joint cure fully
- Step 15: Restring, seat the ball ends correctly, and check setup
- Mistakes to Avoid During Acoustic Guitar Bridge Replacement
- When You Should Stop and Call a Luthier
- Conclusion
- Real-World Repair Experiences and Lessons Guitar Owners Run Into
If your acoustic guitar’s bridge is lifting, cracked, warped, or hanging on for dear life like it just watched a horror movie, you have a repair decision to make. Ignore it, and the guitar can become harder to play, harder to tune, and a lot more expensive to fix later. Deal with it correctly, though, and you can bring the instrument back to life without turning your soundboard into an accidental abstract painting.
This guide walks through 15 practical steps for acoustic guitar bridge replacement in plain American English, with real repair logic and zero fluff. It is written for a standard steel-string acoustic with a pinned bridge. The tone here is relaxed, but the work is not casual. Replacing a bridge is one of those jobs that sounds simple until glue, finish, alignment, and geometry all clock in for the same shift. So yes, it is doable. It is also a repair where patience matters more than bravado.
One important truth before we get started: not every loose bridge needs a full replacement. Sometimes the original bridge is still healthy and only needs to be removed, cleaned, and glued back on. Other times, the bridge is cracked between the pin holes, cupped, too thin, or damaged enough that replacement is the smarter move. Knowing which situation you have is Step One, and skipping that step is how people end up fixing the wrong problem very confidently.
Before You Start: Replacement or Reglue?
A bridge reglue is usually the right repair when the original bridge is structurally sound but has started lifting at the back edge or corners. A bridge replacement makes more sense when the bridge is cracked, warped, badly chipped, slotted incorrectly, thinned down too far, or no longer supports a proper saddle height and setup. If the top of the guitar is distorted, the bridge plate is chewed up, the saddle slot is compromised, or the instrument has an under-saddle pickup or vintage through-cut saddle, the repair gets more technical very quickly.
That is the first “easy way” in this article: do the easy diagnosis before the hard repair. It is much easier to spend ten calm minutes inspecting the guitar than it is to spend six irritated hours undoing a rushed decision.
Tools and Materials You’ll Want Nearby
- Bridge replacement that matches the original footprint, pin spacing, and saddle location
- Painter’s tape or low-tack tape
- Thin protective card or cardboard mask for the guitar top
- Controlled heat source, such as a bridge heater or safe heating pad
- Thin flexible spatula or palette knife
- Sharp blade for lightly scoring the finish around the bridge
- Chisel or scraper for glue cleanup
- Repair-appropriate wood glue
- Bridge caul, inside caul, and clamps
- Small mirror and light for viewing inside the body
- Damp cloths, cotton swabs, and paper towels
- Straightedge, ruler, and string-action gauge if available
- Sandpaper and a flat or radiused fitting block for bridge-bottom cleanup
If your tool plan is “I have enthusiasm and one butter knife,” pause. This repair rewards preparation and punishes improvisation.
How to Replace the Bridge on an Acoustic Guitar in 15 Steps
-
Step 1: Confirm the bridge is actually the problem
Look for a visible gap at the back edge of the bridge. A small piece of paper slipping under the rear corners can reveal early lift. Also inspect the top for bellying, the bridge for cracks between pin holes, and the saddle height for signs that the guitar geometry is already off. If the bridge is intact and only loose, a reglue may be enough. If it is cracked, warped, or badly worn, replacement is justified.
-
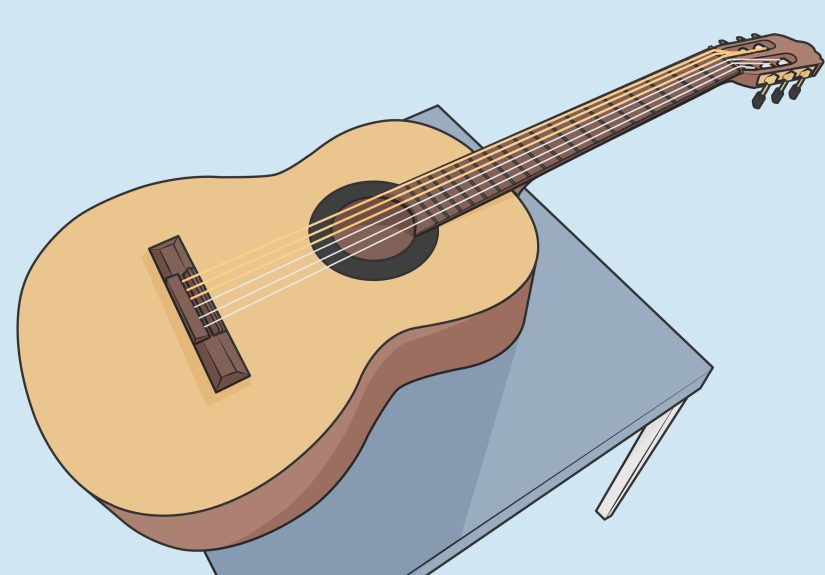
Step 2: Remove the strings, pins, saddle, and anything loose
Take all tension off the instrument. Remove the strings, bridge pins, and saddle, and set them aside in order. If the guitar has a loose saddle, nut, or pickup shim, keep track of every piece. Tiny guitar parts have a supernatural ability to vanish exactly when you start feeling productive.
-
Step 3: Protect the top and mark the bridge footprint
Before you apply heat or slide anything sharp near the finish, protect the area around the bridge. Many repair techs use a cardboard or thin card-stock mask with a cutout around the bridge. Then lightly score the finish around the bridge perimeter and add low-tack tape as a visual alignment guide. This step does two things: it protects the top and gives you a clean reference for where the new bridge must return.
-
Step 4: Warm the bridge slowly and evenly
Old glue does not respond well to panic. Warm the bridge gradually with a controlled heat source. The goal is to soften the glue, not roast the guitar. Slow, even heat is your friend here. Random heat blasts are not. Keep checking the bridge and avoid overheating the finish.
-
Step 5: Work a thin blade under the bridge with patience
Once the glue softens, begin separating the bridge with a thin flexible spatula or palette knife. Work carefully along the joint, following the glue line rather than digging downward into the top. If the bridge resists, stop and apply more heat. Forcing the last stubborn section is how a simple bridge job becomes a top-repair job with bonus regret.
-
Step 6: Lift the bridge and inspect both surfaces
After the bridge comes off, inspect the underside of the bridge and the soundboard footprint. Look for leftover glue, finish under the bridge, torn wood fibers, and any distortion in the top. Cheaper instruments sometimes have finish under the bridge footprint, which weakens the glue joint. If you see that glossy surprise, congratulations: you found one reason the bridge failed.
-
Step 7: Remove old glue and get down to clean wood
Clean both mating surfaces thoroughly. Scrape away old glue while it is still warm if possible, and remove any finish that sits inside the scored bridge outline. The new bridge should not be glued to old junk, shiny finish, dust, or wishful thinking. The joint needs clean, solid wood contact. This is one of the most important steps in the entire repair.
-
Step 8: Make sure the new bridge actually fits the guitar
Do not assume every “acoustic guitar bridge replacement” part is a drop-in miracle. Check the bridge footprint, pin-hole spacing, saddle slot location, bridge thickness, and compensation angle. Then test the bottom of the bridge against the top radius of the guitar. A bridge can look right from three feet away and still fit poorly enough to fail. Dry-fit it now, not after the glue clock starts ticking.
-
Step 9: Fit the bridge bottom to the top if needed
The bottom of the replacement bridge should match the contour of the guitar top. If the fit is off, very careful sanding or fitting may be necessary. This step is about surface contact, not aggressive reshaping. Take off too much wood and you can create a weak joint or alter saddle height in all the wrong ways. Sneak up on the fit slowly.
-
Step 10: Dry-clamp the whole repair before opening the glue
Set the bridge in place without glue and rehearse the clamping sequence. Check that your inside caul clears braces, your top caul sits correctly, and your clamps can reach without chaos. Use a mirror inside the body to confirm placement. If your first clamp rehearsal looks like you are wrestling an octopus in a mailbox, keep practicing before glue enters the chat.
-
Step 11: Check alignment with locating pins or reference marks
Before gluing, verify that the bridge lands exactly where it should. Many techs use temporary locating pins through outer pin holes to keep the bridge from skating while clamping. You can also use your taped outline and original footprint marks. Alignment matters because even a slight shift can affect scale length, intonation, pin fit, and overall setup.
-
Step 12: Apply the glue evenly, but do not flood the neighborhood
Spread an even coat of repair-appropriate wood glue on the prepared surfaces. You want full coverage and reliable squeeze-out, but not a tidal wave running through the soundhole. Keep a towel or paper barrier inside the body if needed to catch drips. If your glue-up looks like a kindergarten finger-paint project, you are using too much.
-
Step 13: Clamp firmly, evenly, and not like you are tightening lug nuts
Position the bridge, bring the cauls into place, and tighten the clamps gradually. The goal is even pressure across the entire footprint. Too little pressure leaves gaps. Too much pressure can starve the joint by squeezing out too much glue. This is not a strength competition. It is a balance exercise with expensive consequences.
-
Step 14: Clean squeeze-out and let the joint cure fully
Wipe away glue squeeze-out while it is still manageable, using damp swabs or cloths and checking the bridge pin holes as you go. Then leave the repair alone. Really alone. Resist the urge to “just see if it’s solid yet.” Let the clamps stay on for the full recommended cure period, and wait until the glue has fully set before restringing and stressing the joint.
-
Step 15: Restring, seat the ball ends correctly, and check setup
When the cure time is complete, reinstall the saddle and bridge pins, then restring the guitar carefully. Make sure each string ball seats firmly against the bridge plate, not somewhere weird where it can rattle and cause mystery noises. Bring the strings to pitch gradually, then check action, saddle height, break angle, and basic intonation. As a general starting point, many techs aim around 3/32 inch on the bass side and 1/16 inch on the treble side at the 12th fret, but your ideal setup depends on your playing style and the guitar itself.
Mistakes to Avoid During Acoustic Guitar Bridge Replacement
Gluing to finish instead of wood
If any finish remains under the bridge footprint, the bond is compromised from the start. A clean wood-to-wood joint is the target.
Using too much force during removal
When a bridge refuses to budge, the answer is usually more patience and controlled heat, not extra aggression. Digging into the top is a repair nobody wants.
Skipping the dry fit
Clamp rehearsal sounds boring until the glue is open and your bridge starts skating sideways. Dry fits prevent live comedy.
Ignoring humidity
If the guitar is overly dry or overly wet, bridge problems may be part of a bigger structural story. Fixing the bridge without stabilizing the environment can lead to repeat issues.
Assuming all setup problems are solved by the new bridge
Sometimes a bridge replacement reveals a neck-angle issue, saddle problem, or top distortion that was hiding in plain sight. A successful glue joint does not automatically equal a perfect setup.
When You Should Stop and Call a Luthier
Call a professional if the guitar has top cracks, loose braces, a distorted bridge plate, heavy finish damage, an under-saddle pickup you are not comfortable reinstalling, a through-cut saddle, or signs that the neck angle is also wrong. Also call a pro if the replacement bridge needs major reshaping or you are not fully confident about scale length and compensation. Bridge work is reversible only right up until the moment it is not.
A good rule: if one wrong move could damage the top, ruin intonation, or make the guitar worth less than it was yesterday, that is not cowardice calling. That is judgment.
Conclusion
Replacing the bridge on an acoustic guitar is not the fastest repair on the planet, but it is one of the most satisfying when done correctly. The easy part is understanding the workflow: diagnose, protect, heat, remove, clean, fit, align, glue, clamp, cure, and set up. The hard part is respecting every one of those stages enough not to rush them.
If your guitar bridge is only lifting and still structurally healthy, a careful reglue may be all you need. If the bridge is cracked, warped, too thin, or otherwise compromised, a full acoustic guitar bridge replacement is often the better long-term fix. Either way, the repair lives or dies on good prep, clean surfaces, accurate alignment, and the discipline to let the glue cure before you string up and start auditioning your best cowboy chords.
Done right, your reward is not just a repaired instrument. It is a guitar that plays cleaner, sounds stronger, and no longer looks like the bridge is trying to make a run for the soundhole.
Real-World Repair Experiences and Lessons Guitar Owners Run Into
One of the most common experiences players report is discovering the bridge problem by accident. They do not wake up one morning saying, “Today feels like a bridge-failure kind of day.” Instead, they notice the action creeping upward, the guitar feeling oddly stiff, or a new buzz showing up after restringing. Then they look closely and realize the back edge of the bridge is lifting just enough to slide in a business card or a bit of paper. That tiny gap is often the moment when the repair becomes real.
Another frequent experience is surprise at how often humidity is part of the story. Players in dry winters may see the top sink and the setup change. Players in damp climates may notice bellying behind the bridge, high action, and a general “why does my guitar suddenly feel like a suspension bridge?” sensation. Many owners assume a loose bridge means bad glue from the factory, and sometimes that is true. But just as often, the bridge is reacting to months of environmental stress that slowly pushed the instrument out of balance.
There is also the famous first-timer mistake of underestimating cleanup. Removing the old bridge feels like the dramatic part, but the real test is cleaning the footprint properly. People are often shocked by how much old glue, finish, dust, and compressed debris can live under a bridge area. This is where patience separates a durable repair from a temporary one. Owners who succeed usually say the same thing afterward: the repair got easier once they stopped trying to hurry the prep work.
Clamping is another big learning moment. Many guitar owners begin with the idea that tighter is always better, then discover that overclamping can cause its own problems. The best outcomes usually come from even, controlled pressure and a calm dry run before the glue-up. People who rehearse the clamp sequence tend to describe the actual glue stage as manageable. People who skip the rehearsal often describe it with words that should not appear in a family article.
After the repair, the most satisfying experience is hearing the guitar wake back up. A properly seated bridge can improve clarity, volume, and tuning stability in ways that surprise players who had slowly adapted to a compromised instrument. At the same time, some owners discover the bridge was not the whole story. Once the repair is complete, they may notice the saddle height still needs adjustment, the neck relief is off, or the guitar would benefit from a full setup. That is not failure. That is the instrument finally telling the truth now that the obvious problem is gone.
The best lesson from real-world bridge repairs is simple: success usually belongs to the patient. The guitar does not care whether you are optimistic, in a hurry, or extremely committed to “winging it.” It responds to clean surfaces, correct alignment, proper humidity, thoughtful clamping, and enough cure time. In other words, the glamorous secret is not glamour at all. It is slow, careful work. Happily, that kind of work tends to sound pretty great when you are done.


