Table of Contents >> Show >> Hide
- What Is a DIY Hummingbird Feeder Umbrella?
- Why Add an Umbrella to a Hummingbird Feeder?
- Best Materials for a DIY Hummingbird Feeder Umbrella
- How to Make a DIY Hummingbird Feeder Umbrella
- Safe Nectar Recipe for Hummingbird Feeders
- Cleaning Schedule: The Part Nobody Should Skip
- Where to Hang a Hummingbird Feeder Umbrella
- DIY Hummingbird Feeder Umbrella Design Ideas
- Common Mistakes to Avoid
- Extra Tips for a Hummingbird-Friendly Yard
- Real-World Experience: What I Learned From Using a DIY Hummingbird Feeder Umbrella
- Conclusion
- SEO Tags
A hummingbird feeder is already a tiny backyard theater: sugar-water drama, aerial acrobatics, territorial side-eye, and one bird who acts like it pays the mortgage. But there is one small upgrade that can make your feeder cleaner, cooler, and easier to maintain: a DIY hummingbird feeder umbrella.
This little shade cover sits above the feeder like a miniature patio umbrella. It helps shield nectar from harsh sun, reduces rain dilution, slows down debris from falling into the feeder, and gives your setup a polished, garden-friendly look. Even better, you can build one with simple materials such as a plastic saucer, acrylic disk, metal plant hanger hardware, or a lightweight outdoor-safe plate.
The goal is not to create a luxury resort for hummingbirdsalthough, honestly, they may behave like demanding resort guests. The goal is to build a safe, practical cover that keeps the feeder more comfortable and easier to manage while still following the basics of responsible hummingbird feeding: plain white-sugar nectar, no red dye, frequent cleaning, and smart placement.
What Is a DIY Hummingbird Feeder Umbrella?
A DIY hummingbird feeder umbrella is a small overhead cover installed above a hanging hummingbird feeder. It can be shaped like a shallow roof, a dome, a saucer, or a mini umbrella. Unlike decorative garden ornaments that are purely cute, this project has a purpose: it helps protect the feeder from direct afternoon sun, light rain, leaves, pollen, and droppings from branches above.
Think of it as a tiny awning for a very fast customer. Hummingbirds need quick energy from nectar, and backyard feeders can help supplement natural food sources during migration and nesting seasons. However, sugar water spoils faster in heat, and dirty feeders can grow mold. A feeder umbrella does not replace cleaning, but it can make the feeder environment easier to maintain.
Why Add an Umbrella to a Hummingbird Feeder?
1. It Helps Keep Nectar Cooler
Direct sun can warm sugar water quickly. Warm nectar may ferment faster, especially during hot summer weather. By adding shade above the feeder, a DIY umbrella helps reduce direct heat exposure. You still need to change and clean the feeder often, but shade can give you a better fighting chance against the “mystery syrup” stage nobody wants.
2. It Helps Reduce Rain Dilution
Some feeders are better sealed than others. During heavy rain, water can splash into ports or drip along the hanger. When nectar becomes diluted, it may be less useful to hummingbirds and may spoil more easily. A small umbrella helps direct rain away from the feeder body and feeding ports.
3. It Can Discourage Some Insect Problems
Ants, bees, and wasps are often attracted to hummingbird feeders because the sugar solution is easy calories. An umbrella alone will not solve every insect issue, but it can help reduce leaks caused by heat expansion and rain splash. Pair it with an ant moat and a feeder with bee guards, and your tiny nectar station becomes much better managed.
4. It Makes Your Feeder Easier to Spot
Hummingbirds are attracted to bright red, orange, and pink visual cues, especially when searching for food sources. You should never add red dye to nectar, but you can use a red feeder or add red accents to the umbrella itself. A red rim, red weatherproof tape, or painted red underside can help catch attention without changing the nectar.
Best Materials for a DIY Hummingbird Feeder Umbrella
The best materials are lightweight, weather-resistant, smooth-edged, and easy to clean. Avoid anything that rusts quickly, flakes paint, sheds fibers, or has sharp edges. Hummingbirds are tiny, but safety standards should not be tiny.
Recommended Materials
- A lightweight plastic plant saucer
- A clear acrylic disk or small plastic serving plate
- A weatherproof melamine plate
- A small metal pie pan with smoothed edges
- Stainless steel wire, S-hooks, or chain
- A drill with a small bit
- Outdoor-safe, non-toxic paint if decoration is needed
- Red vinyl tape or red outdoor-safe accents
- An ant moat for the hanging line
Materials to Avoid
- Cardboard, paper, or untreated wood that molds quickly
- Glitter, loose beads, or dangling decorations
- Paint that flakes or has not fully cured
- Sharp wire ends or rough metal edges
- Sticky substances near feeding ports
- Anything heavy enough to swing dangerously in wind
A good feeder umbrella should look boringly stable. If it spins like a carnival ride, rattles like a haunted attic, or threatens to bonk the feeder every time the breeze sneezes, it needs redesigning.
How to Make a DIY Hummingbird Feeder Umbrella
Step 1: Choose the Right Size
The umbrella should be wider than the feeder but not huge. For most backyard feeders, a cover between 8 and 12 inches wide works well. A cover that is too small will not provide much shade. A cover that is too large may catch wind and swing the feeder around like a tiny nectar pendulum.
As a simple rule, choose a cover that extends at least 1 to 2 inches beyond the feeder on all sides. If your feeder has wide feeding ports, make sure the umbrella does not block the birds’ approach path.
Step 2: Drill the Center Hole
Mark the center of your saucer, plate, or acrylic disk. Drill a small hole large enough for your hanging hook, wire, or chain to pass through. If using plastic, drill slowly to prevent cracking. If using metal, wear eye protection and file the edges smooth afterward.
The center hole matters because balance matters. An off-center umbrella may tilt, which looks charming for about five seconds and then becomes annoying every time it rains.
Step 3: Add a Hanging System
Thread stainless steel wire, a small chain, or a feeder hook through the hole. The umbrella should sit above the feeder, not directly on top of it. Leave enough space for air circulation and for you to remove the feeder for cleaning. A 3- to 6-inch gap usually works well, depending on the feeder design.
If your feeder already hangs from a hook, you can create this order from top to bottom:
- Tree branch, shepherd’s hook, or hanger
- Ant moat
- DIY umbrella cover
- Hummingbird feeder
The ant moat should stay above the feeder so ants cannot simply stroll down the hanger and throw a sugar party. Keep the moat filled with water and clean it regularly.
Step 4: Add Safe Red Accents
If your feeder already has red parts, you may not need to add anything. If your umbrella is plain, consider adding a red rim, red underside dots, or a red weatherproof band around the edge. Do not use red dye in the nectar. The color belongs on the feeder, not in the food.
Let paint cure completely before hanging the umbrella outdoors. “Dry to the touch” is not the same as fully cured. Hummingbirds are not art critics, and they do not need wet paint fumes with lunch.
Step 5: Test for Stability
Before filling the feeder, hang the umbrella and feeder together for a few minutes. Watch how it moves. If the umbrella tilts, adjust the center hole or hanging hardware. If the setup swings too much, move it to a more sheltered location or use a heavier but still safe cover.
The best location is partly shaded, protected from strong wind, visible to hummingbirds, and easy for you to access. If cleaning the feeder requires a ladder, a prayer, and the flexibility of a raccoon, you will clean it less often. Choose convenience.
Safe Nectar Recipe for Hummingbird Feeders
The standard homemade hummingbird nectar recipe is simple: mix 1 part refined white sugar with 4 parts water. For example, use 1 cup of sugar and 4 cups of water. Stir until fully dissolved, let it cool if warm water is used, and fill the feeder.
Use plain refined white sugar only. Do not use honey, brown sugar, powdered sugar, raw sugar, corn syrup, artificial sweeteners, or red dye. Natural flower nectar is clear, and safe feeder nectar should be clear too.
Make small batches so you waste less. Extra nectar can be refrigerated, but it should be discarded if it looks cloudy, smells odd, or shows any mold. When in doubt, throw it out. Hummingbirds deserve better than suspicious backyard juice.
Cleaning Schedule: The Part Nobody Should Skip
A DIY feeder umbrella can help protect nectar from sun and rain, but it does not magically sanitize the feeder. Cleaning is the real secret to a healthy hummingbird station.
In hot weather, change nectar and clean the feeder every day or every other day. In milder weather, cleaning every two to three days is often appropriate, but always clean sooner if the nectar turns cloudy, insects drown in it, or you see dark spots inside the feeder.
Basic Cleaning Method
- Empty old nectar completely.
- Disassemble the feeder as much as possible.
- Scrub ports, seams, and the reservoir with hot water and a small brush.
- Use a vinegar-water rinse for routine cleaning if needed.
- Rinse thoroughly several times.
- Let all parts dry before refilling.
Choose feeders with wide openings and removable parts. If you cannot reach the inside with a brush, mold can hide there. A feeder that looks adorable but cannot be cleaned properly is not a bargain; it is a tiny science experiment with wings nearby.
Where to Hang a Hummingbird Feeder Umbrella
Placement affects everything: nectar freshness, insect pressure, bird safety, and whether you can actually enjoy the show from your window or patio.
Choose Partial Shade
Morning sun and afternoon shade is a strong combination. Morning light helps birds find the feeder, while afternoon shade protects nectar from the hottest part of the day. The umbrella adds an extra layer of protection, especially when natural shade is limited.
Keep It Near Natural Cover
Hummingbirds like nearby perches. Trees and shrubs give them a place to rest, watch their territory, and perform dramatic little security patrols. However, avoid placing the feeder directly under messy branches where leaves, sap, or droppings fall constantly.
Think About Windows
If the feeder is near windows, make the glass visible to birds with exterior screens, decals, tape patterns, or other bird-safe window treatments. Reflections of sky and greenery can confuse birds. A beautiful feeder setup should not create a collision risk.
Separate Multiple Feeders
Hummingbirds can be territorial. One bold bird may try to guard a feeder like a dragon sitting on treasure. If you hang multiple feeders, place them far enough apart that one bird cannot easily dominate all of them. This gives shy birds a better chance to feed.
DIY Hummingbird Feeder Umbrella Design Ideas
The Plastic Saucer Umbrella
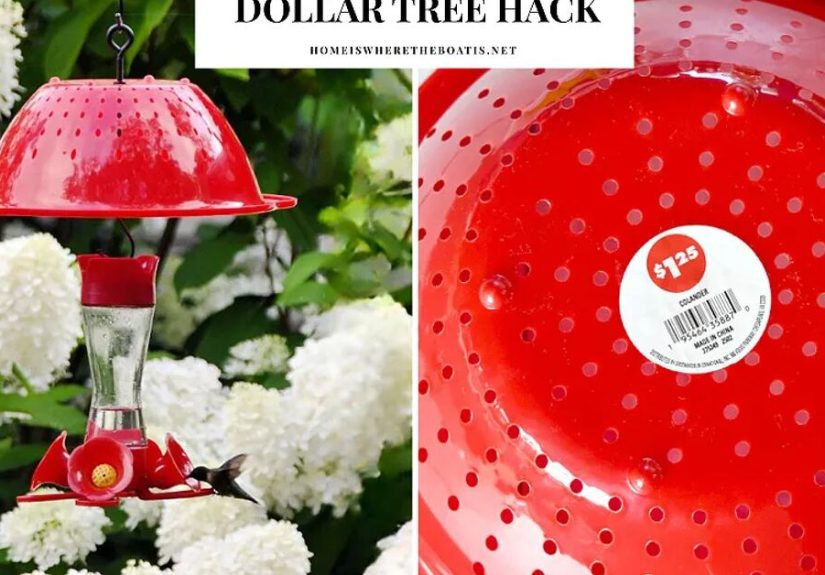
This is the easiest version. Use a red or clear plastic plant saucer, drill a center hole, thread the hanger through it, and place it above the feeder. It is lightweight, inexpensive, and easy to wipe clean. Choose a saucer with a slight downward slope so rain runs off the sides.
The Clear Acrylic Rain Shield
A clear acrylic disk creates a modern look and keeps the feeder visually open. This option is great if you do not want a bright cover taking over your garden design. Add a red edge if your feeder needs extra visibility.
The Decorative Plate Cover
A lightweight melamine plate can become a charming feeder roof. Choose a simple design and avoid plates with peeling coatings. Drill carefully, smooth the hole, and test the balance. This version looks especially nice in cottage gardens or patio corners.
The Mini Garden Hat
For a playful look, use a shallow red plastic bowl turned upside down. It creates a dome shape that sheds rain well. Make sure it does not trap too much heat beneath it; leave enough space between the cover and feeder for airflow.
Common Mistakes to Avoid
Making the Umbrella Too Heavy
A heavy cover can strain hooks, swing in wind, and make cleaning awkward. Keep the design light but stable. If storms are expected, bring the feeder indoors temporarily.
Blocking the Feeding Ports
Hummingbirds need room to approach from multiple angles. If the umbrella hangs too low, birds may avoid the feeder. Raise the cover until feeding access is open and comfortable.
Using Red Dye Instead of Red Design
Red dye is unnecessary and may be harmful. Use red plastic, red feeder parts, or red outdoor-safe accents instead. Clear nectar is the safe choice.
Forgetting the Cleaning Routine
The umbrella is a helper, not a housekeeper. Nectar still needs frequent changing, and the feeder still needs scrubbing. Put cleaning on your routine like watering plants or checking the mail.
Extra Tips for a Hummingbird-Friendly Yard
A feeder is helpful, but a feeder plus habitat is better. Add native flowers with tubular blooms, such as bee balm, trumpet honeysuckle, cardinal flower, salvia, or columbine, depending on what grows well in your region. Native plants provide nectar, attract small insects, and create a more complete food web.
Avoid pesticides near hummingbird areas. Hummingbirds eat more than nectar; they also need tiny insects and spiders for protein. A yard with flowers, perches, clean water, and safe feeders is much more valuable than a lonely feeder hanging in a lifeless lawn.
You can also add a mister or shallow moving-water feature. Hummingbirds often enjoy fine spray and droplets on leaves. Just keep water features clean and avoid deep bowls that are not useful for tiny birds.
Real-World Experience: What I Learned From Using a DIY Hummingbird Feeder Umbrella
The first time I added a small umbrella to a hummingbird feeder, I expected it to be mostly decorative. I thought it would look cute, maybe keep a few raindrops off the feeder, and give the patio a “tiny café for birds” feeling. What surprised me was how much easier it made the whole feeding routine.
Before the umbrella, the feeder sat in a spot that received bright afternoon sun. The nectar warmed quickly, and on hot days it needed attention constantly. After adding a lightweight red plastic saucer above the feeder, the nectar stayed visually clearer between changes. That did not mean I cleaned less often, but it did mean the feeder looked fresher and attracted fewer emergency inspections from me. Anyone who has ever stared suspiciously at cloudy nectar knows this feeling.
The second improvement was rain control. During summer storms, water used to splash onto the feeder and sometimes collect around the feeding ports. With the umbrella installed, rain rolled off the saucer instead of landing directly on the feeder. The birds still visited after light rain, and the feeder was less messy when I brought it down for cleaning.
I also learned that size matters. My first umbrella was too wide and caught the wind. It looked lovely for one calm afternoon, then spun around like it was auditioning for a weather report. I replaced it with a smaller saucer, about 10 inches across, and the setup became much more stable. The lesson: do not build a mansion roof for a studio-apartment feeder.
Another practical lesson was to keep the design simple. I briefly considered adding dangling red beads, because craft stores are dangerous places for people with imagination. Thankfully, common sense arrived before the glue gun did. Dangling decorations can tangle, startle birds, or create unnecessary hazards. A clean red rim was enough.
The ant moat made a major difference too. The umbrella helped with sun and rain, but the ant moat handled the insect highway. Once I placed the moat above the umbrella and kept it filled, ants became much less of a problem. Bees and wasps still appeared occasionally, especially in dry weather, but a clean feeder with no leaks helped reduce their interest.
The best part was visibility. A small red umbrella made the feeder easier for hummingbirds to notice without putting anything artificial in the nectar. The birds did not care that it was homemade. They cared that the food was fresh, the feeder was accessible, and the perch nearby gave them a good lookout point for their dramatic territorial meetings.
Over time, the umbrella became part of the maintenance system rather than just a craft project. I could lift the whole setup down, remove the feeder, wipe the umbrella, refill the ant moat, and rehang everything in a few minutes. The easier the process became, the more consistent I became. That is probably the most important lesson: the best DIY hummingbird feeder umbrella is not the fanciest one. It is the one that makes safe feeding easier to do every day.
Conclusion
A DIY hummingbird feeder umbrella is a small project with a surprisingly useful payoff. It can shade nectar, reduce rain splash, make the feeder more visible, and help your backyard setup look intentional instead of improvised during a caffeine-fueled craft moment. The key is to keep the design safe, lightweight, easy to clean, and paired with responsible feeder care.
Use clear homemade nectar made from refined white sugar and water. Skip red dye. Clean the feeder often. Add native flowers, reduce pesticide use, and make nearby windows safer for birds. When all those pieces come together, your DIY umbrella becomes more than a cute accessoryit becomes part of a healthier hummingbird-friendly yard.
And if one tiny bird claims the feeder, chases everyone else, and acts like the umbrella was custom-built for its personal estate? Congratulations. Your project is officially approved by management.


