Table of Contents >> Show >> Hide
- What Is a Fake Roman Shade (and Why Make One)?
- Pick Your Faux Shade Style
- Tools and Materials
- Step 1: Measure Like a Pro (Without Crying Into Your Tape Measure)
- Method 1: The No-Sew, Renter-Friendly Faux Roman Shade
- Method 2: The Tailored Faux Shade on a Mounting Board
- Fold Math: How Many Folds Should You Fake?
- Pro Tips for a High-End Look
- Common Problems (and Fixes)
- FAQs
- Real-World Experiences: What DIYers Learn After Making a Few Faux Roman Shades
- Conclusion
- SEO Tags
Want the crisp, tailored look of a Roman shade… without the cords, hardware, and “why is this crooked again?” drama?
A fake Roman shade (also called a faux Roman shade) is the window-treatment equivalent of wearing a tuxedo T-shirt:
it looks formal from across the room, but it’s secretly low-maintenance.
In this guide, you’ll learn how to make a faux Roman shade that stays in one position (usually “pretty and up”).
You’ll get two DIY methodsone ultra renter-friendly and no-sew, one more tailoredplus fold math, troubleshooting,
and a “things people learn the hard way” experience section at the end.
What Is a Fake Roman Shade (and Why Make One)?
A real Roman shade raises and lowers with a ring-and-cord system, folding into neat pleats at the top.
A fake Roman shade copies the lookstructured folds and a clean panel of fabricwithout needing to operate.
It’s ideal for:
- Windows you never cover (like a window facing a private yard or sunroom)
- Layering over an existing roller shade or blinds (privacy + the pretty top treatment)
- Rentals where drilling is a no-go
- Kid/pet safetyno dangling cords to manage
Pick Your Faux Shade Style
Flat, Relaxed, or “Softly Posh”?
Faux shades can mimic the most popular Roman shade looks:
- Flat Roman look: tidy and tailored, folds stack evenly.
- Relaxed Roman look: a gentle dip or swag in the bottom for a softer vibe.
- Hobbled look: more permanent soft folds (cute, but can read “country cottage” fast).
Light Filtering vs. Privacy
If you want the fabric to look substantial (and not glow like a paper lantern at noon),
plan for a lining. A blackout curtain panel can also give faux shades a more structured body.
Tools and Materials
Your exact supply list depends on the method you choose, but here are the common MVPs:
Basics
- Measuring tape
- Iron + ironing board (or a flat heat-safe surface)
- Fabric scissors (or rotary cutter + mat)
- Fabric pencil or washable marker
- Straight pins or fabric clips
Fabric + Finish
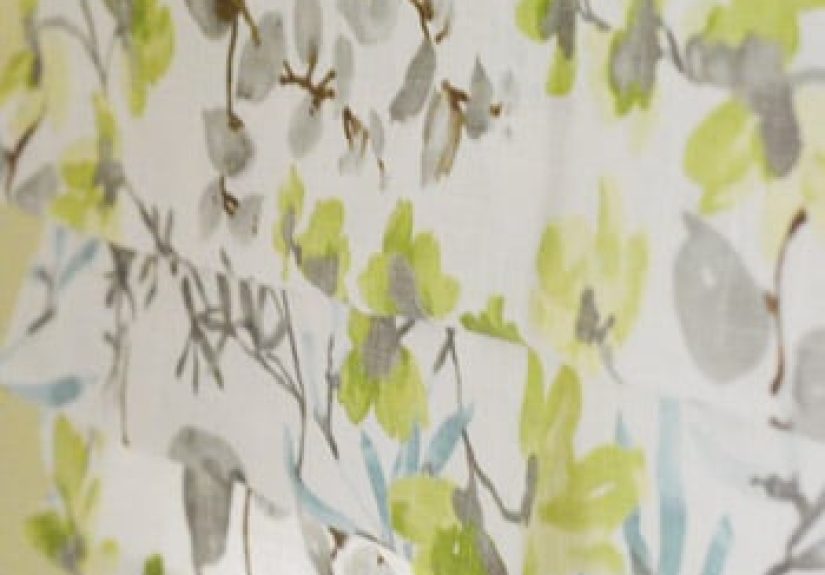
- Home decor fabric (cotton, linen blends, midweight woven)
- Optional lining (light-filtering or blackout)
- Iron-on hem tape (for no-sew) or a sewing machine + thread
- Optional trim: ribbon, banding, pom-pom trim (use responsibly)
Hanging Options (Choose One)
- Renter-friendly: hook-and-loop (Velcro), Command-style strips, mini clear hooks
- Tailored: a mounting board (like a 1×2) + hook-and-loop to attach the fabric panel
Safety note: If you’re using an iron, hot glue, or mounting hardware, use common-sense precautions and
get help from a responsible adult for any cutting or wall-mounting work.
Step 1: Measure Like a Pro (Without Crying Into Your Tape Measure)
Inside Mount vs. Outside Mount
For a faux Roman shade, outside mount is often easiest: you hang the shade above the window trim so it looks taller and more finished.
Inside mount can look super clean too, but it depends on how deep your window frame is and whether you have obstructions (handles, locks, crank operators).
How to Measure (Simple Rules That Save Your Sanity)
- Width: measure across the top, middle, and bottom. For inside-style fit, use the narrowest width.
- Height: measure left, center, right. If you’re covering the full opening, use the longest measurement; if you’re choosing a decorative “drop,” pick your preferred finished length.
- Outside mount coverage: add extra width so the shade overlaps the window frame (usually a couple inches per side, space allowing).
A Quick Example
Let’s say your window opening measures 35 7/8″, 36″, and 35 3/4″ wide. Your “safe” width is 35 3/4″.
If you want an outside-mount look, you might choose something like 40–42″ wide so the fabric overlaps the trim and looks intentional.
Method 1: The No-Sew, Renter-Friendly Faux Roman Shade
This method is perfect if you want a faux shade that’s temporary, removable, and drill-free.
The idea: make a hemmed fabric panel, attach the top with hook-and-loop, and use discreet hooks (or side “Roman tape”) to create folds.
Step 1: Decide Your Finished Size
Faux shades usually cover the top part of the window and stop somewhere above the midpoint.
A common decorative finished length is 16–24 inches, but your window and style get the final vote.
Step 2: Cut Fabric (Give Yourself Wiggle Room)
Cut your fabric panel bigger than the finished size so you can hem cleanly. A practical starting point:
- Add 2–3 inches to the width for side hems.
- Add 8–12 inches to the length for top attachment + folds + bottom hem.
If you’re using a blackout curtain panel, you can often work from the existing finished edges and only adjust width/length as needed.
Step 3: Hem the Panel (No Sewing Required)
Use iron-on hem tape to hem all four sides. Press carefully, keep hems consistent, and don’t rushhem tape is forgiving,
but it still appreciates patience.
Step 4: Add Structure (Optional but Beautiful)
If your fabric is thin, add a lining (or choose a fabric with body). A lined panel:
- Looks more expensive
- Hides window shadows behind the fabric
- Makes folds crisper instead of floppy
Step 5: Add Hanging Support at the Top
Attach the soft side of hook-and-loop across the top back edge of the fabric.
On the wall or trim, use the matching side with removable adhesive strips so the shade can come down later.
A full-width attachment helps prevent the “sad droopy middle” problem.
Step 6: Create the Faux Folds
You have two easy ways to form folds:
-
Hook method: place small clear hooks (removable style) in rows down the window area, then lift the fabric and catch it to form even folds.
A common starting spacing is about 6 inches between rows. -
Roman tape method: attach Roman shade “hook tape” (a trim with evenly spaced loops) along the sides of the panel.
Then use hooks on the wall/trim to connect the loops at consistent points, creating tidy, repeatable folds.
Step 7: Level, Fluff, Adjust
Stand across the room (the place where design truths reveal themselves), then tweak:
- Raise one fold slightly if the shade leans
- Space folds wider for a relaxed look, tighter for a tailored look
- Steam or press the front so the fabric looks crisp
Method 2: The Tailored Faux Shade on a Mounting Board
This approach looks especially polished because the shade has a firm top “headrail” like a real Roman shade.
It’s still faux (no cords), but the finish reads custom.
Step 1: Get a Pre-Cut Mounting Board
Use a 1×2 (or similar) cut to the shade width. Many home centers will cut wood to size, which is a great way to skip power tools.
Step 2: Wrap or Cover the Board (Optional)
If the board might be visible from the side, wrap it in scrap fabric or paint it to match your wall.
The goal: no random raw wood photobombing your beautiful window.
Step 3: Attach Fabric to the Board
Roll or fold the top edge of your fabric around the board and secure it on the back side with strong tape, staples (adult help),
or hook-and-loop. Keep the front clean and smooth.
Step 4: Form Faux “Roman” Loops
Lay the shade face-down on a flat surface. Decide your fold depth (often around 4–6 inches for faux shades).
Fold the fabric up to create a loop, pin it in place from the back, and repeat for the next fold.
Once you love the look, secure the folds more permanently:
- Hand tack a few stitches at key points (less visible than a big seam)
- Or use discreet fabric-safe adhesive in small amounts on the back side only
Step 5: Hang the Board
If you’re drilling into the wall or trim, ask for responsible adult help. If drilling is not an option,
mount the board with heavy-duty removable strips rated for the weight (and always follow the product’s surface/curing guidance).
Fold Math: How Many Folds Should You Fake?
For faux Roman shades, fold spacing is mostly aesthetic. These ranges usually look right:
- 5–6 inches: tighter, tailored, “designer kitchen” vibe
- 7–8 inches: softer, more relaxed
- 9–14 inches: more like functional Roman shade segment spacing (works best on taller shades)
Easy Formula
Finished shade length ÷ desired fold spacing = number of fold “sections”
(round to something that looks good, because your window is not the boss of your taste).
Example: A 20-inch-long faux shade with 5-inch folds gives you about 4 fold sections.
That’s enough to look Roman-y without turning into a fabric accordion.
Pro Tips for a High-End Look
Center Your Pattern
If your fabric has stripes or a big motif, center it on the window before cutting. Otherwise, you’ll stare at that off-center stripe forever.
Not because you’re dramatic. Because you have eyes.
Use a Lining for Better Draping
Lining helps folds stack cleanly and prevents “shadowy window shapes” from showing through light fabrics.
Blackout lining also adds structure, especially for faux shades that don’t have dowels or cords.
Trim Is the Shortcut to “Custom”
A simple ribbon edge, contrast banding, or subtle border can make a faux shade look like it came from a designer workroom.
Keep it clean: one great trim beats three “maybe” trims.
Prevent the Dreaded Center Sag
Full-width hook-and-loop attachment along the top edge keeps the center supported.
If you only anchor the ends, gravity will do its thingand it is not on your payroll.
Common Problems (and Fixes)
“My folds look uneven.”
Mark fold lines with a ruler and fabric pencil on the back, then build each fold to the same measurement.
Step back and adjust the tightness before you permanently tack anything.
“My shade looks wrinkly and homemade.”
Press the front thoroughly before hanging. If you can, steam it once installed so the folds relax into place.
(Yes, pressing is annoying. No, you can’t skip it if you want it to look expensive.)
“The top keeps peeling off.”
Use a stronger attachment strategy: sew-on hook-and-loop on the fabric plus adhesive-backed hook-and-loop on the wall/trim.
Also make sure the surface is clean and dry before applying adhesive products.
“It blocks too much light.”
Shorten the finished length, reduce the number of folds, or switch to a lighter fabric/lining combo.
Faux shades are decorative, so don’t let them bully your sunlight.
FAQs
Can I make a fake Roman shade without a sewing machine?
Yes. Iron-on hem tape, fabric-safe adhesive, and hand tacking can get the job doneespecially for a decorative faux shade that doesn’t move.
Can I make it functional later?
You can convert the look into a working Roman shade by adding dowels/ribs, rings, and a lift system,
but that becomes a different project. Many people keep the faux shade decorative and add a separate roller shade behind it.
What fabric works best?
Midweight woven fabric is the sweet spot: enough body to hold folds, not so stiff that it fights you.
Cotton and linen blends are popular; blackout-backed curtains add structure if you want a thicker, more tailored look.
Real-World Experiences: What DIYers Learn After Making a Few Faux Roman Shades
People who make faux Roman shades often start with one window as a “trial run” and end up doing every window in the house.
Not because they suddenly became obsessed with fabric (okay, sometimes that), but because the learning curve is fastand the payoff is big.
Here are the most common experiences DIYers report, the little surprises that don’t show up in the supply list.
First: measuring feels easy until you discover your window is not perfectly square. Many DIYers realize their trim is slightly off
when they hold up a neatly hemmed rectangle and it looks like it’s leaning. The fix is usually simple: measure width in three places and build
your finished width to the narrowest point if you want an “inside” look, then use a level or painter’s tape guideline when you hang it.
The experience lesson is: don’t trust your eyeballs at arm’s length. Trust the tape measure, then trust the level.
Second: the “nice fabric” decision matters more than expected. DIYers often begin with a lightweight quilting cotton and then
wonder why the folds look limp. Faux shades don’t have cords pulling everything into crisp pleats, so the fabric has to do more of the work.
Switching to a home-decor weight fabricor adding a liningusually transforms the look instantly. The experience lesson is:
structure is the difference between ‘handmade’ and ‘custom’.
Third: fold spacing is both art and math. Many people start with evenly spaced folds (say every 6 inches),
but after hanging, they tweak: the top fold looks best a little deeper, the bottom fold needs a little less puff, and suddenly the “perfect”
spacing is slightly different from the original plan. This is normal. A faux shade is a decorative illusion; it’s allowed to be adjusted.
The experience lesson is: pin first, commit later. Build the folds with pins or temporary hooks, step back, then lock it in.
Fourth: center sag is the sneaky villain. DIYers who attach the shade only at the corners often notice the middle droops a week later,
especially in humid rooms like kitchens. The simple upgraderunning hook-and-loop across the full widthmakes the shade behave like it has a real headrail.
The experience lesson: support the whole top edge, not just the ends.
Fifth: the finishing steps (pressing, pattern centering, trimming) are what get compliments. DIYers who skip pressing often find that
wrinkles show from across the room even if the folds are perfect. Meanwhile, a quick steam, crisp hems, and centered stripes make a faux shade look like
a designer ordered it. The experience lesson: the last 10% of effort creates 90% of the “wow.”
And finally: DIYers often love faux Roman shades because they’re “cordless by default.” In homes with kids or pets, not having dangling lift cords
feels like a design upgrade that also reduces daily worry. The experience lesson is the simplest one: pretty can also be practical.
Conclusion
A fake Roman shade is one of the best DIY window upgrades because it delivers maximum “custom look” for minimum hardware hassle.
Choose the no-sew renter-friendly version if you want fast and removable. Choose the mounting-board version if you want crisp, tailored lines.
Either way, take your time with measuring, press your fabric, and treat folds like a first draftadjustable until it looks exactly right.


