Table of Contents >> Show >> Hide
- Before You Start: What Makes a Light Dimmable?
- Safety First: A Quick Reality Check
- Method 1: Use a Dimmable LED Bulb
- Method 2: Replace a Standard Switch with a Dimmer Switch
- Method 3: Use a Plug-In Lamp Dimmer
- Method 4: Install Smart Bulbs
- Method 5: Use a Smart Dimmer Switch
- Method 6: Add an In-Line Cord Dimmer to a Lamp
- Common Problems and Easy Fixes
- Best Rooms for Dimmable Lighting
- Quick Comparison: Which Dimming Method Should You Choose?
- Real-World Experience: What I’ve Learned About Making Lights Dimmable
- Conclusion
Few home upgrades deliver as much instant “wow, I suddenly live in a boutique hotel” energy as dimmable lighting. One minute your living room is lit like a dentist’s office. The next, it is soft, cozy, and ready for movie night, dinner guests, or pretending you always keep the house this peaceful. The good news is that learning how to make a light dimmable is usually simple. The slightly less glamorous news is that electricity deserves respect, not guesswork, heroics, or “I saw half a video and I’m basically an electrician now” confidence.
This guide explains easy DIY methods for making a light dimmable, including swapping bulbs, installing a dimmer switch, using plug-in lamp dimmers, adding smart bulbs, and solving common flicker or buzzing problems. It is written for homeowners and renters who want practical options, clear steps, and fewer surprises. The main rule is simple: match the bulb, fixture, dimmer, and wiring. When those pieces get along, your lights dim beautifully. When they do not, you get flickering, humming, short bulb life, or a light that behaves like it has stage fright.
Before You Start: What Makes a Light Dimmable?
A light becomes dimmable when the light source and control method are designed to reduce brightness safely and smoothly. That may sound obvious, but it is the source of most dimming problems. Not every LED bulb can dim. Not every old dimmer switch works with modern LEDs. Not every smart switch fits every electrical box. And not every lamp should be controlled by a random mystery gadget found in the back of a drawer.
For a successful DIY dimmable light setup, check three things first: the bulb, the fixture, and the control. The bulb package should clearly say “dimmable.” The fixture should be compatible with the bulb type and wattage. The dimmer switch or plug-in control should be rated for that specific load, especially if you are using LED lighting. LED bulbs use far less wattage than incandescent bulbs, but their electronic drivers can be picky about the dimmer feeding them power.
Safety First: A Quick Reality Check
Changing a standard wall switch to a dimmer can be a reasonable DIY project for someone comfortable with basic electrical work. However, do not treat it like assembling a bookshelf. Turn off power at the breaker, verify the circuit is dead with a voltage tester, and follow the dimmer manufacturer’s instructions exactly. If you find aluminum wiring, damaged insulation, missing grounding, burned wires, a hot switch, frequent breaker trips, or wiring that looks like spaghetti after a tornado, stop and call a licensed electrician.
Also check local rules. Some areas allow homeowners to replace switches; others may require permits or professional work. If you rent, get approval before changing anything hardwired. A dimmer is cheaper than a security deposit argument, and both are cheaper than an electrical fire.
Method 1: Use a Dimmable LED Bulb
The easiest way to start is with the bulb. If your light is already controlled by a compatible dimmer switch, replacing a non-dimmable bulb with a dimmable LED may solve the whole problem. Look for packaging that specifically says “dimmable.” Do not assume all LEDs dim just because they are modern and look fancy in the aisle.
Best for:
This method is ideal for recessed cans, table lamps, ceiling fixtures, sconces, and pendant lights that already have a working dimmer installed.
How to do it:
- Turn off the light and let the bulb cool.
- Remove the old bulb.
- Check the fixture’s maximum wattage rating.
- Install a dimmable LED bulb with the correct base, shape, brightness, and color temperature.
- Test the dimmer from full brightness down to the lowest setting.
If the bulb flickers at low brightness, the dimmer may not be LED-compatible, or the bulb may not work well with that dimmer model. Try another dimmable bulb from a reputable brand or upgrade the dimmer switch to one made for LEDs. A warm 2700K bulb is great for bedrooms and living rooms. A 3000K bulb offers a cleaner warm white for kitchens and bathrooms. For task lighting, 3500K to 4000K can feel brighter and more focused without turning the room into a laboratory.
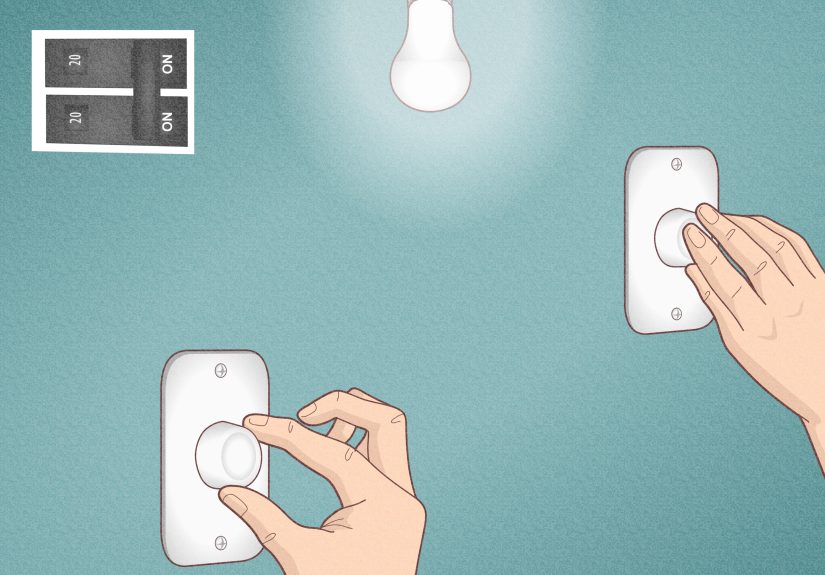
Method 2: Replace a Standard Switch with a Dimmer Switch
If your light is controlled by a regular wall switch, replacing it with a dimmer switch is the classic solution. This is the method most people mean when they ask how to make a light dimmable. The key is choosing the right dimmer for your bulbs and wiring setup.
Choose the right dimmer
Start by identifying your light type: dimmable LED, CFL, incandescent, halogen, low-voltage, or integrated LED fixture. Most homes today should use an LED-rated dimmer for LED bulbs. Older incandescent-only dimmers may cause LEDs to flicker, buzz, fail to turn on, or refuse to dim smoothly. Check the dimmer’s load rating too. A common LED dimmer may handle something like 150 watts of LED load and a much higher incandescent load, but never guess. Read the label.
Single-pole vs. three-way dimmer
A single-pole switch controls one light from one location. A three-way setup controls the same light from two locations, such as both ends of a hallway or the top and bottom of stairs. If you have a three-way circuit, buy a dimmer rated for three-way use and carefully label the common wire before disconnecting the old switch. In many setups, only one of the switches becomes the dimmer while the other remains a regular three-way switch or a compatible accessory switch.
Basic installation overview
- Turn off power at the breaker.
- Confirm power is off with a voltage tester.
- Remove the wall plate and old switch.
- Take a photo of the wiring before disconnecting anything.
- Connect ground to ground, line/load wires as instructed, and neutral if the dimmer requires it.
- Secure wire connectors and gently fold wires into the box.
- Attach the dimmer, install the wall plate, restore power, and test.
Modern smart dimmers often require a neutral wire. Many older homes do not have a neutral in every switch box. If your switch box only has two insulated wires plus ground, choose a dimmer that does not require neutral or call an electrician to evaluate your options. Do not “borrow” a neutral from another circuit. That is not clever. That is how a small lighting project becomes a very expensive lesson.
Method 3: Use a Plug-In Lamp Dimmer
For table lamps and floor lamps, a plug-in lamp dimmer is often the easiest DIY option. No wall wiring, no breaker panel drama, no awkwardly holding a flashlight with your chin. You plug the lamp into the dimmer, plug the dimmer into the outlet, and control brightness with a slider, knob, touch control, or app.
Best for:
Plug-in dimmers work well for living room lamps, bedside lamps, reading lamps, nursery lamps, and decorative accent lighting. They are also a renter-friendly way to create dimmable lighting without changing permanent wiring.
Important compatibility note
Use a dimmable bulb in the lamp. If the lamp has a non-dimmable LED or CFL, the plug-in dimmer may cause flickering, buzzing, or early bulb failure. Also make sure the plug-in dimmer is rated for LED bulbs if you are using LEDs. Some older lamp dimmers were designed for incandescent bulbs only.
One excellent setup is a warm dimmable LED bulb paired with a simple plug-in slide dimmer. It gives you soft nighttime light without the full-power glare that makes midnight water trips feel like an interrogation scene.
Method 4: Install Smart Bulbs
Smart bulbs are another easy way to make a light dimmable without touching the wall switch. The bulb itself contains the dimming electronics, and you control brightness through an app, voice assistant, remote, or automation. Many smart bulbs also offer color temperature adjustment, scheduling, scenes, and vacation modes.
Best for:
Smart bulbs are great for renters, bedrooms, lamps, home offices, and rooms where you want app control. They are also helpful when your switch box does not support a smart dimmer because there is no neutral wire.
What to avoid:
Do not put most smart bulbs on a traditional wall dimmer unless the bulb manufacturer specifically says it is allowed. A smart bulb generally wants steady power. If you feed it chopped dimmer power, it may flicker, disconnect from Wi-Fi, reset, or behave like it has been personally offended. Keep the wall switch on, then dim through the app or smart home system.
If family members keep turning off the wall switch, consider a switch cover, smart button, remote, or smart switch designed to keep power flowing to the bulb. The goal is convenience, not a daily household meeting about why Alexa cannot find the lamp again.
Method 5: Use a Smart Dimmer Switch
A smart dimmer switch combines traditional wall control with app and voice control. It is a strong choice for ceiling lights, recessed lights, dining rooms, and living rooms. You still get a physical switch on the wall, but you can also set schedules, create scenes, or dim the lights from the couch because civilization has advanced and we should enjoy it.
Before buying, check whether the smart dimmer requires a neutral wire. Also confirm that it supports your bulb type, wattage, voltage, and circuit type. Some smart dimmers work with single-pole wiring only. Others support three-way or multi-location setups with companion switches. Read the specifications carefully before opening the box, because returning electrical devices after half-installing them is nobody’s favorite weekend hobby.
Method 6: Add an In-Line Cord Dimmer to a Lamp
An in-line cord dimmer is installed directly on a lamp cord. It is a more hands-on option than a plug-in dimmer and usually best for people comfortable with small appliance wiring. It can make a simple lamp look cleaner because the control becomes part of the cord instead of a separate plug-in block.
Only use an in-line dimmer rated for your lamp and bulb type. Unplug the lamp before doing any work. Follow the device instructions exactly, maintain correct polarity when required, and avoid using damaged or brittle lamp cords. If the cord insulation is cracked or the lamp is old enough to have its own stories from the Nixon administration, consider rewiring the lamp or replacing it.
Common Problems and Easy Fixes
The light flickers
Flickering is usually caused by a non-dimmable bulb, an incompatible dimmer, a dimmer loaded below its minimum requirement, loose wiring, or a bulb that cannot dim as low as the switch is set. Try raising the low-end trim if your dimmer has that feature. If flicker continues, test a different dimmable LED listed as compatible with your dimmer.
The bulb buzzes or hums
Some dimmable LEDs buzz more than others, especially at low brightness. Make sure the dimmer is LED-rated, keep bulbs on the same circuit consistent, and avoid mixing bulb types. If the sound happens across the entire dimming range, try another bulb brand or switch to a higher-quality LED dimmer.
The lights do not dim very low
LEDs often have a minimum stable brightness. Some dim to 20 percent, some lower, some not much at all. Adjust the dimmer’s low-end trim so the light stays stable instead of dropping out. For bedrooms and media rooms, look for bulbs and dimmers known for deep dimming.
The switch feels warm
Some dimmers feel slightly warm during normal operation, but hot is not normal. Check the load rating and whether the dimmer is crowded in a multi-gang box. Dimmer capacity may be reduced when multiple dimmers sit side by side. If the switch is hot, smells burned, trips the breaker, or shows discoloration, turn off power and call an electrician.
Best Rooms for Dimmable Lighting
Dimmable lighting works almost everywhere, but some rooms benefit more than others. In the living room, dimmers help shift from cleaning mode to movie mode. In the dining room, they turn ordinary dinner into “we meant to plate it this way.” In bedrooms, dimming supports softer evening light and less shocking wake-ups. In bathrooms, a dimmer can make late-night use more comfortable while still giving full brightness for shaving, makeup, or checking whether that eyebrow situation is fixable.
Kitchens need a thoughtful approach. Bright task lighting matters for chopping, cleaning, and reading labels, but dimmable under-cabinet or pendant lights can add warmth when the work is done. In hallways, dimmers can be helpful, though motion sensors or low-output night lights may be more practical. Outdoor lights can be dimmable too, but use weather-rated fixtures, outdoor-rated bulbs, and controls designed for exterior use.
Quick Comparison: Which Dimming Method Should You Choose?
| Method | Best Use | DIY Difficulty | Main Caution |
|---|---|---|---|
| Dimmable LED bulb | Fixtures with existing dimmers | Easy | Must match dimmer compatibility |
| Wall dimmer switch | Ceiling lights and recessed lights | Moderate | Turn off power and verify wiring |
| Plug-in lamp dimmer | Table and floor lamps | Very easy | Use dimmable bulbs only |
| Smart bulb | Renters and app-controlled rooms | Very easy | Do not pair with regular dimmers unless approved |
| Smart dimmer switch | Whole-room control and automation | Moderate | May require neutral wire |
| In-line cord dimmer | Custom lamp projects | Moderate | Must be rated for the lamp and bulb type |
Real-World Experience: What I’ve Learned About Making Lights Dimmable
After helping with and observing plenty of lighting upgrades, the biggest lesson is that dimming problems are rarely mysterious. They usually come from mismatched parts. Someone buys a beautiful new LED chandelier, connects it to a dimmer from 1998, and then wonders why the bulbs flicker like a haunted hallway. The fixture is not haunted. The dimmer is just from the era when LEDs were not part of the conversation.
The smoothest projects start with planning. Before buying anything, remove one bulb and write down the base type, wattage, color temperature, and fixture style. Then look at the switch. Is it single-pole or three-way? Is there a neutral wire in the box? How many bulbs does the switch control? A five-minute inspection can save three trips to the hardware store, which is useful because the second trip is annoying and the third trip makes you question your life choices.
One of the best beginner upgrades is a plug-in dimmer for a bedside lamp. It is simple, inexpensive, and instantly useful. Pair it with a warm dimmable LED bulb, and the room becomes more comfortable at night. Instead of clicking from darkness to full brightness, you can ease the light up gradually. It is especially helpful in guest rooms, nurseries, and bedrooms where harsh light feels rude after 9 p.m.
For wall switches, I have learned to buy quality dimmers rather than the cheapest possible option. A good LED-rated dimmer with adjustable low-end trim can solve problems that cheaper dimmers cannot. Low-end trim is especially helpful because many LEDs become unstable when pushed too dim. Raising the minimum brightness slightly may remove flicker while still keeping the light soft. It feels like a tiny adjustment, but it can be the difference between “perfect ambiance” and “why is my ceiling pulsing?”
Another experience-based tip: do not mix bulb types on one dimmer. Even if all bulbs technically work, they may dim at different rates. One bulb may glow warmly while another cuts out early, and suddenly your dining room looks like a lighting science experiment. Use the same brand, model, brightness, and color temperature in multi-bulb fixtures whenever possible.
Finally, respect the signs that a DIY project should stop. A normal switch swap should not reveal burned wire, melted plastic, loose connections, crumbling insulation, or mystery wiring that does not match the instructions. When something looks wrong, it probably is wrong. Calling an electrician is not admitting defeat. It is choosing not to turn a lighting upgrade into a dramatic neighborhood story.
Conclusion
Making a light dimmable can be easy, affordable, and surprisingly satisfying when you choose the right method. For lamps, a plug-in dimmer or smart bulb is often the fastest path. For ceiling fixtures, an LED-compatible dimmer switch gives clean wall control. For smart homes, smart dimmers and smart bulbs add schedules, scenes, and voice control. The magic is not just in the dimmer itself; it is in matching the dimmer, bulb, fixture, load rating, and wiring.
If you remember only one thing, remember this: “dimmable” is a system, not just a sticker on a bulb box. Use dimmable bulbs, LED-rated controls, compatible parts, and safe installation practices. Do that, and your lighting can move smoothly from bright and practical to soft and relaxing without flicker, buzz, or electrical drama. Your room gets better mood lighting, your eyes get a break, and your home feels more polished with one small upgrade.