Table of Contents >> Show >> Hide
- What You’ll Need
- Method 1: The Fast No-Glue Pocket Folder (Folded)
- Method 2: The Sturdy Two-Pocket Paper Folder (Tape/Glue)
- Common Mistakes (and How to Fix Them)
- Creative Ways to Use a DIY Paper Folder with Pockets
- Keeping It Neat: Styling Tips That Don’t Feel Like Homework
- Real-World Experiences and Lessons Learned
- Conclusion
A pocket folder is basically a paper hug for your papers. It keeps permission slips from ghosting you, prevents receipts
from multiplying in your backpack, and makes you look like a person who “totally has it together” (even if you are
currently powered by iced coffee and hope).
In this guide, you’ll learn two reliable ways to make a paper folder with pockets:
(1) a no-glue folded version you can make fast, and (2) a sturdier two-pocket folder with taped or glued
pocket flaps that behaves more like a real store-bought folder. Both are beginner-friendly, customizable, and designed
to hold standard sheets neatly.
What You’ll Need
Basic materials (choose based on your goal)
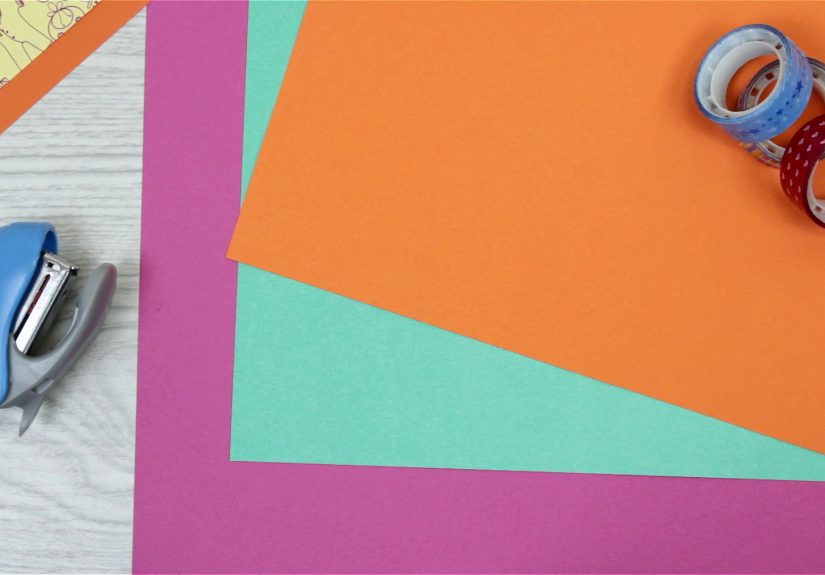
- Paper: Letter (8.5″ x 11″) or A4 works great. For sturdiness, use cardstock (65–110 lb) or heavy construction paper.
- Ruler: For straight folds and clean measurements.
- Something to “score” folds: A butter knife (not sharp), a bone folder, or the back of a spoon.
- Adhesive (optional): Double-sided tape, glue stick, or craft glue for the sturdier pocket folder.
- Scissors (optional): For trimming pocket height or making a label notch.
- Decor (optional): Markers, stickers, washi tape, labels.
Paper choice matters (a quick, practical analysis)
If your folder is for one-time use (handouts, a party activity, quick sorting), regular printer paper is fine.
If it’s going into a backpack where it will fight for survival next to a water bottle and a hoodie, go thicker:
cardstock or at least a heavyweight sheet. Thicker paper holds creases, keeps pockets from sagging, and doesn’t tear as easily.
Method 1: The Fast No-Glue Pocket Folder (Folded)
This is the “I need a pocket folder in five minutes” method. It’s great for receipts, notes, or a small packet of papers.
It won’t be as tough as a taped pocket folder, but it’s quick and surprisingly useful.
Step-by-step instructions
-
Start with one sheet (letter or A4) in landscape.
Place the paper so the long side runs left to right. Smooth it flatpaper wrinkles are the tiny chaos gremlins of crafts.
-
Make a center crease.
Fold the paper in half like a book (left edge to right edge), align corners, crease firmly, then open it back up.
That center crease is your alignment “rail.” -
Create side folds that become pocket walls.
Fold the left edge toward the center crease, stopping about 1 to 1.5 inches from the crease. Crease.
Repeat on the right side so both side folds are equal. (These folds help form side boundaries so papers don’t slide out.) -
Form the bottom pocket lip.
Fold the bottom edge up about 2 to 3 inches. Crease well. This becomes a pocket “lip” that holds papers in place.
For thicker stacks, go closer to 3 inches. -
Lock the pocket corners.
At the bottom left and bottom right, you’ll have layered paper where the side folds and bottom lip overlap.
Tuck the overlapping corners inward by folding small triangles (like you’re making neat little corner bookmarks).
Press the folds firmly to help the pocket keep its shape without tape. -
Fold into a folder.
Now refold along the original center crease so it closes like a book. Open ityour inside bottom area acts like a pocket.
-
Test fit and adjust.
Slide in a few sheets. If they peek out too easily, increase the bottom lip fold next time, or add a tiny piece of tape
on each bottom corner as a “seatbelt.”
Best uses for Method 1
- Quick homework collection or a single class handout set
- Travel documents for one day (tickets, confirmations)
- Receipts and coupons so they stop living in your pockets like feral cats
- Kids’ artwork that deserves better than being crumpled into modern art
Method 2: The Sturdy Two-Pocket Paper Folder (Tape/Glue)
This one is closer to a classic two-pocket school folder. You’ll build a “jacket” and add pocket flaps that get taped or glued.
It takes a little longerbut it holds up better and looks more professional.
Recommended paper for this method
Use cardstock or heavyweight scrapbook paper. If you only have printer paper, you can still do itjust reinforce the pocket edges
with tape or add a second layer of paper.
Cut sizes (simple and practical)
- Folder base: One sheet of letter-size cardstock (8.5″ x 11″) or A4 cardstock
- Pocket pieces: Two rectangles cut from scrap (or a second sheet). Aim for about 4″ to 4.5″ tall and 8″ to 8.25″ wide.
- Pocket flaps: Add 0.5″ to 0.75″ extra on three sides of each pocket piece (left, right, and bottom) as glue/tape flaps.
Don’t stress the numbers too hard. The key is: the pocket front should be wide enough to cover most of the inside panel,
and the flaps should be wide enough to stick securely without bulging.
Step-by-step instructions
-
Make the folder “spine.”
Place your base sheet in landscape. Lightly score down the center (at 5.5″ on letter paper). Fold in half and crease sharply.
Open it back up. This crease is your folder spine. -
Decide your pocket height.
A 4″ pocket height holds letter-size papers well without covering too much. If you want to hide papers more, go 4.5″.
If you want easy grab-and-go, go 3.5″. -
Create two pocket pieces.
Cut two pocket fronts (roughly 4″–4.5″ tall). For each pocket front, add flaps by either:
- Option A (template style): Cut one larger piece and score flaps on left, right, and bottom (0.5″–0.75″).
- Option B (scrap strip style): Keep the pocket front as a rectangle and tape/glue narrow strips along edges as flaps.
-
Score and fold the pocket flaps.
Score along each flap line, then fold flaps inward. Scoring first prevents ugly tears and keeps edges crisp.
Crisp folds are the difference between “handmade” and “made in a hurry at 2 a.m.” -
Attach the left pocket.
Place one pocket on the inside left panel of your folder base. Apply double-sided tape or glue to the left, right, and bottom flaps.
Press firmly, especially at corners. Avoid adhesive along the top edgeyour papers need to slide in. -
Attach the right pocket.
Repeat on the inside right panel. Before pressing it down permanently, close the folder to make sure the pocket doesn’t bulge
or interfere with the spine fold. If it does, trim the pocket width slightly. -
Reinforce stress points.
Add a strip of tape along the pocket edges (especially the top corners) if the folder will carry lots of papers. This “edge armor”
helps prevent tearing where fingers grab papers. -
Optional: Make a business card slot or label area.
Cut a small half-moon notch at the top of one pocket, or add a label tab on the front cover. If you’re using this as a
homework folder, label one pocket “TO DO” and the other “DONE” so your future self can stop guessing.
Quick pocket-folder upgrades (small effort, big payoff)
- Water resistance: Cover the outside with clear packing tape in strips (overlap slightly). It’s a DIY “laminate” effect.
- Stronger spine: Add a strip of tape along the outside spine fold.
- Expandable pocket: Create a small pleat by folding the pocket sides in a tiny “W” before tapinggives extra room.
- Corner protectors: Fold tiny triangles on bottom corners and tape them down for a cleaner look and less tearing.
Common Mistakes (and How to Fix Them)
1) “My pocket is crooked”
This usually happens when you eyeball placement. Use the center crease and the bottom edge as guides.
Lightly mark placement with pencil before sticking anything down.
2) “My folder won’t close flat”
Your pocket pieces may be too wide, or your flaps may be too thick. Trim pocket width by 1/8″–1/4″ and avoid piling tape layers
right at the spine.
3) “Papers slide out when I carry it”
Increase pocket height, add a top corner notch so papers sit deeper, or use a simple elastic band around the folder.
For Method 1, add a small piece of tape to lock bottom corners.
4) “The paper tore at the fold”
Score before folding and crease slowly. If the paper is thin, reinforce folds with tape on the inside.
Creative Ways to Use a DIY Paper Folder with Pockets
School and study
- Homework command center: Left pocket = “turn in,” right pocket = “keep.” Instant clarity.
- Study kit: Add an index-card pocket for formulas, vocab, or mini flash cards.
- Project planner: One pocket for research printouts, one for drafts and notes.
Home and life admin
- Receipts and warranties: Label a folder by month or category (appliances, car, medical).
- Family documents: Keep school forms, schedules, and event flyers in one “grab folder.”
- Budget packets: Create categories (utilities, subscriptions, savings) to stop paper piles from turning into paper mountains.
Gifts and events
- Gift card holder: Make a neat pocket inside and decorate the outside like a mini presentation folder.
- Party packet: Invitations + schedule + map + “don’t forget” list all in one place.
- Experience voucher: Slide a printed “coupon” (movie night, brunch date, museum trip) into the pocket.
Keeping It Neat: Styling Tips That Don’t Feel Like Homework
- Pick a theme: One color family or pattern makes the folder look intentional.
- Use a “label zone”: Leave a clean rectangle on the front for a title. Your future self will thank you.
- Decorate strategically: Keep bulky stickers away from the spine fold so it still closes nicely.
- Make it scannable: Add simple icons (book, house, dollar sign) for quick identification.
Real-World Experiences and Lessons Learned
People usually discover the value of a paper folder with pockets in one of two ways: either they’re naturally organized (rare and mysterious),
or they’ve had a single traumatic moment where a gust of wind turned their paperwork into confetti. If you’ve ever tried to juggle
loose sheets while opening a door, you already know why pockets matter. A pocket folder is basically a tiny paper bouncer: “Sorry, documents,
you’re not on the list to escape.”
One common experience is that the first DIY folder looks amazing on the table… and then immediately becomes a little lopsided the moment you
insert paper. That’s not you being “bad at crafts.” That’s physics. Thin paper plus heavy content equals saggy pockets. The fix is simple:
use thicker paper next time (cardstock), and crease like you mean it. Scoring the fold line before folding is one of those small steps that feels
unnecessary until you do it once and realize your folds suddenly look crisp and professional. It’s like the difference between a haircut and a haircut
you got while running late.
Another classic lesson: pocket height is everything. If the pocket is too short, papers slide out the first time you pick up the folder at an angle.
If the pocket is too tall, you’ll feel like you’re trying to retrieve documents from a paper well. Many people end up happiest around the
4-inch pocket range for letter-size paper, especially for school or everyday organizing. It’s deep enough to hold sheets securely, but not so deep that
you have to perform a dramatic tug-of-war with your own homework.
People also tend to learn the hard way that the spine area needs respect. If you stack tape layers right next to the center fold, the folder won’t close
flat and starts behaving like a stubborn book that refuses to shut. The trick is to keep bulky reinforcement away from the crease and, if needed,
reinforce the spine with a single strip of tape on the outside rather than building “tape mountains” inside.
Customization is where the fun really kicks in. A lot of folks start with a simple folder and then realize it can become a whole system:
labels, color-coding, little index-card slots, a “TO DO / DONE” pocket setup, or a dedicated place for sticky notes. The more personal you make it,
the more likely you’ll actually use it (because it feels like yours, not like something you grabbed in a panic).
A surprisingly popular move is using the folder for real-life “adulting”: receipts, appointment printouts, car maintenance notes, school forms,
and those mysterious papers that arrive in the mail and immediately try to hide under other papers.
Finally, a very relatable experience: once you make one pocket folder, you start seeing pocket-folder potential everywhere.
A cereal box becomes sturdy backing. A pretty paper bag turns into a cover. Leftover wrapping paper becomes a design upgrade. Suddenly,
you’re not just making a folderyou’re building a tiny portable filing system that doesn’t cost much and actually looks good.
And if someone asks where you bought it, you get to casually say, “Oh, this? I made it.” Which is the craft equivalent of a mic drop.
Conclusion
Making a paper folder with pockets is one of those satisfying little projects that delivers instant payoff: cleaner piles, fewer lost papers, and a neat
place to stash the stuff you swear you’ll organize “later.” Start with the no-glue folded version when you’re short on time, and upgrade to the taped/glued
two-pocket folder when you want durability. Either way, you’ll end up with a practical organizer that’s easy to customizeand honestly, kind of fun to make.


