Table of Contents >> Show >> Hide
- Why Pressed Copper Penny Wind Chimes Work So Well
- Choose the Right Pennies Before You Start
- Materials You’ll Need
- Design Your Wind Chime Before Assembly
- How to Drill Holes in Pressed Pennies Safely
- How to Assemble Pressed Copper Penny Wind Chimes
- How to Get Better Sound From Penny Wind Chimes
- Where to Hang Your Pressed Copper Penny Wind Chime
- Easy Style Variations to Try
- Common Mistakes to Avoid
- How to Maintain Copper Penny Wind Chimes
- What It’s Like to Actually Make One
- Conclusion
If your backyard needs a little sparkle, a little music, and a little “Wait, are those pennies?” energy, pressed copper penny wind chimes are a surprisingly charming DIY project. They catch the light, make a soft metallic clink, and turn ordinary outdoor decor into something with personality. Best of all, they look more expensive than they are, which is the universal language of a good craft.
This project works especially well when you use already pressed souvenir pennies or other flattened copper-toned pieces instead of trying to invent your own backyard coin-forging operation. That means less chaos, better results, and a much lower chance of explaining to your neighbors why you were outside with a hammer and suspicious levels of confidence.
In this guide, you’ll learn how to make pressed copper penny wind chimes step by step, choose the right materials, create better sound, hang them securely, and avoid the common mistakes that make a wind chime look sad instead of artsy. By the end, you’ll have a DIY garden accent that sounds lovely, looks custom, and tells the world, “Yes, I do make interesting things on purpose.”
Why Pressed Copper Penny Wind Chimes Work So Well
Pressed copper penny wind chimes sit in a sweet spot between craft project and garden decor. They are lightweight enough to move with a breeze, but sturdy enough to survive outside when assembled properly. The copper color adds warmth, and the elongated coin shape creates a vintage, collected look that feels more thoughtful than a generic store-bought chime.
There is also something wonderfully satisfying about using pennies in a decorative way. Older cents and souvenir-style pressed pennies have visual character that plain metal discs just do not. They already come with tiny details, embossed designs, dates, and places, which means your wind chime can feel personal without requiring advanced artistic talent. That is excellent news for the many of us whose drawing skills peaked with stick figures.
Another reason this project works: the sound is soft. Penny chimes usually create a light, bright tinkling sound rather than the deep ringing you get from long metal tubes. If you want a subtle garden sound instead of a dramatic “ancient temple in a thunderstorm” soundtrack, pennies are a smart choice.
Choose the Right Pennies Before You Start
The phrase “pressed copper penny” matters here. Not all pennies behave the same way. Modern U.S. pennies are mostly zinc with copper plating, while older pennies contain more copper. In practical DIY terms, that means older pennies often age more gracefully and may look richer over time, while newer pennies can be more prone to showing wear if aggressively handled.
For the best-looking wind chime, use one of these options:
- Pressed souvenir pennies: The easiest and most attractive choice. They are already flattened and decorative.
- Pre-drilled craft-ready pressed pennies: The best option if you want the project to feel more fun than hardware class.
- Older copper-heavy cents: Good for accent pieces if you want a deeper copper tone.
- Copper-toned blanks mixed with real pressed pennies: Useful when you want a fuller design without collecting dozens of souvenir coins.
If you are using real coins in a craft, stick to decorative, novelty, or jewelry-style use and avoid anything sketchy, destructive, or intended to recover metal value. Also, skip unsafe homemade flattening methods altogether. This project is supposed to make music, not headlines.
Materials You’ll Need
Here is a practical supply list for a durable set of pressed copper penny wind chimes:
- 12 to 30 pressed pennies or flattened copper-toned discs
- A wood ring, driftwood branch, metal hoop, or small wooden plaque for the top support
- Strong nylon string, jewelry wire, coated beading wire, or outdoor fishing line
- Small jump rings or split rings
- Crimp beads or small knots for securing strands
- 1 center drop piece, such as a larger pressed penny, copper charm, washer, or windcatcher
- Hand drill or rotary tool with a small metal bit if your pennies are not pre-drilled
- Clamp, scrap wood backing, and safety glasses
- Optional beads, copper spacers, patina solution, or clear outdoor sealant
If you are new to metal crafts, do not let the drill scare you. The goal is not to become a blacksmith. You only need clean, small holes and a little patience.
Design Your Wind Chime Before Assembly
A better design makes assembly easier and the finished chime more balanced. Before you thread anything, decide on three things: shape, spacing, and sound.
1. Pick a shape
Round hoops create a classic chime silhouette. Driftwood makes the project feel rustic and coastal. A wooden bar or plaque gives the whole design a cleaner, more modern look. If you want a handmade garden style, driftwood is hard to beat. If you want something polished enough to gift, a smooth stained wood base looks great.
2. Plan strand lengths
Use strands of different lengths so the pennies move independently. If all the strands hang at exactly the same height, the chime can look stiff and sound less interesting. Staggered lengths create movement, visual depth, and more chances for that nice light clink.
3. Think about contact points
Pennies need a little room to move, but not so much space that they never touch. Aim for strands close enough to interact when the breeze picks up, especially near the center drop piece. That center element acts like a conversation starter for the rest of the chime.
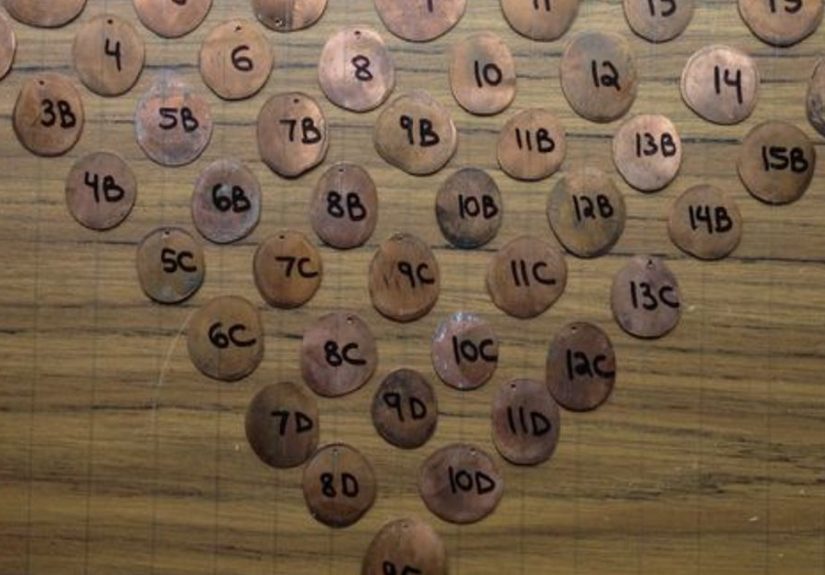
How to Drill Holes in Pressed Pennies Safely
If your pennies are already drilled, congratulations, you have skipped the fussiest part. If not, here is the safest and cleanest way to prepare them.
- Mark the hole location. Place the hole near the top edge, leaving enough metal around it so the penny will not tear out.
- Use a center punch. Make a small indentation where the drill bit will start. This helps keep the bit from skating across the metal like it is late for an appointment.
- Clamp the penny securely. Put it over scrap wood and never hold it in your fingers while drilling.
- Use the right bit. A small metal-rated bit works well for this project.
- Drill slowly. Start at a low speed and let the bit work. Do not force it.
- Add a tiny drop of oil if needed. This helps reduce heat and makes drilling smoother.
- Smooth rough edges. Use a small file or fine sandpaper if the hole has burrs.
Safety matters here. Wear eye protection, secure the metal, and take your time. Neat holes make the finished wind chime look far more polished, and they help prevent broken strands later.
How to Assemble Pressed Copper Penny Wind Chimes
Step 1: Prepare the top support
If you are using driftwood or a wooden bar, drill small evenly spaced holes along the bottom edge. If you are using a ring or hoop, mark your hanging positions so the strands are balanced. Add three or four top hanging points so the entire chime sits level outdoors.
Step 2: Build the penny strands
Cut several lengths of wire or line. Thread one pressed penny onto each strand using a jump ring, then continue adding pennies, beads, or spacers as desired. You can stack them vertically like a chain or use single pennies per strand for a lighter, airier look.
A good beginner formula is five to seven strands with varying lengths. Keep the middle strands slightly longer than the outer ones. That gives the chime a fuller shape and helps direct movement toward the center.
Step 3: Add the center drop
The center drop is the part that hangs in the middle and catches the wind. This can be a larger pressed penny, a copper charm, a small washer, or a flat decorative windcatcher. It should hang just low enough to interact with nearby strands when the breeze moves it.
This piece matters more than people think. Without it, your chime may look pretty but sound sleepy. With it, the whole project wakes up.
Step 4: Balance the arrangement
Before tying final knots or crimping wire permanently, hang the chime and test its balance. If one side dips lower, shorten that side or redistribute weight. A balanced wind chime moves better, sounds better, and looks intentional rather than “I definitely stopped measuring halfway through.”
Step 5: Secure everything for outdoor use
Double-knot line, crimp wire ends, and trim loose threads. If your chime will live outdoors year-round, consider using coated wire and a clear protective finish on any wood parts. Copper and pressed pennies can develop patina over time, which many people love, but the structure should still be weather-ready.
How to Get Better Sound From Penny Wind Chimes
Sound is where this project becomes art instead of decoration. If your wind chime looks amazing but sounds like two forks arguing in a drawer, adjust the setup.
- Use mixed lengths: Different lengths create more natural movement.
- Avoid crowding: Too many pennies packed together can mute the sound.
- Include a windcatcher: A slightly wider center piece helps trigger motion.
- Test in light breeze: You want soft interaction, not nonstop clattering.
- Use lighter connectors: Heavy hardware can deaden movement.
Remember that penny chimes are meant to be delicate. They are not trying to sound like cathedral bells. Their charm comes from small movement, soft metallic notes, and the flash of copper in the sun.
Where to Hang Your Pressed Copper Penny Wind Chime
Location affects both sound and longevity. Hang your wind chime where it gets a gentle breeze rather than constant heavy wind. A porch corner, pergola, covered patio, garden arch, or tree branch with moderate airflow is ideal.
If you place it in a wind tunnel, the chime may tangle, wear down faster, or make more noise than you actually wanted. On the other hand, if you hang it in a completely still spot, it becomes sculpture. Lovely sculpture, yes, but still sculpture.
Try hanging it near a seating area, kitchen window, reading nook, or garden entrance. Wind chimes work best when they contribute to a sensory moment. A little movement, a little sound, a little copper shimmer, and suddenly your yard feels like it has opinions.
Easy Style Variations to Try
Travel souvenir wind chime
Use pressed pennies from different cities, parks, museums, or road trips. This turns the chime into a memory piece, not just a craft.
Rustic garden version
Pair pressed pennies with driftwood, twine-colored cord, and a matte copper windcatcher.
Polished modern version
Use a stained wood base, evenly spaced strands, minimal beads, and carefully matched copper tones.
Mixed-metal version
Add brass washers, silver beads, or dark patina accents for more visual contrast.
Common Mistakes to Avoid
- Using weak thread that degrades outdoors
- Drilling holes too close to the edge of the penny
- Making all strands the same length
- Overloading the top support with too much weight
- Skipping balance testing before final assembly
- Hanging the chime where strong wind slams pieces together nonstop
- Using unsafe methods to flatten or alter coins
The easiest way to make this project look expensive is simple: keep the hardware clean, the spacing intentional, and the design a little restrained. Not every penny needs a bead, a charm, a tassel, and a dramatic backstory.
How to Maintain Copper Penny Wind Chimes
If your wind chime lives outdoors, expect the color to change over time. Copper tones can darken and develop patina, especially in humid climates. Some people love that aged look. Others prefer a brighter shine. Either approach is fine.
To maintain the finish:
- Wipe occasionally with a soft dry cloth
- Check knots, crimps, and jump rings every few months
- Bring it indoors during severe storms
- Reapply sealant to wood parts if needed
- Untangle strands before the whole thing turns into metallic spaghetti
A well-made pressed copper penny wind chime does not need much maintenance, but a quick seasonal check keeps it looking intentional instead of “mysterious object hanging from porch.”
What It’s Like to Actually Make One
The first time I made pressed copper penny wind chimes, I expected a simple craft. What I got was a mini lesson in patience, proportion, and how something tiny can completely change the mood of a space. On the table, the project looked almost too humble to matter: a pile of pressed pennies, a branch, some wire, and a few jump rings. Nothing about it screamed masterpiece. Then the pieces started coming together, and suddenly the whole thing had character.
The part that surprised me most was how much the little design choices mattered. Move one penny up half an inch, and the strand looked better. Change the center drop, and the sound improved. Swap a thick connector for a lighter one, and the breeze finally had enough power to make everything move. It was one of those projects that rewarded small adjustments. The final result did not feel mass-produced. It felt tuned.
I also learned that pressed pennies carry emotional weight in a way regular craft supplies do not. If you use souvenir pennies from trips, family vacations, state fairs, or old museum visits, the wind chime becomes a memory archive that just happens to make noise. You are not only hanging metal discs. You are hanging little snapshots of places and moments. That gives the finished piece a warmth that is hard to fake.
There is also a practical satisfaction to making something decorative that does not require a giant budget or a workshop full of intimidating tools. Once I stopped trying to overcomplicate the design, the project became much more enjoyable. A few pennies, a clean layout, and careful spacing did more for the look than any fancy extra embellishment. It reminded me that good DIY often comes from restraint, not excess.
Out in the yard, the wind chime changed with the time of day. In the morning, it caught sunlight and flashed copper. In the late afternoon, it looked warmer and more antique. When the breeze picked up, the sound was subtle enough that it never felt intrusive. That was another pleasant surprise. I had worried it would either do nothing or make a chaotic racket. Instead, it made a light, bright sound that felt more like punctuation than performance.
The biggest lesson from the experience was that this kind of project works best when you let it be a little personal. It does not need perfection. In fact, a tiny bit of irregularity gives it charm. A slightly curved penny, a driftwood base with texture, a strand that hangs just a touch longer than the others, all of that makes the wind chime feel handmade in the best possible way. It has rhythm without looking rigid.
If I were making another one, I would still keep the same basic formula: pressed pennies with visual meaning, a simple top support, lightweight connectors, and a center piece that catches enough wind to keep things lively. I would skip any rushed shortcuts and spend a little more time testing balance before locking everything in place. That step alone makes a huge difference.
In the end, making pressed copper penny wind chimes feels like the best kind of DIY: useful, decorative, memorable, and just quirky enough to invite compliments. People notice them. Then they get closer, realize what they are made of, and smile. That reaction alone is worth the effort. A good project does not just fill space. It creates a moment. These wind chimes do exactly that.
Conclusion
If you want a DIY project that blends craft, garden decor, and a little storytelling, pressed copper penny wind chimes are hard to beat. They are affordable, customizable, and surprisingly elegant when you focus on good spacing, clean assembly, and safe materials. Use already pressed pennies, build with lightweight outdoor-friendly hardware, test the balance, and hang the finished chime where a gentle breeze can do the rest.
The result is a handmade piece that sparkles in the light, adds soft sound to your outdoor space, and gives old coins or souvenir pennies a new life. It is thoughtful without being fussy, creative without being complicated, and decorative without trying too hard. In other words, it is the kind of project that makes you feel both crafty and suspiciously competent.


