Table of Contents >> Show >> Hide
- Before You Repair Anything, Figure Out What You’re Working With
- What You’ll Need for Basic Leather Jacket Repair
- How to Fix Scuffs and Light Scratches
- How to Repair a Small Tear in a Leather Jacket
- How to Fix Cracks, Dryness, and Rough Areas
- How to Handle Holes, Missing Material, and Worn Panels
- What About Peeling Leather?
- How to Deal With Stains, Water Spots, and Oil Marks
- How to Repair Zippers, Linings, Cuffs, and Hardware
- When to Call a Professional Leather Repair Service
- Mistakes That Can Ruin a Leather Jacket
- How to Keep Your Leather Jacket From Needing Another Repair
- Real-World Repair Experiences and Lessons From Living With Leather
- Conclusion
A leather jacket is one of those rare wardrobe pieces that can survive trends, bad dates, questionable playlists, and at least a few winters with attitude. But even the coolest jacket eventually runs into trouble: a sleeve gets scuffed, a pocket seam opens up, the elbow starts cracking, or a small tear appears and suddenly your “effortlessly rugged” look starts drifting toward “lost a fight with a shopping cart.”
The good news is that many leather jacket problems are repairable. Light scratches, surface scuffs, minor tears, fading, and loose seams can often be improved at home with patience and the right products. The less good news? Leather is not forgiving. Too much water, harsh cleaners, aggressive scrubbing, or the wrong glue can make a small problem much bigger. So the smart approach is simple: clean first, repair second, condition last, and know when to stop before you turn a tiny nick into a dramatic personal growth story.
This guide walks you through how to repair a leather jacket safely, including how to fix tears, scuffs, scratches, stiffness, and more. It also covers when to use a leather repair kit, when to call a professional, and which mistakes to avoid if you want your jacket to age like a movie star instead of a cardboard box.
Before You Repair Anything, Figure Out What You’re Working With
Not every “leather” jacket should be treated the same way. Smooth finished leather, suede, nubuck, and faux leather all react differently to moisture, cleaners, and repair products. Start by checking the care label and looking closely at the surface. If it feels smooth and has a finished topcoat, it will usually tolerate gentle cleaning and conditioning better than suede or nubuck. If it has a velvety nap, stop right there and switch to products made specifically for suede or nubuck. If the material is faux leather and the surface is peeling, that is often a coating failure rather than true leather damage.
You should also identify the type of damage. Is it a light surface scuff? A scratch with no missing material? A clean tear with edges that still meet? A hole with missing leather? Cracking from dryness? A broken zipper or torn lining? Each issue needs a slightly different fix, and treating all problems with one mystery bottle from the internet is how repair projects become cautionary tales.
What You’ll Need for Basic Leather Jacket Repair
You do not need a workshop worthy of a luxury fashion house. For most home repairs, a small, organized kit is enough:
- Soft microfiber cloths
- Mild leather cleaner or a very diluted gentle soap solution
- Leather conditioner
- Cotton swabs
- A soft sponge
- Small scissors or a seam ripper
- A leather or fabric patch for backing tears
- Flexible leather glue or adhesive made for repair work
- Leather filler for minor cracks or shallow gouges on smooth leather
- Color balm, touch-up cream, or leather dye matched to the jacket
- A padded hanger
For hardware issues, you may also need a replacement zipper pull or slider, but full zipper replacement is usually better handled by a leather specialist. Once a needle punctures leather, the hole is permanent, so this is not the moment for cheerful trial and error.
How to Fix Scuffs and Light Scratches
1. Clean the area first
Most repair jobs should begin with cleaning. Wipe the jacket with a dry microfiber cloth to remove dust and loose debris. If the damaged area is dirty, use a small amount of leather cleaner or a lightly dampened cloth with a very mild soap solution. Blot gently instead of soaking the leather. Too much water can stain or strip oils, and leather tends to remember your bad decisions.
2. Let it dry completely
Do not rush this step. Air-dry the jacket on a padded hanger in a well-ventilated room away from strong heat or direct sunlight. Skip the hair dryer, radiator, and sunny windowsill. Leather likes calm, not drama.
3. Massage in conditioner
For many light scratches and surface scuffs, conditioner alone can make a visible difference. Put a small amount on a soft cloth and work it into the mark using gentle circular motions. Often the scratch looks lighter because the leather is dry and the finish is slightly disturbed. Conditioner can darken the area back toward the surrounding tone and help the scuff blend in.
4. Add color only if needed
If the mark is still visible after conditioning, use a color balm or touch-up product matched as closely as possible to the jacket. Test it on a hidden spot first. Apply a tiny amount, build slowly, and buff lightly between layers. Over-coloring one patch can make it stand out more than the original scratch, which is not the victory speech you want.
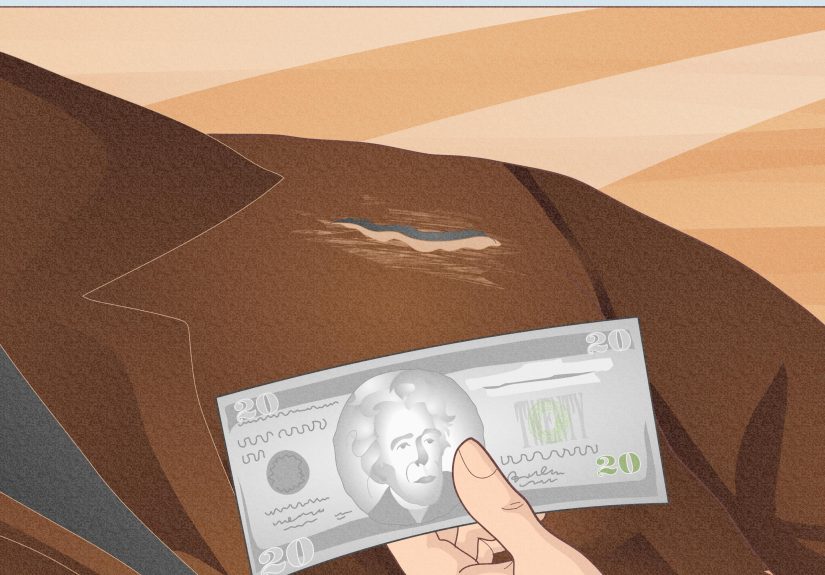
How to Repair a Small Tear in a Leather Jacket
If the tear is small and the leather edges still line up neatly, you can often repair it from the inside using a backing patch and flexible adhesive.
Step 1: Access the underside
Turn the jacket inside out. If the jacket is lined, look for a nearby seam in the lining that can be opened carefully with a seam ripper. That gives you access to the underside of the tear without causing extra damage.
Step 2: Trim only what is truly loose
If there are fuzzy fibers or tiny frayed bits sticking up, trim them carefully with small scissors. Do not trim the leather itself unless something is obviously detached. The goal is a neat edge, not an accidental “before and after” where the “after” is worse.
Step 3: Slide a patch behind the tear
Use a thin patch of repair fabric or leather backing that is larger than the tear. Position it behind the damaged area so it supports both sides evenly. This gives the torn edges something to bond to.
Step 4: Glue the patch in place
Apply a small amount of flexible adhesive to the backing patch, then press it gently into position from the inside. Once it is secure, align the torn edges on the outer surface and press them down onto the backing. Use as little glue as possible. Excess adhesive can seep through and leave a shiny, stiff spot.
Step 5: Let it cure naturally
Allow the repair to dry fully at room temperature. Do not blast it with heat. After it cures, use a tiny amount of conditioner or touch-up color on the surface if needed to improve the appearance. Then resew the lining seam you opened.
This method works best on clean, small tears. If leather is missing, the tear is on a high-stress area like the shoulder, or the jacket is expensive or vintage, professional repair is the smarter move.
How to Fix Cracks, Dryness, and Rough Areas
If your jacket feels stiff, looks dull, or has shallow cracking, dryness is often the main culprit. Leather needs periodic conditioning to stay flexible. Start by cleaning the jacket gently and letting it dry. Then apply a thin, even coat of conditioner with a clean cloth. Focus on elbows, cuffs, pocket edges, and collar areas, since these flex the most.
Let the conditioner absorb fully, then buff away residue. If the leather still looks rough, a second light application may help. Do not dump on half the bottle in one go. More product does not equal more wisdom. Over-conditioning can soften the jacket too much, leave it greasy, or alter the color.
For shallow surface cracking on smooth leather, a leather filler can help level the area before color touch-up. Use it sparingly, let it dry completely, and sand only if the product instructions specifically allow it. Deep cracks, widespread dryness, or brittle leather often call for a professional restoration rather than a kitchen-table experiment.
How to Handle Holes, Missing Material, and Worn Panels
Once material is missing, the repair becomes more than a simple blend-and-buff job. A hole or gouge usually needs a backing patch, filler, color correction, and texture matching. That can be done with a leather repair kit, but this is where DIY starts to get risky. The biggest challenge is not closing the gap. It is making the repair look natural from three feet away and not like your jacket lost a tiny battle with drywall paste.
If the damage is on a hidden area, a home repair may be acceptable. If it is front-and-center on the chest, lapel, or sleeve, get a quote from a professional leather repair service. Color matching and texture matching are where pros earn their money.
What About Peeling Leather?
Real leather usually scratches, dries, scuffs, or cracks. Faux leather is more likely to peel or flake because its surface coating breaks down over time. If your jacket is genuinely peeling, first confirm whether it is real leather, bonded leather, or faux leather. A conditioner will help true leather dryness, but it will not magically reattach a failing synthetic coating.
Small areas of finish loss on real leather can sometimes be improved with color balm or refinisher. Widespread peeling, however, often means the jacket needs professional refinishing or replacement. That is especially true if flakes come off every time you touch it. At that point, your jacket is not “distressed.” It is just distressed.
How to Deal With Stains, Water Spots, and Oil Marks
Act fast. Blot spills immediately with a clean cloth. Do not rub, because rubbing can spread the stain and disturb the finish. For routine dirt, use a slightly damp cloth and minimal cleaner. For oil or grease, blot first, then use an absorbent powder such as cornstarch and let it sit before gently removing it. Strong stains from paint, glue, makeup, heavy dye transfer, or unknown substances are best left to a professional cleaner.
If you get a water spot while cleaning, lightly re-dampen the surrounding area and feather it outward so the finish dries more evenly. Then allow the entire panel to air-dry naturally before conditioning. The trick is evenness, not panic.
How to Repair Zippers, Linings, Cuffs, and Hardware
Not every leather jacket problem is on the leather itself. Sometimes the jacket is fine, but the zipper is missing teeth, the slider slips, the lining is torn, or the knit cuff has given up on life. These repairs are extremely common and often very worthwhile, especially on quality jackets.
A loose zipper pull may be replaceable at home. A full zipper replacement, torn lining replacement, sleeve shortening, waistband replacement, or major seam repair is usually better done by a leather specialist. The reason is simple: leather does not self-forgive needle holes. One crooked stitch line is there forever, like a tattoo you did not ask for.
When to Call a Professional Leather Repair Service
DIY is a good option for light scuffs, basic cleaning, minor scratches, and small tears with clean edges. Call a professional if the jacket is vintage, expensive, sentimental, heavily stained, deeply cracked, moldy, faded across large areas, or damaged in a structural zone. Also call a pro for broken zippers, lining replacement, missing panels, collar replacement, and anything involving major sewing.
In other words, if you are wondering, “Can I just wing it?” the answer is usually no if the repair affects shape, strength, or visible design lines.
Mistakes That Can Ruin a Leather Jacket
- Putting it in the washing machine
- Using bleach, ammonia, or harsh household cleaners
- Soaking the leather
- Drying it with a hair dryer or near direct heat
- Using too much product at once
- Skipping a patch test on hidden areas
- Trying to hand-stitch visible leather without experience
- Using the wrong products on suede or nubuck
- Storing it in plastic or in a hot, damp place
How to Keep Your Leather Jacket From Needing Another Repair
Prevention is not glamorous, but it is cheaper than restoration. Wipe your jacket down regularly with a dry cloth. Condition smooth leather every so often, especially if it feels dry. Treat spills quickly. Use a padded hanger. Store it in a cool, dry place with a breathable cover. Keep it away from heavy sunlight, high heat, and overstuffed pockets that stretch the shape. If you wear the jacket constantly, an occasional professional cleaning can help preserve both the finish and the fit.
Real-World Repair Experiences and Lessons From Living With Leather
One of the most useful things people learn about leather jackets is that damage rarely arrives all at once. It sneaks in. A tiny scuff appears near the cuff after brushing a brick wall. A faint scratch shows up across the pocket because keys lived there a little too enthusiastically. Then winter ends, the jacket gets stuffed into a closet under bad lighting, and the next time it comes out, it looks drier, stiffer, and mysteriously older. The lesson is not that leather is fragile. It is that leather tells the truth about how you treat it.
Many jacket owners also discover that the first repair is the hardest only because they are nervous. They think any contact with the leather will ruin it, so they avoid maintenance until the damage is obvious. Then they panic, over-clean the area, rub too hard, or pour on too much conditioner. In real life, the best repairs usually come from a slower approach. Clean a little. Let it dry. Assess the finish in daylight. Add a small amount of conditioner. Wait again. Leather rewards patience and punishes rushing with almost theatrical flair.
Another common experience is learning the difference between a cosmetic fix and a structural one. A light scratch that looks catastrophic under bathroom lighting often becomes barely noticeable after cleaning and conditioning. Meanwhile, a small tear that seems harmless can spread if it sits on a stress point like the elbow or side seam. That is why experienced jacket owners stop judging damage by emotion and start judging it by movement. If the area bends, pulls, stretches, or carries weight, the repair needs to be stronger, not merely prettier.
People with vintage jackets often describe a different challenge: restraint. They want the jacket to look brand new again, but vintage leather usually looks best when repaired, not over-restored. A little wear can add character. A full glossy recolor on one small panel can make the whole jacket look uneven. The sweet spot is preserving the history while preventing further damage. Think “well-traveled and still cool,” not “freshly laminated.”
There is also a practical lesson almost everyone learns eventually: hardware repairs are not a sign of defeat. Replacing a zipper, relining a body, or fixing knit cuffs can give a quality jacket years of extra life. Plenty of people keep beloved bombers, motos, and flight jackets in rotation simply because they stop obsessing over perfection and invest in targeted repairs that actually matter. A jacket with a professionally replaced zipper is still your jacket. It is just your jacket with better odds.
And finally, leather teaches people a quiet kind of maintenance discipline. Not the fussy kind. The grown-up kind. Spot the problem early. Use the gentlest effective method. Know when a pro will do it better. Hang it properly. Condition it occasionally. Avoid weird internet hacks involving random pantry ingredients and wild confidence. That is really the long game with leather jacket repair: less heroism, more consistency. The jacket does not need a miracle. It just needs decent care, a little common sense, and the occasional rescue before a small problem becomes a full-blown plot twist.
Conclusion
Repairing a leather jacket is part craftsmanship, part restraint, and part knowing when not to get cute with the glue. The safest path is to clean first, treat light scuffs and scratches with conditioner, patch small tears from the inside, use filler and color carefully, and send major structural or visible repairs to a specialist. Done right, even a worn jacket can look richer, softer, and more character-filled after repair than it did before the damage happened.
That is the beauty of leather: it does not have to stay perfect to stay beautiful. It just needs the right kind of attention. Handle it gently, repair it thoughtfully, and your favorite jacket can keep doing what great leather jackets do bestshowing up year after year looking like it has stories, not problems.