Table of Contents >> Show >> Hide
- What Is a Faux Inlay Pattern?
- Why Faux Inlay Works So Well in Home Decor
- Where to Use a Faux Inlay Pattern
- How to Prepare for Painting On a Faux Inlay Pattern
- Choosing the Right Faux Inlay Pattern
- Step-by-Step: How to Paint a Faux Inlay Pattern
- Common Mistakes to Avoid
- Design Ideas That Look Especially Good
- Why This Technique Is So Good for DIY Furniture Makeovers
- Final Thoughts on Painting On a Faux Inlay Pattern
- Experiences With Painting On a Faux Inlay Pattern
Note: This article is formatted as body-only HTML for easy publishing and copying.
There are two kinds of furniture makeovers in this world: the ones that whisper, “Yes, I have been refreshed,” and the ones that strut into the room wearing sunglasses. Painting on a faux inlay pattern belongs firmly in the second category. It is bold, detailed, decorative, and just dramatic enough to make a plain dresser, tabletop, cabinet door, or console look like it has lived a much more glamorous life than it actually has.
If you have ever admired bone inlay furniture, marquetry panels, or richly patterned vintage pieces and then checked the price tag with the emotional stability of a Victorian heroine, faux inlay painting is your DIY escape route. It lets you create the illusion of inlaid craftsmanship with paint, patience, and a pattern that knows how to behave. The result can feel intricate and high-end without requiring a workshop, an apprenticeship, or a second mortgage.
This guide walks through how to create a faux inlay pattern with paint, why the technique works so well, where it looks best, what mistakes to avoid, and how to make the finished piece look intentional rather than “I met a stencil at midnight and things escalated.” Whether you are updating a side table or giving a tired dresser a full decorative glow-up, painting on a faux inlay pattern can turn an ordinary surface into the visual star of the room.
What Is a Faux Inlay Pattern?
A faux inlay pattern is a painted design that mimics the look of decorative inlay. Traditional inlay uses materials such as wood veneer, shell, bone, resin, or metal to create embedded patterns in furniture or architectural surfaces. Faux inlay borrows the visual language of those designs and recreates it with paint. The pattern may be floral, geometric, lattice-inspired, scroll-like, or medallion-based, depending on the style you want.
The beauty of this technique is illusion. A well-painted faux inlay pattern can suggest craftsmanship, layering, and age. It gives flat surfaces visual movement. It adds contrast without clutter. Most importantly, it makes people lean in and ask, “Wait, did you buy that like this?” That is the exact moment you casually say, “Oh, this old thing?” while enjoying your victory.
Why Faux Inlay Works So Well in Home Decor
Painting on a faux inlay pattern works because it combines two things people love: custom character and budget-friendly transformation. A simple painted piece can look fresh, but a decorative pattern adds a sense of story. It suggests handwork. It creates focal points. It makes furniture feel collected rather than merely purchased.
Another reason faux inlay remains popular is flexibility. You can go soft and subtle with tone-on-tone neutrals, or high-contrast and theatrical with black and ivory, navy and white, sage and cream, charcoal and brass-toned accents, or dusty blue with warm wood peeking through. You can place the pattern on drawer fronts, tabletops, side panels, cabinet doors, headboards, and even painted floor sections if you use the right products and sealer.
It also works across design styles. In a traditional space, a faux inlay pattern can echo antique furniture details. In a modern room, a simplified geometric version can feel crisp and artful. In bohemian or collected interiors, floral or bone-inlay-inspired motifs add that “I travel, I thrift, I have opinions about lamps” energy.
Where to Use a Faux Inlay Pattern
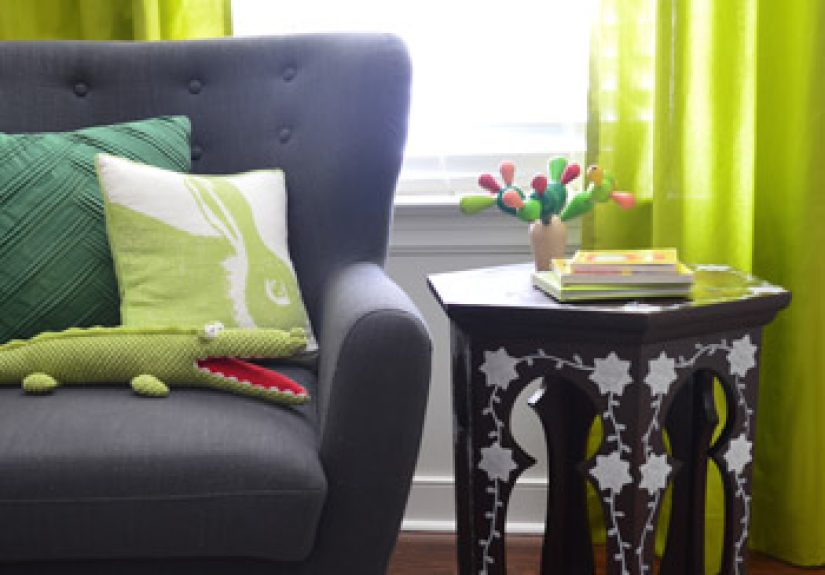
Not every surface needs a full decorative opera. Sometimes one well-placed pattern does the job. A faux inlay design looks especially good on nightstands, dresser tops, coffee tables, desk fronts, console tables, vanity drawers, entry cabinets, and wooden trays. It can also be used to highlight recessed panels on furniture or the center section of a tabletop.
If you are new to the technique, start small. A side table or stool gives you enough space to practice alignment, paint control, and sealing without committing your entire weekend and emotional stability to a giant armoire. Once you get comfortable, larger pieces become much less intimidating.
How to Prepare for Painting On a Faux Inlay Pattern
Preparation is the least glamorous part of the project, which is exactly why it matters so much. Decorative painting looks best on a surface that is clean, lightly sanded where needed, and ready to accept primer and paint evenly. If the base is grimy, glossy, flaky, or greasy, the prettiest pattern in the world will still behave like a diva on a bad set.
1. Clean the Surface Thoroughly
Begin by removing dust, wax, grease, and residue. Old furniture has an uncanny ability to collect invisible nonsense. If you skip cleaning, you are basically inviting adhesion problems to the party. Wipe everything down well and let it dry completely before moving on.
2. Sand for Better Adhesion
You do not need to sand a piece into another dimension. In many cases, a light scuff sand is enough. The goal is to dull a slick or glossy finish so primer can grip the surface. On wood furniture, that often means a medium grit for prep, while finer sanding can be used between coats for a smoother finish. On laminate or previously finished pieces, sanding becomes even more important because paint likes a little tooth instead of a polished skating rink.
3. Prime Like You Mean It
Primer is not the boring cousin of paint. It is the reason your beautiful work stays attached to the furniture instead of peeling off later like a regretful sticker. Choose a primer suited to the surface, especially if you are painting over laminate, glossy finishes, or anything that has lived a complicated life. A good primer helps create an even base color and gives your faux inlay details a cleaner, more professional look.
4. Paint the Base Coat
Your base coat is the stage, not the entire performance. Pick a color that supports the pattern. For a classic faux bone inlay look, deep charcoal, black, navy, forest green, or muted gray work beautifully with ivory, warm white, or pale beige patterning. For a softer cottage or vintage effect, try greige, dusty blue, sage, clay, or creamy white. Apply thin, even coats and let them dry fully before adding decorative work.
Choosing the Right Faux Inlay Pattern
The pattern matters almost as much as the paint. A faux inlay design should fit the scale of the furniture and the mood of the room. Tiny intricate motifs can look stunning on a jewelry box or tray but feel visually frantic on a large dresser. Oversized medallions may be dramatic on a tabletop but awkward on narrow drawer fronts.
Good pattern choices include repeating florals, vines, lattice grids, Moorish-inspired shapes, stylized leaves, scroll borders, and symmetrical geometric designs. The easiest way to get a clean look is to use a stencil, but transfers, tracing methods, and careful freehand detailing can also work. If you are using a repeating stencil, test the layout first. Dry-fit everything before paint touches the piece. This is the decorative version of measuring twice and avoiding tears.
Step-by-Step: How to Paint a Faux Inlay Pattern
Map the Layout First
Before painting, decide where the pattern will start and end. Mark the center point if you want a balanced look. On drawer fronts, symmetrical placement usually looks best. On a larger top surface, you might create a border, a central medallion, or an all-over repeating pattern. Use painter’s tape, a ruler, and light pencil marks if needed. Planning now saves you from the unforgettable experience of discovering your pattern is drifting diagonally toward chaos.
Use Light Paint on the Stencil
One of the biggest mistakes in decorative painting is overloading the stencil brush or roller. More paint does not equal more beauty. It usually equals bleeding, smudging, and the kind of cleanup that makes you question your hobby choices. Use a very small amount of paint, offload excess, and build color with light tapping or gentle rolling. Several thin passes are much safer than one enthusiastic swamp of paint.
Lift the Stencil Carefully
Once the section is painted, remove the stencil carefully rather than letting it bond emotionally with the surface. Work steadily and keep the stencil clean as you go. If paint begins to build up on the edges, your crisp design can quickly become a fuzzy suggestion of a pattern instead of the real thing.
Add Depth for a More Convincing Inlay Look
This is the step that separates “nice stencil project” from “wait, is that inlaid?” After the main pattern dries, use a tiny artist brush to add selective shading or highlights. A soft gray or deeper version of the base color around one side of the motif can create dimension. A small ivory or metallic highlight on the opposite edge can suggest light catching the design. Keep this subtle. You are creating a visual illusion, not drawing attention to your special effects department.
You can also lightly distress the piece after the pattern dries if you want an aged finish. Sand gently in natural wear areas or very lightly over the pattern so it feels integrated rather than freshly stamped. This looks especially effective on farmhouse, vintage, and collected-style furniture.
Seal the Finish
After all paint is fully dry, seal the surface with an appropriate topcoat. For furniture, a clear protective finish helps preserve the pattern from scratches, fingerprints, and daily use. If the piece will see frequent handling, such as a tabletop or cabinet, do not skip this step. Let the paint and sealer dry and cure according to product instructions before heavy use. Decorative painting looks much more professional when it survives actual life.
Common Mistakes to Avoid
The first mistake is rushing the prep. The second is rushing the drying time. The third is assuming enthusiasm is a substitute for patience. It is not, although it does make for a memorable afternoon.
Another common mistake is choosing a pattern that is too busy for the furniture. If the piece has ornate legs, carved edges, bold hardware, and a loud grain pattern, an all-over intricate faux inlay may be too much. Let one feature be the star. Decorative furniture should feel intentional, not like every idea applied for a job and all of them were hired.
Color contrast is another area where people get carried away. Strong contrast can be gorgeous, but if the room is already full of bold patterns, a quieter faux inlay finish may be smarter. Likewise, if the furniture is meant to anchor a room, then a dramatic high-contrast pattern can be exactly the right move.
Design Ideas That Look Especially Good
A dark navy base with a warm white floral lattice pattern looks elegant and classic. Charcoal with soft ivory feels luxurious and slightly global in mood. Sage green with cream reads relaxed, collected, and quietly expensive. Black with pearl-toned patterning gives a nod to bone-inlay-inspired furniture without trying too hard.
For more modern interiors, try a simplified geometric faux inlay on a clean-lined cabinet. For vintage or cottage spaces, use a faded floral scroll on a painted table or chest. For children’s rooms or creative studios, even playful motifs can work if the palette stays controlled. Faux inlay does not need to be serious. It simply needs to be deliberate.
Why This Technique Is So Good for DIY Furniture Makeovers
Painting on a faux inlay pattern is one of the best decorative furniture techniques because it delivers a lot of visual payoff without requiring expensive materials. It gives new life to thrifted finds, inherited pieces, builder-basic furniture, and anything else that currently looks like it gave up in 2009. It lets you personalize a room without buying something mass-produced. It also gives you the rare DIY reward of standing back and saying, “That should not look this good, and yet here we are.”
For content creators, home decorators, and weekend DIY fans, faux inlay painting also photographs beautifully. The detail catches light, creates texture on camera, and makes furniture feel layered and custom. That means it works not only in real spaces but also in the visual storytelling of home design.
Final Thoughts on Painting On a Faux Inlay Pattern
If you want a furniture project that feels more artistic than ordinary painting, a faux inlay pattern is a fantastic choice. It combines craftsmanship, creativity, and practicality in one satisfying makeover. With the right prep, a balanced design, light stencil application, and a protective finish, you can create a result that looks refined, personal, and far more expensive than it actually was.
The best part is that faux inlay painting rewards personality. You can keep it subtle, bold, rustic, elegant, playful, or dramatic. You can make it look antique, modern, collected, or globally inspired. In other words, you are not just painting furniture. You are giving it a backstory. And honestly, some tables desperately need one.
Experiences With Painting On a Faux Inlay Pattern
The experience of painting on a faux inlay pattern is equal parts craft project, design experiment, and tiny emotional roller coaster. At first, the furniture rarely looks promising. It usually sits there in its awkward prep phase, sanded, primed, and stripped of personality, like it is waiting for someone to tell it who it is meant to become. That part can feel dull, but it is also strangely satisfying because the transformation has started, even if it has not become photogenic yet.
Then comes the layout stage, which feels suspiciously like doing geometry for decorative reasons. You measure the center, mark the edges, adjust the stencil, step back, squint, move it one-eighth of an inch, and repeat that cycle several times because suddenly precision matters more than your morning coffee. This is the point where many people realize faux inlay painting is not hard in the dramatic sense, but it does ask you to slow down. It is a patient person’s hobby, or at least a hobby that forces impatient people to impersonate patient people for a few hours.
The first successful stencil pull is usually the turning point. You lift the stencil and see a crisp shape against the base color, and the project begins to make sense. Until then, it can feel like you are just applying paint in oddly specific locations. After that first clean reveal, however, the piece starts talking back. It tells you where it wants more detail, where it needs balance, and whether the pattern is elegant, playful, or just a little too enthusiastic.
One of the most memorable parts of the experience is how much the finish changes as layers build. A single pass can look flat, but once the pattern repeats, the edges are touched up, and a little shading is added, the surface begins to look richer. That is when faux inlay stops feeling like a stencil project and starts feeling decorative. The details matter. Tiny highlights, soft distressing, or a slightly aged wax finish can change the entire personality of the piece.
There is also a practical kind of joy in using this technique on older furniture. A scratched tabletop or forgettable cabinet suddenly gets a new purpose. Instead of hiding flaws, the pattern redirects attention and gives the piece style. It feels resourceful in the best way. You are not just covering something up; you are reimagining it.
Of course, not every moment is glamorous. Sometimes paint bleeds. Sometimes the stencil shifts. Sometimes you discover that “almost centered” is actually very noticeable once the pattern repeats fifteen times across a surface. But even those moments teach you something useful. Decorative painting has a way of rewarding problem-solving. A small mistake can often be corrected with the base color, a detail brush, and a refusal to panic.
What makes the experience stick with people is the final reveal. Once the topcoat goes on and the finish deepens, the furniture often looks more polished than expected. It catches the light differently. The pattern feels integrated. The surface looks intentional. And because it was done by hand, it carries a warmth that factory-perfect furniture often lacks. The small imperfections become part of the charm, not evidence of failure.
In the end, painting on a faux inlay pattern feels personal. It is not just a technique; it is a conversation between the maker, the piece, and the room it will live in. You start with paint and a plan, and you end with furniture that has presence. That is a pretty good trade for a weekend project and a slightly overworked stencil brush.


