Table of Contents >> Show >> Hide
- Before You Start: A 10-Minute Setup That Saves 2 Hours
- 19 Beginner Sewing Projects and DIY Crafts
- Classic Scrunchie
- Knotted Headband (or Twist Headband)
- Fabric Key Fob or Wristlet Strap
- Lavender Sachets (or “Microwave NOT Required” Hand Warmers)
- Square Coasters / Mug Rugs
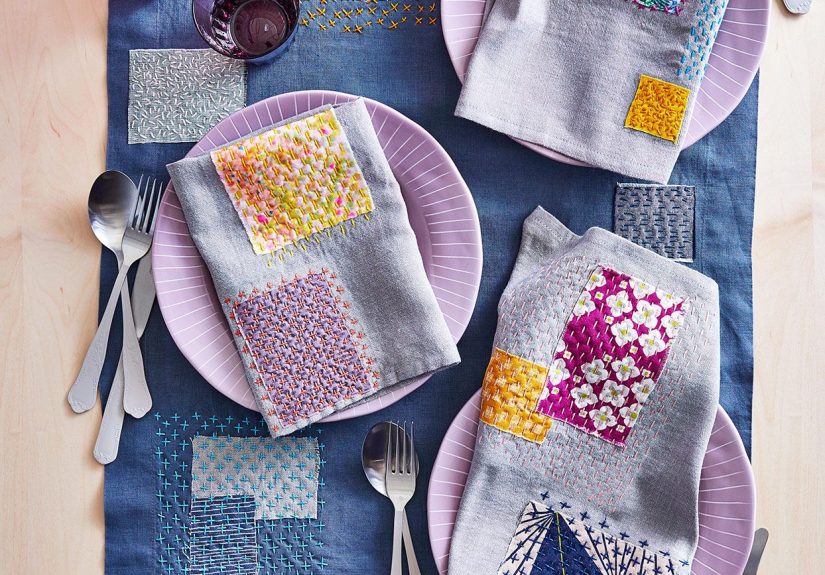
- Reusable Fabric Napkins
- Tea Towels with a Decorative Edge
- Drawstring Gift Bag
- Reusable Snack Bag (Simple Lined Pouch)
- Reusable Produce Bags (Mesh Bags)
- Envelope Pillow Cover
- Pillowcase (Banded or “Burrito” Method)
- Microwave Bowl Cozy (With Safety Rules)
- Simple Tote Bag (Lined, Beginner-Friendly)
- Small Zipper Pouch (Yes, You Can)
- Phone or Tablet Sleeve
- Half Apron with Pockets
- Simple Elastic-Waist Skirt (or Pajama Shorts)
- Patch a Pair of Jeans (or Sew on a Fun Patch)
- Quick Hem Fix (Jeans, Curtains, or a Skirt)
- Pick Your Weekend Plan (So You Actually Finish)
- Beginner Troubleshooting (Because Sewing Is 30% Sewing)
- Conclusion
- Real-World Beginner Sewing Experiences (Bonus )
Want the satisfaction of saying “I made that” without committing to a six-month quilting saga? Perfect. These beginner sewing projects are designed for
real life: limited time, limited patience, and a sewing machine that sometimes acts like it has feelings. Pick one project, pick three, or go full craft-goblin
and make a whole batch. By Sunday night, you’ll have practical things you can actually useplus a few new skills that make the next project feel way less scary.
Below you’ll find 19 easy sewing projects (with a couple of crafty upgrades) that build confidence fast: straight seams, corners, simple hems, drawstrings,
elastic, and yeszippers (don’t panic, they’re just fancy straight lines).
Before You Start: A 10-Minute Setup That Saves 2 Hours
Beginner sewing is less about raw talent and more about avoiding tiny avoidable chaos. Do this quick setup first, and you’ll spend the weekend sewingnot
arguing with tangled thread like it owes you money.
Grab these basics
- Fabric scissors (only for fabricpaper will betray your blades)
- All-purpose polyester or cotton thread (good-quality is worth it)
- Universal needles (great for cottons and many beginner-friendly fabrics)
- Pins or clips, seam ripper (your best friend, not a symbol of failure)
- Measuring tape/ruler, fabric marker/chalk
- Iron + ironing board (pressing is the “cheat code” that makes DIY look professional)
Beginner fabric rules (that actually help)
- Start with woven cotton (quilting cotton, broadcloth, canvas). It’s stable and doesn’t wiggle like slippery fabric does.
- Pre-wash when it matters: if your project will be washed later (tote bags, pillowcases, napkins), pre-wash the fabric first to reduce surprise shrinkage.
- Press as you go: after every seam, press it flat, then press it open or to one side. Your stitches will instantly look more “I went to sewing school” and less “I fought a raccoon.”
19 Beginner Sewing Projects and DIY Crafts
Each project includes what it teaches you and why it’s beginner-friendly. If you’re totally new, start at #1 and keep going until your confidence (or your snack supply)
runs out.
-
Classic Scrunchie
The gateway project of modern sewing. It’s quick, forgiving, and lets you practice making a tube, turning it right-side out, and sewing elastic into a casing.
Use cotton for your first one; save slippery silk for when you feel unstoppable.- Skills: straight stitch, casing, elastic
- Time: 20–40 minutes
- Upgrade: make a “skinny” scrunchie or add a bow tail
-
Knotted Headband (or Twist Headband)
Great for practicing seams on curves without needing a perfect fit. Use quilting cotton with a little structure, or try a soft knit later (knits are friendly… once you know what you’re doing).
Bonus: it hides “I haven’t washed my hair” days with style.- Skills: curves, turning, topstitching
- Time: 45–75 minutes
-
Fabric Key Fob or Wristlet Strap
If you can sew a straight line, you can make this. It’s basically a long, pressed strip with hardware. You’ll practice precision pressing and neat topstitching
(the stuff that makes handmade look expensive).- Skills: pressing, topstitching, simple hardware
- Time: 20–30 minutes
-
Lavender Sachets (or “Microwave NOT Required” Hand Warmers)
Tiny pillows filled with dried lavender or rice (for hand warmers, follow safe instructions and materials). They’re perfect for practicing seams, corners, turning,
and hand-stitching a small opening closed. Also: instant gift that looks thoughtful.- Skills: pivoting corners, turning, ladder stitch (optional)
- Time: 30–60 minutes (batch-friendly)
-
Square Coasters / Mug Rugs
Two fabric squares + batting = a mini confidence boost. This is where you learn how seam allowance affects size, how to keep corners crisp, and how quilting lines
instantly make things look “intentional.”- Skills: layering, stitching a turning gap, topstitching
- Time: 30–60 minutes
-
Reusable Fabric Napkins
Straight hems are the most underrated skill in sewing. Napkins are basically hem practice that turns into something you’ll actually use. Use cotton or linen-like
woven fabric, and keep it simple with a double-fold hem.- Skills: measuring, hemming, pressing
- Time: 45–90 minutes for a set
-
Tea Towels with a Decorative Edge
Take a plain towel up a notch by adding a contrasting fabric band, trim, or even a hanging loop. This teaches tidy edge finishesaka the difference between “DIY”
and “Did you buy that?”- Skills: edge finishing, attaching trim, straight seams
- Time: 45–75 minutes
-
Drawstring Gift Bag
This is a fabric rectangle that becomes a useful bagno fancy pattern required. You’ll learn casings, channels, and how to make seams that survive real use.
Make a few and suddenly you’re the person who gives gifts in cute reusable bags (very main character behavior).- Skills: casing, basic construction, pressing
- Time: 45–75 minutes
-
Reusable Snack Bag (Simple Lined Pouch)
A great intro to sewing lined items. You can use cotton inside and out, or use a food-safe liner fabric designed for this purpose if you’re planning to store snacks
directly. If that feels complicated, make it a “dry snack” bag or a little storage pouch for pens, cords, or hair ties.- Skills: sewing a lining, boxing corners (optional)
- Time: 60–90 minutes
-
Reusable Produce Bags (Mesh Bags)
Light, washable, and surprisingly easy. This project teaches gentle fabric handling (mesh likes to scoot), plus simple channels for a drawstring. It’s also a satisfying
“I made a sustainable thing!” moment.- Skills: controlling slippery fabric, casing
- Time: 45–90 minutes (make a set)
-
Envelope Pillow Cover
The fastest way to “new room” energy without buying new pillows. The envelope back avoids zippers and buttons, but still looks polished. Great for practicing straight seams
and making crisp corners with pressing.- Skills: measuring for fit, hemming, clean edges
- Time: 60–90 minutes
-
Pillowcase (Banded or “Burrito” Method)
Pillowcases are beginner gold: mostly straight seams, big pieces that are easy to handle, and a finished item you can wash and use immediately. The banded version looks extra fancy
for not much extra effortlike a magic trick, but with cotton.- Skills: long seams, seam finishing, accuracy
- Time: 60–120 minutes
-
Microwave Bowl Cozy (With Safety Rules)
Bowl cozies are fun and useful, but they come with a strict materials rule: use 100% cotton fabric, 100% cotton batting, and 100% cotton thread if it will go in the microwave.
If you’re unsure about any material, play it safeheat the bowl first, then place it in the cozy afterward.- Skills: darts/curves, layering, topstitching
- Time: 60–120 minutes
- Beginner tip: make one first, then batch-produce like a cozy factory
-
Simple Tote Bag (Lined, Beginner-Friendly)
Totes teach you structure: boxed corners, straps, and the magic of a lining that hides messy seams. Use canvas or sturdy cotton for the exterior and quilting cotton inside.
Pick a bold print and let the fabric do half the decorating.- Skills: straps, boxing corners, lining
- Time: 2–3 hours
-
Small Zipper Pouch (Yes, You Can)
Zippers feel dramatic until you realize they’re just controlled stitching next to a zipper tape. Start with a basic pouch so you only learn one new thing at a time.
Use clips if pins feel annoying, and go slowzippers respect patience.- Skills: zipper foot, topstitching, turning
- Time: 60–120 minutes
-
Phone or Tablet Sleeve
A padded sleeve is a confidence-builder that looks impressive. Add a flap with Velcro or a snap if you want a closure without the zipper learning curve.
Use quilting cotton + batting for padding, and keep measurements slightly roomy.- Skills: measuring, padding, neat topstitching
- Time: 1–2 hours
-
Half Apron with Pockets
Aprons are like “training wheels” for garments: you practice waist ties, hems, and pockets without dealing with tricky fitting. Make the pockets big enough to hold your phone,
a notepad, or your “I’m definitely finishing this today” optimism.- Skills: hemming, ties/waistband, pockets
- Time: 2–3 hours
-
Simple Elastic-Waist Skirt (or Pajama Shorts)
This is where sewing starts feeling like wizardry: fabric rectangle becomes clothing you can wear. Choose a woven cotton, add an elastic casing, and keep it relaxed-fit.
The goal is comfort, not couture. (Couture can come later, when you own 37 presser feet on purpose.)- Skills: casing, hemming, basic garment construction
- Time: 2–4 hours
-
Patch a Pair of Jeans (or Sew on a Fun Patch)
Practical sewing is powerful. Learn how to secure a patch, reinforce stress points, and extend the life of clothes. Use a denim needle if you have one, go slow over thick seams,
and embrace visible mendingbecause it’s cool and it works.- Skills: stitching through thickness, reinforcement, mending
- Time: 30–90 minutes
-
Quick Hem Fix (Jeans, Curtains, or a Skirt)
Hemming is the skill that pays rent. Once you can measure evenly, press a clean fold, and stitch close to the edge, you can customize thrift finds, rescue too-long curtains,
and make your wardrobe feel more “you.”- Skills: measuring, pressing, straight stitching
- Time: 30–90 minutes
Pick Your Weekend Plan (So You Actually Finish)
The secret to a satisfying weekend project isn’t speedit’s picking the right difficulty for your energy level. Here are three “choose your own adventure” routes.
Plan A: The Confidence Sprint (1–3 hours total)
- Scrunchie + key fob + coasters
- Napkins or tea towels if you want something useful immediately
Plan B: The Bag Era (3–6 hours total)
- Drawstring gift bag
- Reusable produce bag
- Finish with a lined tote (or save it for Sunday)
Plan C: The “My Home Looks Different Now” Makeover (4–7 hours total)
- Envelope pillow cover or pillowcase
- Half apron with pockets
- Optional: one zipper pouch as your “I’m brave now” trophy
Beginner Troubleshooting (Because Sewing Is 30% Sewing)
If your stitches look messy
Rethread your machine completely (top thread and bobbin). It fixes an absurd number of problems. Also check that your needle is fresh and inserted correctly.
Needles are cheap; frustration is expensive.
If the fabric keeps bunching up
Start stitching a little in from the edge, hold thread tails for the first couple stitches, and make sure the presser foot is down. Use a scrap “leader” fabric if needed.
If seams won’t stay flat
Press. Then press again. Pressing isn’t the boring stepit’s the step that makes everything look like you know what you’re doing, even when you whispered “please work”
to the machine five minutes ago.
If your project is “almost done” but you’re stuck
That’s normal. Finishing takes practice: turning gaps, topstitching, trimming corners, and hand-sewing small openings closed. These are the details that turn “homemade”
into “handmade.”
Conclusion
Beginner sewing projects don’t have to be complicated to be impressive. In a single weekend, you can learn the core skillsstraight seams, casings, hems, and clean finishes
and end up with items you’ll use every day. Pick one project that feels easy, one that feels “slightly spicy,” and let your sewing machine earn its keep. You’ve got this.
And if you don’t? That’s what the seam ripper is for. (It’s basically a reset button with a tiny blade.)
Real-World Beginner Sewing Experiences (Bonus )
Here’s something nobody tells you on day one: the first time you sit down to sew, you will spend a suspicious amount of time not sewing. You’ll thread the machine, then
wonder if you threaded it correctly, then realize the presser foot is up, then remember the bobbin exists, then briefly consider taking up pottery instead. This is normal.
Every sewist has had the moment where the machine makes a sound that feels personal.
The biggest “aha” for most beginners is learning the difference between sewing and finishing. Sewing is the fun partpieces come together quickly and
you start seeing a tote bag or pillow cover emerge. Finishing is where the magic lives: pressing seams flat, trimming corners so they turn crisply, and topstitching so
edges lie beautifully. The first time you press a seam properly and it suddenly looks smooth and professional, you’ll understand why experienced sewists talk about irons
like they’re family members.
Another beginner rite of passage is meeting your seam ripper. It feels dramatic at first, like you’ve “messed up.” But the truth is: ripping stitches is not failureit’s
editing. Chefs taste and adjust. Writers rewrite. Sewists unpick and restitch. And once you accept that the seam ripper is just part of the process, you get braver fast.
You’ll try a zipper pouch because you know you can undo a few inches if needed. That confidence is everything.
Beginners also tend to over-control the fabric. You’ll want to push it, pull it, steer it like a shopping cart with a wonky wheel. Then, at some point, you’ll relax your hands
and let the feed dogs do their job. That’s when your seams straighten out. It’s a weird little life lesson: sometimes the best control is gentle guidance, not force.
And then there’s the “stash reality check.” You start with one cute cotton print for a scrunchie. Then you buy “just a little extra” for a matching headband. Then you see a sale
and suddenly you own enough fabric to upholster a small boat. The upside is that beginner projects are perfect for scrapscoasters, zipper pouches, sachets, and drawstring bags
can all be made from leftover pieces. The more you sew, the more you’ll naturally start choosing projects that match what you already have on hand.
The most satisfying part, though, is the way small projects change how you see everyday objects. A tote bag stops being “a bag” and becomes a set of rectangles, straps, and seams.
A pillow cover becomes a few straight lines plus good pressing. You start noticing topstitching on store-bought items, seam finishes inside clothing, and how pockets are attached.
Sewing quietly turns you into a detective of constructionand once you see it, you can’t unsee it (in the best way).
So if this weekend you make one slightly lopsided scrunchie or a tote bag that’s “charmingly handmade,” you’re still winning. You’re building skills. Next weekend, you’ll be faster,
neater, and way more confident. And that’s how people become sewistsone weekend project at a time.


