Table of Contents >> Show >> Hide
- What Is Glass Painting from a Pattern Tracing?
- Supplies You Will Need
- How to Prepare Your Pattern and Glass Surface
- Step-by-Step: How to Do Glass Painting from a Pattern Tracing
- Best Paint Types for Pattern-Traced Glass Painting
- Common Mistakes and How to Fix Them
- Easy Project Ideas for Beginners
- What the Experience Is Really Like When You Learn This Technique
- Conclusion
- SEO Tags
Glass painting has a magical little trick up its sleeve: it makes ordinary light look expensive. A plain picture frame, a thrifted vase, or a clear suncatcher can suddenly throw color around a room like it owns the place. And the good news is that you do not need the drawing skills of a Renaissance master to make it happen. If you can trace a line and resist the urge to poke wet paint “just to see if it’s dry yet,” you can absolutely do glass painting from a pattern tracing.
This technique is one of the easiest ways for beginners to get clean, polished results. Instead of drawing directly onto the glass from imagination, you place a printed design behind the glass and trace it. That means less stress, better symmetry, and far fewer moments of staring at your project thinking, “Well, that flower now looks like a confused octopus.”
In this guide, you will learn how to choose the right supplies, prep glass properly, trace a pattern cleanly, apply color without a streaky mess, and cure the finished design so it lasts. You will also get practical tips for avoiding the most common beginner mistakes, plus a longer section on what the experience actually feels like once you get started. Because technique matters, but so does knowing when the wobble in your line is normal and not the end of civilization.
What Is Glass Painting from a Pattern Tracing?
Glass painting from a pattern tracing is exactly what it sounds like: you place a pattern, template, or printed design behind a transparent piece of glass and use it as a guide for your outline. After the outline dries, you fill each section with paint. This method is popular for faux stained-glass projects, painted windows, glass panels in frames, ornaments, jars, dishes with exterior decoration, and handmade gifts.
The big advantage is control. Pattern tracing helps you keep shapes balanced, letters readable, petals petal-shaped, and geometric designs sharp. It is especially useful for beginners because the hardest part of many decorative projects is not the painting itself. It is getting the design to sit where you want it and stay consistent from one section to the next.
You can use this approach for several styles of glass painting, including:
- Faux stained glass with raised outline lines and translucent color
- Opaque painted motifs on plates, jars, and vases
- Paint-marker line work on glassware
- Reverse glass painting on the back side of a frame or panel
Supplies You Will Need
Before you start, gather everything in one place. Glass painting is not wildly complicated, but it becomes a comedy sketch when your hands are sticky and the paper towels are somehow in another room.
Basic materials
- Clear glass surface such as a frame insert, suncatcher blank, vase, jar, ornament, or oven-safe dish
- Printed pattern or traced design
- Painter’s tape or low-tack tape
- Rubbing alcohol and lint-free cloth
- Glass paint, enamel paint, or faux stained-glass paint
- Fine-tip liner, paint marker, liquid leading, or detail brush
- Small brushes or squeeze bottles, depending on paint type
- Craft stick, pin, or toothpick for bubbles
- Paper towels and a protected work surface
Optional but helpful
- Graphite transfer paper for surfaces where a pattern cannot sit behind the glass
- Cotton gloves to avoid fingerprints
- A light box or bright window for more visible tracing
- Palette for mixing custom colors
- Scraper or razor blade for cleanup on flat glass
Choose paint based on the project. For a faux stained-glass look, use a product designed to create translucent color and raised outlines. For decorative dishes, glass jars, and vases, use a paint labeled for glass or multi-surface enamel use. Always read the label, because drying and curing directions can vary.
How to Prepare Your Pattern and Glass Surface
Prep work is where many beautiful projects are quietly won. Or quietly wrecked. If the glass is greasy, dusty, or fingerprint-heavy, your paint may bead up, slide around, or lift when you layer it. Glass is slick by nature, so it rewards cleanliness and punishes shortcuts with dramatic flair.
1. Pick a beginner-friendly pattern
Start with a design that has clear, closed shapes. Flowers, leaves, simple birds, monograms, stars, hearts, and geometric panels work beautifully. Avoid super-tiny details on your first try unless your life’s mission is to test your patience. Tracing works best when each section has a clear border that can hold paint.
2. Print the design to size
Measure your glass first, then print the pattern at the size you actually need. This sounds obvious, yet many projects begin with, “I thought it would fit,” followed by aggressive trimming and emotional bargaining.
3. Clean the glass thoroughly
Wash the piece if needed, dry it well, and then wipe the painting area with rubbing alcohol using a lint-free cloth. This removes oils and residue so the paint can grip better. Do not touch the cleaned area too much afterward, or you will reintroduce oils from your fingers. Your fingerprints are sentimental, but your paint does not care.
4. Tape the pattern in place
For flat transparent glass, tape the pattern behind the glass so it does not shift while you trace. If you are using a frame insert or panel, this part is wonderfully easy. If the surface is curved, you may need to tape a smaller motif inside the object temporarily or use graphite transfer paper for the design instead.
Step-by-Step: How to Do Glass Painting from a Pattern Tracing
Step 1: Trace the outline
Use your chosen outline method to follow the pattern. For faux stained-glass work, this may be liquid leading or peel-and-stick leading strips. For more illustrative projects, it may be a glass paint marker or a fine brush with black enamel.
Work slowly and keep your hand relaxed. A death grip does not improve elegance. If you are using a squeeze bottle, practice on scrap glass first so you learn how much pressure creates the line width you want. Keep the bottle or tip steady, and turn the glass when needed instead of twisting your wrist into an existential question mark.
For handwriting, monograms, or detailed decorative text, you can transfer the design first with graphite paper, then trace over it lightly with a glass paint marker. This is especially helpful on dishes and curved surfaces where taping a pattern behind the glass is awkward.
Step 2: Let the outline dry completely
This is not the moment for optimism. If the outline is still tacky, filling it with color can cause bleeding, dragging, or broken edges. Let the outline dry fully according to the product directions. For many faux stained-glass leading products, overnight is the safest bet. Think of the outline as the fence. If the fence is still wet, the paint-cows are escaping.
Step 3: Fill in each section with paint
Now the fun begins. Add paint around the perimeter of a section first, then fill the middle. This gives you cleaner edges and helps prevent tiny unpainted gaps. With squeeze-bottle glass color, let the paint touch the outline so it reaches all the way to the border. With brush-on glass paint, use a soft brush and a light hand.
Do not keep brushing the same area over and over. On glass, overworking wet paint often makes it lift, streak, or thin out. Lay the paint down, guide it where it needs to go, and then leave it alone. Hover if you must. Stare dramatically if needed. But resist the urge to fuss.
Step 4: Pop bubbles and smooth the surface
If you see bubbles, use a toothpick, pin, or craft point tool to pop them gently. For faux stained-glass paint, a gentle combing motion through the wet color can also even out the texture. Tap the surface lightly underneath if your product directions allow. The goal is smooth coverage without craters.
Step 5: Dry and cure the piece
Drying and curing are not the same thing. Dry means the surface no longer feels wet. Cured means the paint has fully hardened enough for regular use or gentle washing. Depending on the paint, curing may happen by air over several days, or by baking the piece if the glass is oven-safe and the product directions allow it.
Never assume all glass can be baked. Recycled or decorative glass may not tolerate oven curing. If you are using an oven-safe enamel on approved glassware, follow the label exactly, usually starting in a cool oven and allowing the piece to cool inside the oven as well. No shortcuts. No preheating. No dramatic temperature swings.
Best Paint Types for Pattern-Traced Glass Painting
Translucent faux stained-glass paint
This is the best choice when you want sunlight to shine through the design. It works beautifully for window hangings, framed panels, decorative inserts, and seasonal glass art. These paints are often applied with squeeze bottles and paired with liquid leading or adhesive leading strips.
Glass and enamel craft paint
These paints are ideal for decorative jars, exterior-painted dishes, frames, ornaments, and glass home decor. Some dry opaque, some satin, some glossy. Many brush-on formulas are self-leveling or designed to reduce brush strokes, which is helpful when you want a smoother finish.
Paint markers for glass
Paint markers are excellent for line work, lettering, small motifs, and pattern tracing on dishes or cups. They are often easier for beginners than a brush, especially when the design includes names, quotes, or delicate outlines.
Common Mistakes and How to Fix Them
Paint slides or beads up
The glass probably was not cleaned well enough, or it was touched too much after cleaning. Wipe the surface clean, let it dry, and start again.
Outline looks shaky
Use shorter strokes, rotate the glass as you work, and practice on scrap first. Also, choose a less detailed pattern until your hand gets used to the motion.
Color has thin gaps or “light holes”
You likely did not bring the paint all the way to the outline or did not add enough paint to level properly. Refill the area gently while it is still wet, or patch it later if the product allows.
Brush marks are obvious
Use a softer brush, apply slightly more paint, and stop overworking the section. Glass painting rewards confidence more than constant touching up.
Smudges happen while tracing
Let one area dry before placing your hand near it, work from top to bottom if possible, and keep a scrap sheet nearby to rest your hand on. If wet paint lands where it should not, wipe it promptly.
Dried mistakes ruin your mood
On flat smooth glass, some dried paint can be carefully removed with a scraper or razor blade, depending on the product and surface. Test cautiously in an inconspicuous area first. Your project may still be salvageable, which is excellent news for both the glass and your blood pressure.
Easy Project Ideas for Beginners
- Botanical frame insert: Trace leaves and wildflowers on a sheet of frame glass for an easy faux stained-glass panel.
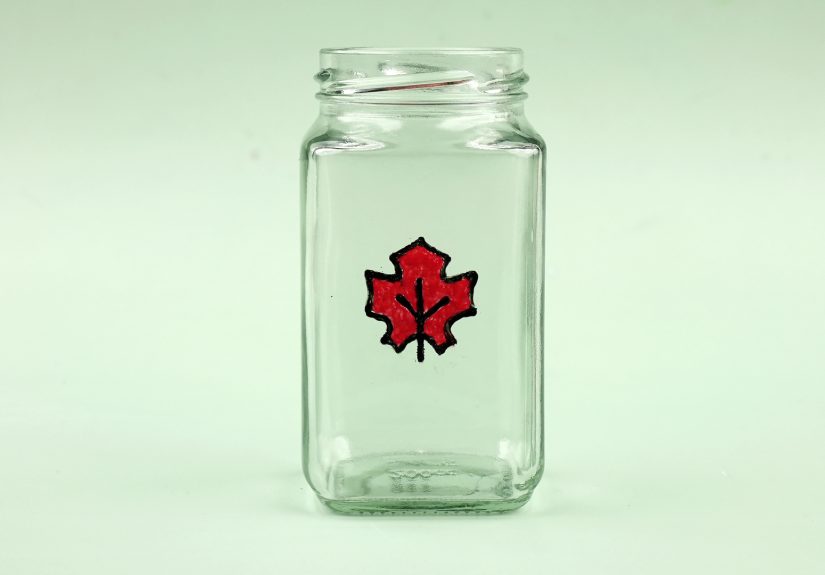
- Monogrammed canister: Use a traced letter and paint marker on the outside of a storage jar.
- Seasonal suncatcher: Try snowflakes, pumpkins, stars, or hearts in simple outlined sections.
- Recipe plate display: Transfer a family recipe onto the back or rim area of an oven-safe decorative dish using a paint marker and follow cure directions carefully.
- Geometric window art: Use a repeating pattern with leading lines and translucent color for a modern look.
What the Experience Is Really Like When You Learn This Technique
The first time most people try glass painting from a pattern tracing, they expect it to behave like paper or canvas. It does not. Glass is smoother, slicker, and a little more opinionated. Your first reaction is usually surprise. The second is often, “Why is this line moving like that?” That learning curve is normal.
One of the most common experiences beginners have is discovering that slower is not always better. You think going extra slowly will produce the perfect line, but sometimes it makes the outline wobble because your hand starts second-guessing itself. A calmer, steadier motion usually works better than a painfully cautious crawl. In other words, the glass can sense fear.
Another very real experience is the strange emotional power of paint bubbles. They are tiny. They are fixable. Yet when you spot one in a beautiful section of blue, it somehow feels personal. The good news is that once you learn to pop them gently and move on, your confidence goes up fast. Glass painting teaches a useful creative lesson: many “disasters” are actually just maintenance.
People also tend to underestimate how much cleaner their setup needs to be. On paper, a speck of lint is almost charming. On glass, it is an uninvited guest that catches the light forever. After one or two projects, most painters become dramatically more respectful of lint-free cloths, clean hands, and uncluttered work tables. It is not glamorous, but it makes a huge difference.
There is also the deeply specific experience of waiting for paint to dry while convincing yourself you are not going to touch it. Glass painting demands patience in stages. First the outline needs to dry. Then the color needs to settle. Then the whole piece needs to cure. It is an art form that repeatedly asks, “Would you like to make this worse by checking on it too much?” Many beginners, naturally, say yes at least once.
But here is the rewarding part: the progress becomes obvious quickly. Unlike some crafts where improvement sneaks up on you, glass painting gives visible feedback. Your second outline is steadier than your first. Your third fill section is smoother. You stop flooding areas too thinly. You learn how much paint is enough. You start choosing patterns that suit the material instead of fighting it. Within a few projects, what felt slippery and awkward begins to feel surprisingly intuitive.
There is also something uniquely satisfying about seeing a traced design come alive once light hits it. A pattern on paper can look flat and ordinary. The same pattern on painted glass suddenly feels luminous and intentional. That moment is often what hooks people. It is not just that the project turned out pretty. It is that the glass collaborates with light, and your traced design becomes more than the sum of its supplies.
Experienced crafters often say that glass painting from a pattern tracing is a confidence-building technique, and that feels true. It gives you structure without making the process feel mechanical. You still choose the colors, the finish, the style, and the rhythm of the line. The pattern supports you, but it does not do the art for you. That balance is why the technique stays popular. It is beginner-friendly, but it does not feel childish or limiting.
Most of all, the experience teaches you to work with the material instead of trying to dominate it. Clean thoroughly. Trace lightly. Let outlines dry. Apply color with intention. Stop overworking. Respect cure times. Those habits sound simple, but together they are the difference between a cloudy, uneven project and one that looks polished enough to make guests ask where you bought it. That is the sweet spot of glass painting: humble supplies, a traced pattern, and a final result that looks fancier than it has any right to.
Conclusion
If you want a beginner-friendly way to create beautiful decorative glass art, pattern tracing is one of the smartest places to start. It removes much of the pressure of drawing freehand, helps you build cleaner designs, and makes glass painting feel far more approachable. With the right prep, a well-secured pattern, patient drying time, and the correct paint for your project, you can make everything from faux stained-glass panels to personalized gifts and decorative dishes.
The secret is not fancy talent. It is good prep, light hands, and a willingness to let the paint do its job. Start with a simple pattern, respect the cure time, and expect the first project to teach you plenty. By the second or third piece, you will likely find yourself eyeing every clear jar, frame, and glass panel in your house like it is a new artistic opportunity. Which, to be fair, it probably is.


