Table of Contents >> Show >> Hide
- A quick “pick your method” guide
- Before you melt: what butter does when it heats up
- Method 1: Microwave (fast, easy, surprisingly easy to overdo)
- Method 2: Stovetop saucepan (best control, great for “just melted”)
- Method 3: Double boiler (gentle heat, minimal risk)
- Method 4: Gentle heat shortcuts (warm spot & residual heat)
- What your recipe really wants: melted, cooled, clarified, or browned?
- Troubleshooting: the most common butter-melting problems
- Kitchen Experiences: Butter-melting moments you’ll recognize (and how to win them)
- Conclusion
- SEO Tags
Melting butter sounds like the culinary equivalent of tying your shoesuntil you’re scraping butter freckles off the inside of your microwave, or you accidentally “melt” it into full-on brown butter while you were busy answering one text (we’ve all seen it happen). The good news: melted butter is easy. The better news: melted butter is easy when you do it on purpose.
This guide walks you through the best ways to melt buttermicrowave, stovetop, double boiler, and a couple of gentler optionsplus how to keep it from splattering, separating, scorching, or showing up too hot for your recipe. Along the way, you’ll learn what recipes really mean by “melted and cooled,” when you actually want clarified butter or browned butter, and how to get the exact texture you’re aiming for.
A quick “pick your method” guide
- Fastest, least dishes: Microwave (best for small amounts and baking prep).
- Most control: Stovetop saucepan (great when you need “just melted,” not sizzling hot).
- Gentlest, hardest to mess up: Double boiler (ideal when precision matters).
- Already cooking something: Warm spot / residual heat methods (nice for gentle melting while multitasking).
Before you melt: what butter does when it heats up
Butter isn’t just fat. It’s a mixture of butterfat, a little water, and milk solids. That’s why it can hiss, foam, and splatter: the water heats faster than the fat and can turn to steam, which pops through the melted butter like tiny geysers. That same mix is also why butter can “separate” if overheatedonce the emulsion breaks, it may look oily with pale bits or foam on top.
Practical takeaway: melting butter is less about blasting it with heat and more about getting it warm enough to liquefy (butter melts around the low-to-mid 90s °F) without boiling the water inside it. In other words: gentle heat wins. Drama-free butter is still butter.
Method 1: Microwave (fast, easy, surprisingly easy to overdo)
Best for
- 1 tablespoon to 1 stick for baking, popcorn, brushing on bread, or quick sauces
- When you want speed and can pause/stir
Step-by-step
- Cut it up: Slice butter into tablespoons or small cubes so it melts evenly.
- Use the right container: A microwave-safe bowl or glass measuring cup with room to spare (butter can bubble up).
- Cover it (lightly): Drape a paper towel over the top, or use a loose microwave-safe cover. This is your “anti-butter confetti” shield.
- Go low and short: Start at 40–50% power. Heat in short bursts, then stir.
- Stop early: When most of it is melted and a few soft chunks remain, stir and let residual heat finish the job.
Timing cheat sheet (because microwaves have personalities)
- 1–2 tablespoons: 10–20 seconds at 40–50% power, then stir and repeat if needed
- 1/4 cup (4 Tbsp): about 20–40 seconds total at 40–50% power, in bursts
- 1 stick (1/2 cup): about 45–90 seconds total at 40–50% power, in bursts (stir every 20–30 seconds)
The goal is not “liquid lava.” The goal is melted butter that’s calm, smooth, and not boiling around the edges. If you see aggressive bubbling, you’re already in splatter countryback away slowly, stir, and lower the power.
Microwave splatter prevention (the stuff that saves your sanity)
- Lower power helps: It slows the heat buildup that makes butter pop and spray.
- Cover with a paper towel: It catches splatters and still lets steam escape.
- Use a “butter-wrapper lid”: If you saved the wrapper, it can act like a quick cover for the bowl (mess-reducer, not magic spell).
- Choose a bigger bowl than you think you need: More headspace means fewer butter eruptions.
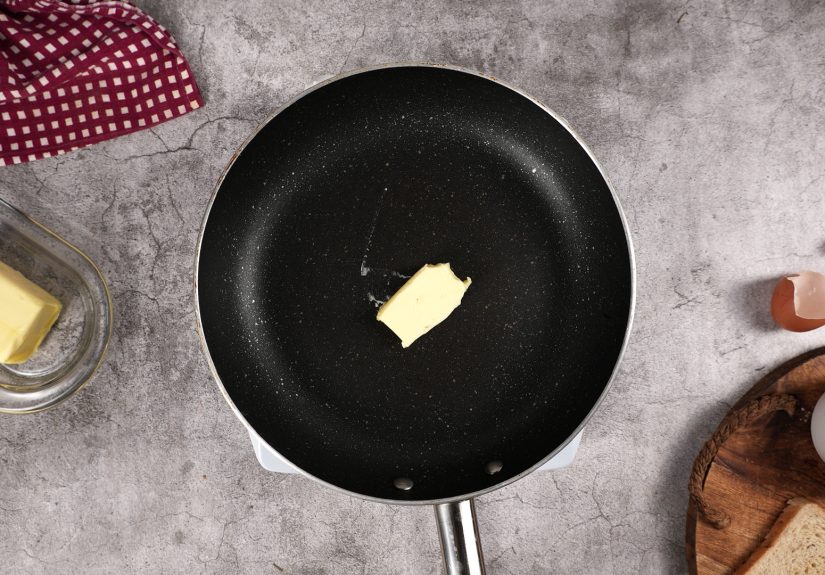
Method 2: Stovetop saucepan (best control, great for “just melted”)
Best for
- Larger amounts (multiple sticks) without hot spots
- When you want melted butter that isn’t scorching hot
- When you’re already at the stove making a roux, sauce, or sauté
Step-by-step
- Use a small, heavy-bottomed pan if possible (it heats more evenly).
- Cut butter into pieces so it melts at the same pace.
- Set heat to low or medium-low. If you hear sizzling, your heat is too high for plain “melted” butter.
- Stir or swirl occasionally. You’re encouraging melting, not starting a cardio program.
- Pull it off early. When it’s mostly melted, remove from heat and swirlresidual heat will finish it.
If your butter starts to foam a lot or smell nutty, you’re drifting toward browned butter territory. That’s not a tragedyit’s deliciousbut it is a different ingredient with a different impact in baking and sauces.
Method 3: Double boiler (gentle heat, minimal risk)
Best for
- When you need the gentlest melt (delicate sauces, careful baking prep)
- When you don’t want browning or scorching
- When you’re already using a double boiler for chocolate and want the same vibe for butter
Step-by-step
- Simmer, don’t boil: Add 1–2 inches of water to a pot and bring it to a gentle simmer.
- Set a bowl on top: The bowl should fit snugly without touching the water.
- Add butter and stir occasionally: Gentle steam heat will melt it evenly.
- Remove when melted: Wipe any condensation off the bottom of the bowl so water doesn’t drip into your butter.
This method is slower than the microwave, but it’s calm and consistentlike a warm blanket for your butter. If you’ve ever scorched butter on the stove, the double boiler is your “I would like fewer surprises today” method.
Method 4: Gentle heat shortcuts (warm spot & residual heat)
Sometimes you don’t need “melted right now,” you need “melted soon, without fuss.” If you’re cooking anyway, gentle ambient heat can do the work. For example, you can set butter in a heat-safe dish near (not on) a warm stovetop, or use residual warmth from an oven that was just turned off. The point is controlled warmthnot direct heatso you don’t overshoot into bubbling or browning.
These methods are slower, but they’re handy when you’re prepping ingredients and want the butter to melt gradually while you measure flour, crack eggs, or pretend your kitchen is a peaceful place where nothing ever spills.
What your recipe really wants: melted, cooled, clarified, or browned?
Melted butter
Plain melted butter is butter that has turned liquid but hasn’t browned the milk solids. It’s used for brushing (garlic bread, pastries), quick sauces, popcorn, and many baking recipes (like brownies and some cookies) where the batter doesn’t rely on creaming air into softened butter.
Melted & cooled butter
If a recipe says “melted and cooled,” it’s trying to prevent you from cooking your eggs or warping your batter structure. Hot butter can scramble eggs, melt sugar unevenly, or make a dough greasy. After melting, let butter sit 5–10 minutes (or until it feels warm, not hot) before mixing. If you want to speed it up, pour it into a wider bowl to cool faster.
Clarified butter (and why it behaves differently)
Clarified butter is butterfat with the water and milk solids removed. That means less splatter, a higher tolerance for heat, and a cleaner flavor. It’s popular for sautéing and for certain sauces because the milk solids that normally brown first are gone. If your goal is “melt butter for high-heat cooking without burning,” clarified butter (or ghee) is often the better tool.
Ghee
Ghee is a form of clarified butter cooked longer so the milk solids brown before being strained out, giving it a deeper, toastier flavor. It’s loved for high-heat cooking and its nutty richness. If you taste “butter, but louder,” you’re in ghee territory.
Browned butter
Brown butter happens when the water cooks off and the milk solids toast to a golden-brown, creating a nutty aroma. It can be done on the stovetop (classic) or even in the microwave with the right container and careful timing. Brown butter is amazing in cookies, cakes, pasta, and vegetables but it changes moisture and flavor, so don’t swap it into a recipe unless you mean it.
Troubleshooting: the most common butter-melting problems
“My butter exploded in the microwave.”
That’s usually the water in butter turning into steam too quickly. Use lower power, shorter bursts, a bigger bowl, and a paper towel cover. Also: stop before it’s fully melted and let residual heat finish the job.
“My butter looks separated or greasy.”
It was overheated. For many uses (like brushing bread), it’s still fine. For baking, let it cool and whisk briefly; if it still looks broken, consider using it in a recipe that doesn’t need a smooth emulsion (like brownies or a crumb crust).
“It started browning and I didn’t want that.”
Heat was too high or it stayed on too long. Next time: lower the heat, use a heavier pan, and remove from heat when mostly melted. Residual heat is your friend.
“My recipe says melted butter, but mine is piping hot.”
Let it cool. Hot butter can throw off texture, especially when mixed with eggs, chocolate, or sugar. Aim for warm-to-the-touch, not steaming.
Kitchen Experiences: Butter-melting moments you’ll recognize (and how to win them)
The first time most people “learn” how to melt butter is the classic microwave shortcut: stick of butter, small bowl, one optimistic minute. Twenty seconds in, everything seems fine. Forty seconds in, you hear a pop. Fifty seconds in, you hear five pops. And by the time you open the door, the microwave looks like it lost a paintball matchonly the paint is butter and the prize is more cleaning. That’s when the lesson lands: melting butter is less about time and more about control.
Another familiar scene: you’re making cookies that call for melted butter, and you’re feeling efficient. You melt it on the stovetop and walk away to measure sugarbecause measuring sugar takes forever if you do it with confidence. You come back and the butter is foaming, the edges are turning amber, and your kitchen suddenly smells like toasted hazelnuts. That smell is incredible… but now you have browned butter, not plain melted butter. Sometimes you roll with it and get delicious results. Other times the recipe gets a little drier or the flavor shifts more than you wanted. Either way, you remember to keep the heat low next time and pull the pan off early.
Then there’s the “melted and cooled” misunderstanding. A recipe says to whisk melted butter into eggs, and you think, “Great, I’ll do it while it’s hot so it blends easier.” You pour it in, and the eggs respond by turning into tiny cooked bitsbecause they are eggs, and they do egg things. After that, you start giving melted butter a quick cooldown window: five to ten minutes on the counter, or poured into a wider bowl so it stops radiating heat like a tiny butter sun.
Some butter experiences are actually wins. Like when you discover the double boiler method for the first time: the butter melts slowly, evenly, and without any browning at all. No sizzling. No panic. No weird hot spots. It feels almost suspiciously calm, like your butter is finally behaving because it knows you’re watching. It’s especially helpful when you’re multitasking and don’t want the stovetop to sneak into “toasted” territory.
And of course, butter melting shows up everywhere: brushing melted butter on biscuit tops, stirring it into mashed potatoes, blooming spices in ghee, building a roux for mac and cheese, or making “drawn butter” for seafood. Each one teaches you a slightly different rhythm. For brushing and dipping, you can handle a little separation. For sauces and baking, you want it gentler and not overly hot. For high-heat cooking, you realize why clarified butter and ghee have such devoted fans: fewer splatters, more heat tolerance, and a cleaner path to golden-brown food.
The biggest “real kitchen” takeaway is that butter is forgivingas long as you’re paying attention for the last 30 seconds. If you melt it slowly, stop early, and let residual heat finish, you’ll get smooth melted butter nearly every time. If you rush it, butter will happily turn your microwave into a modern art exhibit. Choose your adventure wisely.
Conclusion
The best way to melt butter depends on what you’re making: microwave for speed, stovetop for control, double boiler for the gentlest melt, and warm ambient heat when you’re already cooking and don’t need instant results. No matter the method, your secret weapons are the same: smaller pieces, lower heat, short bursts, stirring, and stopping early so residual heat finishes the job. Melt butter on purpose, and it’ll behave like an ingredient. Melt it aggressively, and it’ll behave like a prank.


