Table of Contents >> Show >> Hide
- First, Decide What You Mean by “Mirror”
- The Quickest Ways to Start Mirroring (No Deep Diving Required)
- Method 1: Mirror with a Cable (Most Reliable, Least Dramatic)
- Method 2: Mirror Wirelessly with Miracast (No Cable, More Variables)
- Method 3: Use Another Windows PC as a Wireless Second Screen
- Method 4: Cast from Chrome (Chromecast / Google Cast)
- Method 5: Third-Party Mirroring Apps (When Built-In Options Don’t Play Nice)
- Troubleshooting: Fix the Most Common Screen Mirroring Problems
- Make Your Mirroring Session Look Professional (Even If You’re in Pajamas)
- Quick FAQ
- Conclusion
- SEO Tags
Screen mirroring sounds fancy, but it’s basically your Windows PC saying, “Hey TV/monitor/projector/other device,
wanna see exactly what I’m seeing?” It’s perfect for presentations, movie nights, big-screen gaming
(with a few caveats), and those moments when you need a second screen because your browser tabs have multiplied
like gremlins after midnight.
In this guide, you’ll learn the main ways to mirror a Windows screenwired and wirelessplus how to fix the
most common “Why is nothing happening?” problems. Expect clear steps, a few laughs, and a lot fewer cable
existential crises.
First, Decide What You Mean by “Mirror”
Windows gives you a few display modes, and choosing the right one saves you from yelling at your TV like it’s
ignoring you on purpose.
Mirror (Duplicate)
This is classic screen mirroring: your external display shows the same thing as your PC screen. Great for
slideshows, demos, and “Look at this memeno, the good one.”
Extend
This turns the external display into extra workspace. Your desktop becomes wider, like it joined a gym.
Great for productivityless great if you expected your TV to show the same screen.
Second screen only
Windows sends everything to the external display and turns off (or blanks) the laptop screen. Useful if you’re
presenting and don’t want the audience to see your notes… or your snack research tab.
Shortcut you’ll love: Press Windows + P to open the Project menu and quickly
switch between PC screen only, Duplicate, Extend, and Second screen only.
The Quickest Ways to Start Mirroring (No Deep Diving Required)
- Windows + P: Choose Duplicate (mirror) or Extend (extra screen).
- Windows + K: Opens the wireless “Cast/Connect” panel to connect to a wireless display.
- Settings path: Settings → System → Display → Multiple displays (look for wireless or detection options).
If you’re the type who likes to finish tasks in under 12 seconds, start with those shortcuts.
If you’re the type who likes to understand what’s happening, keep going. (No judgment. I see you.)
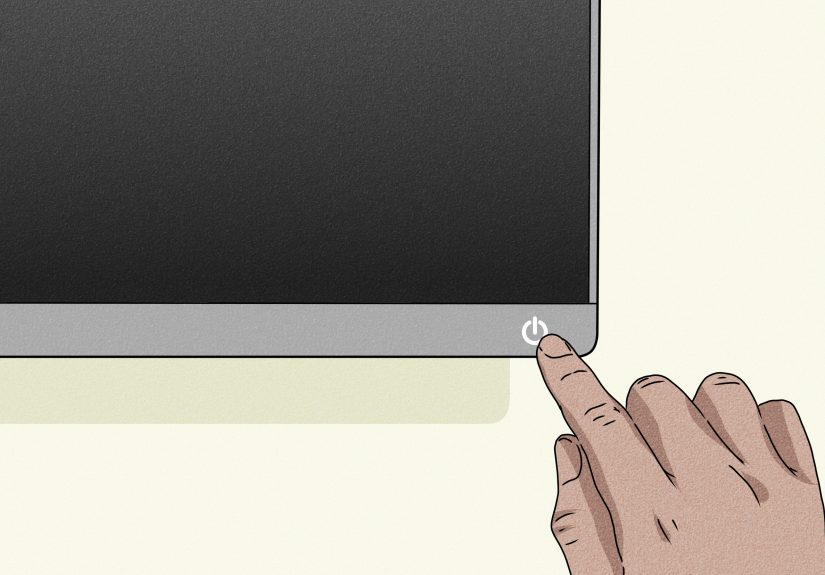
Method 1: Mirror with a Cable (Most Reliable, Least Dramatic)
If you want the smoothest experienceespecially for games, fast motion video, or important meetingswired
mirroring is the “eat your vegetables” option. Not always exciting, but it works.
Common cable types
- HDMI: The most common for TVs and many monitors.
- DisplayPort: Common on desktops and higher-end monitors.
-
USB-C (DisplayPort Alt Mode): Many modern laptops can send video over USB-C
(often through a USB-C to HDMI/DisplayPort adapter or a dock).
Step-by-step: Wired screen mirroring
-
Connect the cable from your PC to the TV/monitor/projector.
If you’re using a dock or adapter, connect that first, then the display cable. - Pick the correct input on the TV/monitor (HDMI 1/HDMI 2/etc.).
- On your Windows PC, press Windows + P and select Duplicate.
-
If the display looks weird (too big, too small, blurry), go to
Settings → System → Display and adjust Resolution and Scale. -
For audio: click the speaker icon on the taskbar and choose the TV/monitor as the output device
if Windows doesn’t switch automatically.
If the external display is blank
- Re-seat the cable on both ends (yes, really).
- Try another HDMI port or another cable (cables have feelings and sometimes they get moody).
- Restart the display and your PC.
- In Settings → System → Display, click Detect if Windows doesn’t find it.
Method 2: Mirror Wirelessly with Miracast (No Cable, More Variables)
Wireless mirroring on Windows often uses Miracast. If your TV/projector supports it (or you have a
Miracast adapter plugged into HDMI), Windows can “cast” your screen over a direct wireless connection.
It’s convenientjust expect occasional hiccups depending on hardware, drivers, and interference.
Before you start: what you need
- A Windows 10 or Windows 11 PC with Miracast support.
- A TV/monitor/projector that supports Miracast or a Miracast HDMI adapter.
- Wi-Fi turned on on your PC (even if you’re not “using the internet” for mirroring).
Step-by-step: Wireless mirroring (Windows 11 and Windows 10)
-
On the TV/projector: turn on its screen mirroring mode (the wording varies by brand).
If you’re using a Miracast adapter, switch the TV input to that adapter’s HDMI port. - On your Windows PC, press Windows + K.
- Select the device you want to connect to from the list.
- If prompted, approve the connection on the TV/device.
- After it connects, press Windows + P and choose Duplicate (mirror) or Extend.
Alternative path (if you prefer Settings)
Go to Settings → System → Display, then expand Multiple displays and look for an option
like Connect to a wireless display.
Pro tip: make it look better
- Lower the mirrored resolution if the connection stutters (wireless mirroring is not a fan of crowded airwaves).
- Move the PC closer to the TV/receiver and reduce obstacles.
- Close bandwidth-heavy apps (cloud sync, big downloads, 47 open video calls… you know who you are).
Method 3: Use Another Windows PC as a Wireless Second Screen
This is one of the coolest built-in tricks: you can project from one Windows PC to another Windows PC.
Think: laptop → desktop, or main PC → spare laptop. It’s great for travel, small desks, and pretending your
setup is a mission-control center.
Set up the receiving PC (the one that will show the mirrored screen)
- On the receiving PC: go to Settings → System → Projecting to this PC.
-
If Windows says you need it, install the Wireless Display optional feature:
- Open Optional features.
- Select View features.
- Search for Wireless Display, select it, and install.
- Open the Connect app (Windows may surface it after Wireless Display is installed).
Project from the sending PC (your main PC)
- Press Windows + K on the sending PC.
- Select the receiving PC from the list.
- Choose Duplicate or Extend using Windows + P.
Important note: Your receiving PC must be available for projection (Wi-Fi on, Wireless Display installed,
and the Connect screen ready). Otherwise, Windows will act like it has never met that computer in its life.
Method 4: Cast from Chrome (Chromecast / Google Cast)
If you have a Chromecast (or a TV with Chromecast built in), you can cast from the Chrome browser. This is
especially handy for streaming a browser tab, a website, or even a local video file you open in Chrome.
Step-by-step: Cast a tab or file from Chrome
- Open Google Chrome on your Windows PC.
-
Open what you want to share:
- A website in a tab, or
- A local media file (in Chrome, press Ctrl + O and choose a file).
- Click the three-dot menu in the top-right corner.
- Select Cast (or Cast, save, and share, depending on Chrome’s wording).
- Pick your Chromecast/TV from the list.
When Chrome casting is the best move
- You mainly need a browser tab on the big screen.
- You want an easy “works in most living rooms” option.
- You’re okay with “casting content” rather than full desktop mirroring in every situation.
If your goal is full desktop mirroring with minimal delay, Miracast or a cable is usually the better fit.
If your goal is “put this webpage/video on the TV right now,” Chrome casting is hard to beat.
Method 5: Third-Party Mirroring Apps (When Built-In Options Don’t Play Nice)
Sometimes hardware support is limited, drivers are stubborn, or you’re trying to mirror to a device that
doesn’t speak Miracast. That’s when third-party apps can help. Many offer extra features like:
- Better compatibility across different device types
- Recording, annotations, or classroom-style controls
- More flexible receiver options (phones/tablets/other platforms)
If you go this route, choose well-known software, review permissions carefully, and treat it like any app that
can “see” your screen: don’t give it access unless you trust it.
Troubleshooting: Fix the Most Common Screen Mirroring Problems
Problem: “Your device doesn’t support Miracast”
-
Confirm your PC supports wireless display:
- Press Windows + K. If Windows says Miracast isn’t supported, that’s a clue.
-
For a deeper check, open Command Prompt and run:
netsh wlan show drivers and look for Wireless Display Supported.
- Update your Wi-Fi and graphics drivers (Miracast depends on both).
- If you’re on a desktop without Wi-Fi, you may need a compatible Wi-Fi adapter (Miracast typically needs Wi-Fi capability).
Problem: The TV/receiver isn’t showing up
- Make sure the TV/adapter is in screen mirroring mode and ready to pair.
- Turn Wi-Fi on on your PC (even if you’re wired to ethernet for internet).
- Restart both devices and try again.
-
If you’re projecting to another Windows PC, make sure the receiver has Wireless Display installed and the
Connect app open.
Problem: It connects, but the video stutters or lags
- Move devices closer and reduce walls/obstacles.
- Close heavy apps (downloads, streaming, big file transfers).
- Lower resolution or frame rate expectationswireless mirroring is not a magic portal.
- For gaming or live demos, use an HDMI/USB-C cable instead.
Problem: No sound on the TV
- Click the speaker icon in the Windows taskbar and select the TV/wireless display as your output device.
- If sound still won’t route correctly, disconnect and reconnect, then re-check audio output.
Problem: “Wireless Display” is missing (when trying to receive projection)
-
Go to Settings → System → Projecting to this PC and follow the prompt to install
the Wireless Display optional feature. - Run Windows Update and reboot if optional features refuse to install.
Make Your Mirroring Session Look Professional (Even If You’re in Pajamas)
1) Hide pop-ups and notifications
Turn on Focus Assist / Do Not Disturb so your “LOW BATTERY” warning doesn’t appear right over your
big moment. Also: maybe don’t mirror the screen while your group chat is on fire.
2) Use “Duplicate” for audiences, “Extend” for you
Presenters love Extend mode because you can keep notes on your laptop and show slides on the projector.
Audiences love it because they don’t accidentally see your desktop chaos.
3) Adjust scaling for TV readability
TVs can make text look tiny. In Settings → System → Display, increase Scale so menus
and text are readable from the couch.
4) Keep a “presentation desktop”
Create a clean desktop or a dedicated browser profile for presenting. It’s like putting on a blazer…
but for your Windows UI.
Quick FAQ
Do mirroring and casting require internet?
Not necessarily. Many wireless display setups work via direct wireless connections. However, Wi-Fi usually needs to be enabled,
and streaming from online services obviously needs internet access.
Why does mirroring feel delayed?
Wireless mirroring compresses and transmits video in real time, which can add latency. For fast-paced gaming or
real-time editing, a cable is usually the best choice.
Can I mirror to a Roku or Fire TV?
Often yesmany Roku devices and Fire TV devices support screen mirroring, but the exact steps and support can vary by model.
If the option isn’t available on the device, it may not support mirroring.
Conclusion
Mirroring your Windows screen doesn’t have to be complicated. If you want the simplest, most dependable option,
go wired (HDMI/USB-C/DisplayPort). If you want freedom from cables, use Windows + K for wireless
displays (often Miracast) or project to another Windows PC using the Wireless Display feature. If your goal is
“put this browser tab on the TV,” Chrome casting is a fast win.
The big secret is knowing what you want: Duplicate for mirroring, Extend for extra space,
and Second screen only for clean presentations. Once you pick the right mode, the rest is mostly
connecting the right thingand occasionally convincing your devices to stop being shy.
Real-World Experiences: What People Run Into (and How They Get Past It)
In real life, screen mirroring is rarely “press one button and angels sing.” It’s more like “press one button,
then your TV pretends it didn’t hear you.” A common experience is the first-time conference room setup: someone
walks in with a laptop, sees a wall-mounted display, and confidently presses Windows + K… only to
discover three nearly identical device names and one mysterious “Living Room TV” that definitely shouldn’t be in
the office. The fix is usually boring but effective: make sure the receiver is in the correct mirroring mode,
confirm the HDMI adapter is on the right input, and try again with the closest, most obvious device name.
Another classic: “It connected, but the audio is still coming from my laptop.” This happens a lot during movie
nights and classroom demos. People assume the video connection automatically moves audio, but Windows sometimes
keeps the previous output device. The usual solution is to click the speaker icon and select the TV/wireless
display as the audio output. Once someone learns that trick, they suddenly become the unofficial tech hero of
the household (or the teacher’s lounge).
Lag is also a frequent guest at the mirroring party. Folks try wireless mirroring for gaming, notice a delay,
then decide the technology is “broken.” It’s not brokenwireless mirroring just has physics to deal with. In
everyday experience, moving the PC closer, shutting down heavy background tasks, and reducing interference helps.
But the most practical “real-world” solution is simply switching to a cable when the task is time-sensitive:
a job interview screen-share, a live demo, or anything where a half-second delay makes you feel like you’re
controlling your cursor via telepathy.
People also learnsometimes the hard waythat mirroring is honest. It shows everything: pop-up notifications,
calendar reminders, and “Your friend liked your post” alerts at the worst possible time. A very common
experience is someone presenting slides and getting a notification that isn’t exactly “presentation-friendly.”
The fix becomes part of their routine: turn on Do Not Disturb, close personal apps, and keep a “clean”
desktop for public viewing. It’s the digital version of checking your teeth before a big meeting.
Finally, there’s the “my PC can’t do Miracast” momentoften on desktops or older laptops. People discover that
Miracast depends on Wi-Fi and graphics driver support, and the answer isn’t always a setting you missed; it can
be hardware limitations or driver changes. In those cases, real-world solutions tend to be practical: use an
HDMI cable, add a compatible adapter/dock for USB-C video output, or use a different casting approach like
Chrome casting when it fits the content. The best takeaway from experience is this: have two methods ready.
One wireless (convenient) and one wired (bulletproof). That way, your mirroring session stays a productivity
boostnot an unplanned improv comedy show.


