Table of Contents >> Show >> Hide
- Why Foot Blisters Happen (So You Can Outsmart Them)
- How to Prevent Foot Blisters: 14 Steps
- Step 1: Buy Shoes That Actually Fit Your Feet (Not Your Hopes)
- Step 2: Match the Shoe to the Job
- Step 3: Break In New Shoes Gradually
- Step 4: Lace Up Like You Mean It (Yes, It Matters)
- Step 5: Choose the Right Socks (And Retire the All-Cotton Crew)
- Step 6: Consider a Two-Sock System for High-Friction Days
- Step 7: Make Sure Socks Fit (Wrinkles Are Tiny Blister Factories)
- Step 8: Keep Feet DryMoisture Control Is Blister Control
- Step 9: Check Your Shoes for Grit, Rough Seams, and Sneaky Offenders
- Step 10: Keep Toenails Trimmed and Foot Skin Comfortable
- Step 11: Use Lubricant on Known Hot Spots
- Step 12: Tape or Pad “Hot Spots” Early (Do Not Ignore the Tingle)
- Step 13: Add Cushioning or Support to Reduce Pressure Points
- Step 14: Build Up Graduallyand Know When to Get Help
- Quick “If a Blister Is Trying to Happen” Playbook
- What Works Best (A Practical Summary)
- Real-World Experiences: What People Learn the Hard Way (So You Don’t Have To)
- Conclusion
Foot blisters are the universe’s way of saying, “Nice plans you had todaywould be a shame if something rubbed.”
The good news: most blisters are predictable, preventable, and honestly kind of boring once you understand what causes them.
The bad news: your feet don’t care that you “just bought these shoes yesterday” or that your hike has “only two more miles.”
This guide breaks down what’s really happening when a blister forms and gives you 14 practical steps to stop them before
they startwhether you’re walking the dog, training for a race, working a long shift, or hiking like you’re auditioning for
a nature documentary.
Why Foot Blisters Happen (So You Can Outsmart Them)
Most foot blisters are friction blisters. They form when your skin experiences repeated rubbing (friction) plus
enough pressure and heat to irritate it. Add moisture (sweat, rain, puddles, your shoes turning into tiny saunas) and friction
becomes even more effective at causing damage. Your body responds by separating layers of skin and filling the gap with fluidaka
the classic bubble you did not invite.
Think of blister prevention like a three-part mission:
reduce rubbing, control moisture, and remove pressure points.
Do that consistently, and blisters lose most of their power.
How to Prevent Foot Blisters: 14 Steps
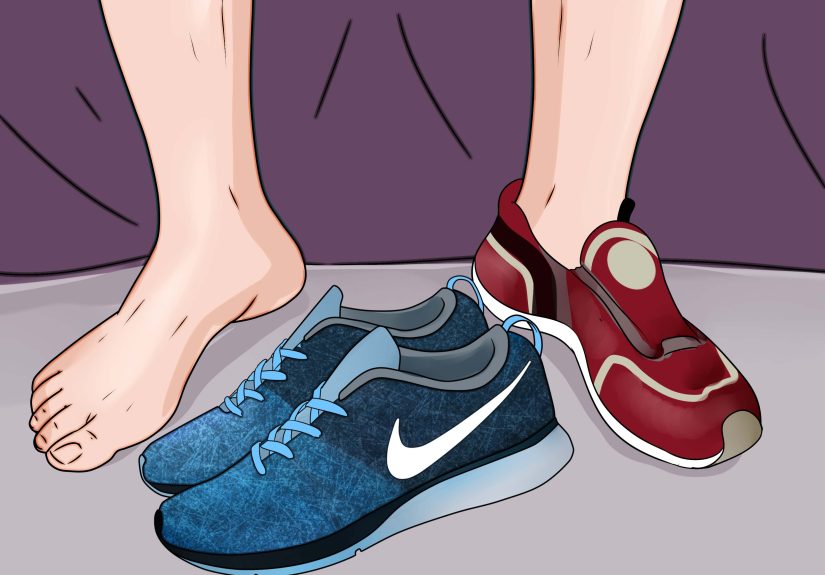
Step 1: Buy Shoes That Actually Fit Your Feet (Not Your Hopes)
A shoe that’s too tight creates pressure and pinching. A shoe that’s too loose lets your foot slide, increasing friction.
Aim for a secure heel, enough room to wiggle your toes, and zero “hot spots” during a short test walk.
Example: If you feel rubbing at your heel after a five-minute walk around the house, that won’t magically improve on a two-hour
outing. It will get promoted from “annoying” to “painful manager” fast.
Step 2: Match the Shoe to the Job
Running shoes, hiking boots, work shoes, and cleats all move your foot differently. Choose footwear designed for your activity,
because the wrong shoe can create friction in weird places (like the side of your pinky toe, which is already having a rough life).
Step 3: Break In New Shoes Gradually
New shoes often have stiffer materials and unfamiliar pressure points. Wear them in short sessions firstaround the house,
on a quick errand, or during a short walkbefore you trust them with an all-day mission.
Pro tip: “Breaking in” should feel like a gentle introduction, not a ritual sacrifice.
Step 4: Lace Up Like You Mean It (Yes, It Matters)
Laces aren’t decoration. They control heel slip and pressure across the top of your foot. If you get blisters on your heel,
try a heel-lock (runner’s loop). If you feel pressure on the top of your foot, try “window lacing” to relieve that hot zone.
This is one of the simplest ways to reduce rubbing without buying anything newjust a different lace pattern and 20 seconds of effort.
Step 5: Choose the Right Socks (And Retire the All-Cotton Crew)
Cotton tends to hold moisture, which increases friction. For blister prevention, choose moisture-wicking socks
made with synthetics (like polyester/nylon blends) or wool (like merino).
If you’re prone to blisters, socks aren’t a throwaway detail. They’re protective gear.
Step 6: Consider a Two-Sock System for High-Friction Days
If one pair of socks isn’t cutting it, try a thin liner sock under your regular sock. The idea is that friction happens
between layers of fabric rather than between fabric and skin.
Caveat: Only do this if your shoes still fit properly. If the extra layer makes shoes tight, you’ve traded friction for pressure.
Not a win.
Step 7: Make Sure Socks Fit (Wrinkles Are Tiny Blister Factories)
Socks that are too loose can bunch and wrinkle, creating pressure points. Socks that are too tight can squeeze and rub in new places.
Look for a snug fit, smooth seams, and enough toe room to avoid rubbing at the tips.
If you frequently get blisters between toes, try toe socks or socks with minimal seams.
Step 8: Keep Feet DryMoisture Control Is Blister Control
Moisture increases friction. If your feet sweat a lot or you’re in wet conditions, take moisture management seriously:
- Use foot powder (or an anti-chafe powder) to reduce dampness.
- Change into dry socks mid-activity on long days.
- Dry shoes thoroughly between uses (remove insoles to help them air out).
- In wet conditions, consider gaiters or strategies to limit water and grit getting into shoes.
Step 9: Check Your Shoes for Grit, Rough Seams, and Sneaky Offenders
A single grain of sand can behave like a tiny belt sander after a few thousand steps. Before long walks, shake out your shoes,
inspect the inside, and feel for anything rough. Also check for worn linings or edges that rub.
If your shoes are fine until mile three, debris is often the culprit.
Step 10: Keep Toenails Trimmed and Foot Skin Comfortable
Long toenails can hit the front of shoes and cause irritation (and sometimes painful nail-related problems).
Trim nails straight across and smooth rough edges.
Also: dry, cracked skin can snag and irritate more easily, while overly soft, waterlogged skin is more prone to friction damage.
Aim for “healthy and resilient,” not “sandpaper” or “prune.”
Step 11: Use Lubricant on Known Hot Spots
If you always blister in the same place, don’t wait for the warning signsprevent the friction.
A thin layer of petroleum jelly or an anti-chafe balm on blister-prone areas can reduce rubbing during activity.
This is especially helpful for runners, long-distance walkers, and anyone whose feet tend to get sweaty.
Step 12: Tape or Pad “Hot Spots” Early (Do Not Ignore the Tingle)
That “slight rub” feeling is your early-warning system. Stop and deal with it immediately. Use athletic tape, blister tape,
moleskin, or a gel blister pad to protect the area before a blister forms.
A smart move is to pre-tape spots that always blisterlike heels or the ball of the footbefore long hikes or race days.
You’re not being dramatic. You’re being strategic.
Step 13: Add Cushioning or Support to Reduce Pressure Points
Blisters aren’t only about friction; pressure increases friction forces. If you have a high-pressure spot (like the ball of the foot
or the side of a toe), consider:
- Cushioned insoles or targeted padding to spread pressure
- Socks with appropriate cushioning in high-impact zones
- Toe socks or toe spacers (when appropriate) if toes rub together
If you have persistent issues, a professional fitting at a running store or a podiatry consult can help identify biomechanical causes
(like excessive heel slip or uneven pressure patterns).
Step 14: Build Up Graduallyand Know When to Get Help
Sudden jumps in distance or time on your feet can overwhelm your skin’s ability to adapt. Increase activity gradually and give your
feet time to toughen up. Keep a small blister kit on longer outings (tape, blister pads, alcohol wipes, spare socks).
Also, use extra caution if you have diabetes, reduced sensation in your feet, or poor circulation. In those cases, small foot problems
can become serious faster, so early medical advice is worth it.
Quick “If a Blister Is Trying to Happen” Playbook
Prevention is the goal, but real life includes surprise friction. If you feel a hot spot:
- Stop and remove the shoe/sock.
- Dry the area if it’s damp.
- Protect it with tape, moleskin, or a blister bandage (a “donut” pad can reduce pressure).
- Adjust lacing or sock setup so it doesn’t keep rubbing.
If you already have a blister, keeping it clean and protected is usually the safest move. Seek medical care if you notice increasing
redness, warmth, swelling, drainage/pus, fever, or worsening painespecially if you have risk factors like diabetes.
What Works Best (A Practical Summary)
If you only remember a few things, make them these:
fit beats brand, dry beats damp, and hot spots must be handled immediately.
Most blister disasters happen because someone ignored a small rub and hoped it would “work itself out.”
It will, but not in the way you want.
Real-World Experiences: What People Learn the Hard Way (So You Don’t Have To)
Talk to anyone who spends serious time on their feetnurses, runners, hikers, theme-park parentsand you’ll hear the same plotline:
everything is fine until it suddenly, dramatically isn’t. The “suddenly” part is the trick. Blisters usually send warnings; we’re just
famously bad at listening.
One common story starts with brand-new shoes. Someone buys shiny new sneakers or boots, tries them on, takes a few steps, and thinks,
“Yep, comfortable.” Then they wear them for an all-day outing. Around hour two, the heel starts to feel a little warm. They keep going.
Around hour three, it’s a definite rub. They keep going because they’re “almost done.” By hour five, they’re walking like a cartoon
cowboy. The lesson: the right time to fix a hot spot is when it’s just a hot spot. A strip of tape at hour two is a tiny inconvenience.
Limping home at hour five is an entire personality change.
Another classic experience happens on wet days. A hiker crosses a shallow stream, gets their socks damp, and tells themselves it’s “no big deal.”
But moisture changes everything. The sock fabric grips differently, the skin softens, and friction spikes. People who never blister in dry conditions
suddenly get blisters in places they didn’t know existedlike the side of the arch or the top of the toes. The fix is boring but effective: carry
spare socks, dry your feet when you can, and treat moisture like the villain it is. Dry feet are quieter feet.
Runners often learn that shoe fit is not a one-time decision. Feet can swell during longer runs, and lacing that felt “perfect” at mile one can
feel like a clamp at mile sixor it can loosen enough to cause heel slip. Many runners discover the magic of small adjustments: heel-lock lacing to
stop slipping, or window lacing to relieve pressure. The funny part is that these adjustments look like nothing. The dramatic part is how much pain
they can prevent.
Then there’s the “I thought socks were socks” era. People wear thick cotton socks because they feel soft, then wonder why their feet are wet and
blistered after a long day. Switching to moisture-wicking socks can feel like a minor upgradeuntil the first day you finish a walk and realize you
don’t need to peel your socks off like a banana. Some people go further and try a liner sock system, especially for hikes. It’s not glamorous, but
neither is stopping to patch your heel with whatever you can find in the bottom of a backpack.
The most seasoned folksespecially hikerstend to carry a tiny blister kit like it’s a superstition. Tape, blister pads, alcohol wipes, a spare pair
of socks. They don’t pack it because they expect disaster; they pack it because they’ve learned that small problems are easiest to fix when they’re still small.
If you’ve never stopped mid-walk to tape a hot spot, it can feel extra. If you’ve ever had a blister ruin an entire weekend, it suddenly feels like wisdom.
The overall takeaway from real-life blister experience is simple: blisters aren’t usually “bad luck.” They’re feedback. When you treat early friction as
actionable informationadjusting fit, lacing, socks, moisture, or paddingyou turn blisters from inevitable to optional. Your feet will still work hard.
They’ll just do it without filing a complaint in the form of a fluid-filled bubble.
Conclusion
Preventing foot blisters comes down to smart basics: footwear that fits, socks that manage moisture, and quick action when a hot spot appears.
If you build a simple routinecheck fit, control sweat, remove friction, protect problem areasyou’ll spend less time limping and more time actually
enjoying whatever you’re doing on those feet.


